Integrate CookiePal with WordPress
Welcome to CookiePal! This guide will walk you through how you can install a cookie banner on your website.

Integrate CookiePal with WordPress
CookiePal helps you ensure your WordPress website complies with GDPR and other privacy laws by managing cookie consent for your users. This guide will walk you through the steps to integrate CookiePal with your WordPress site using the official CookiePal plugin.
Step-by-Step Guide
Step 1: Sign in to CookiePal
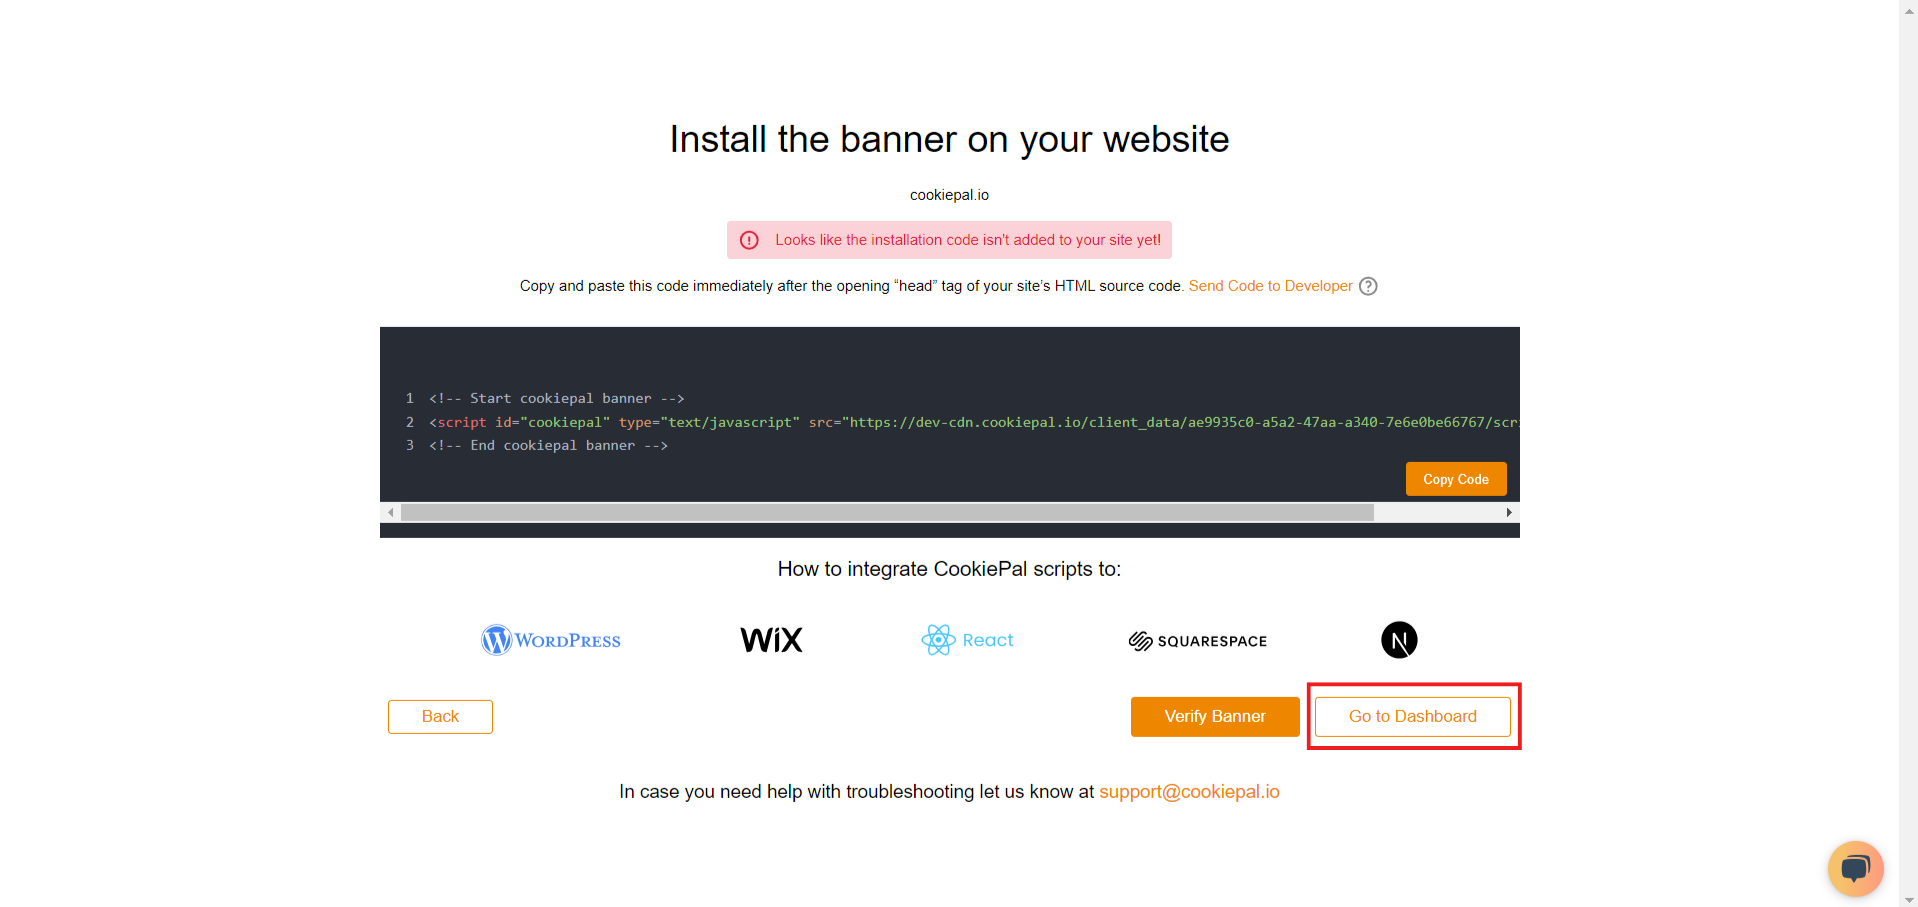
Go to Dashboard: After completing your customisations, navigate to the dashboard.
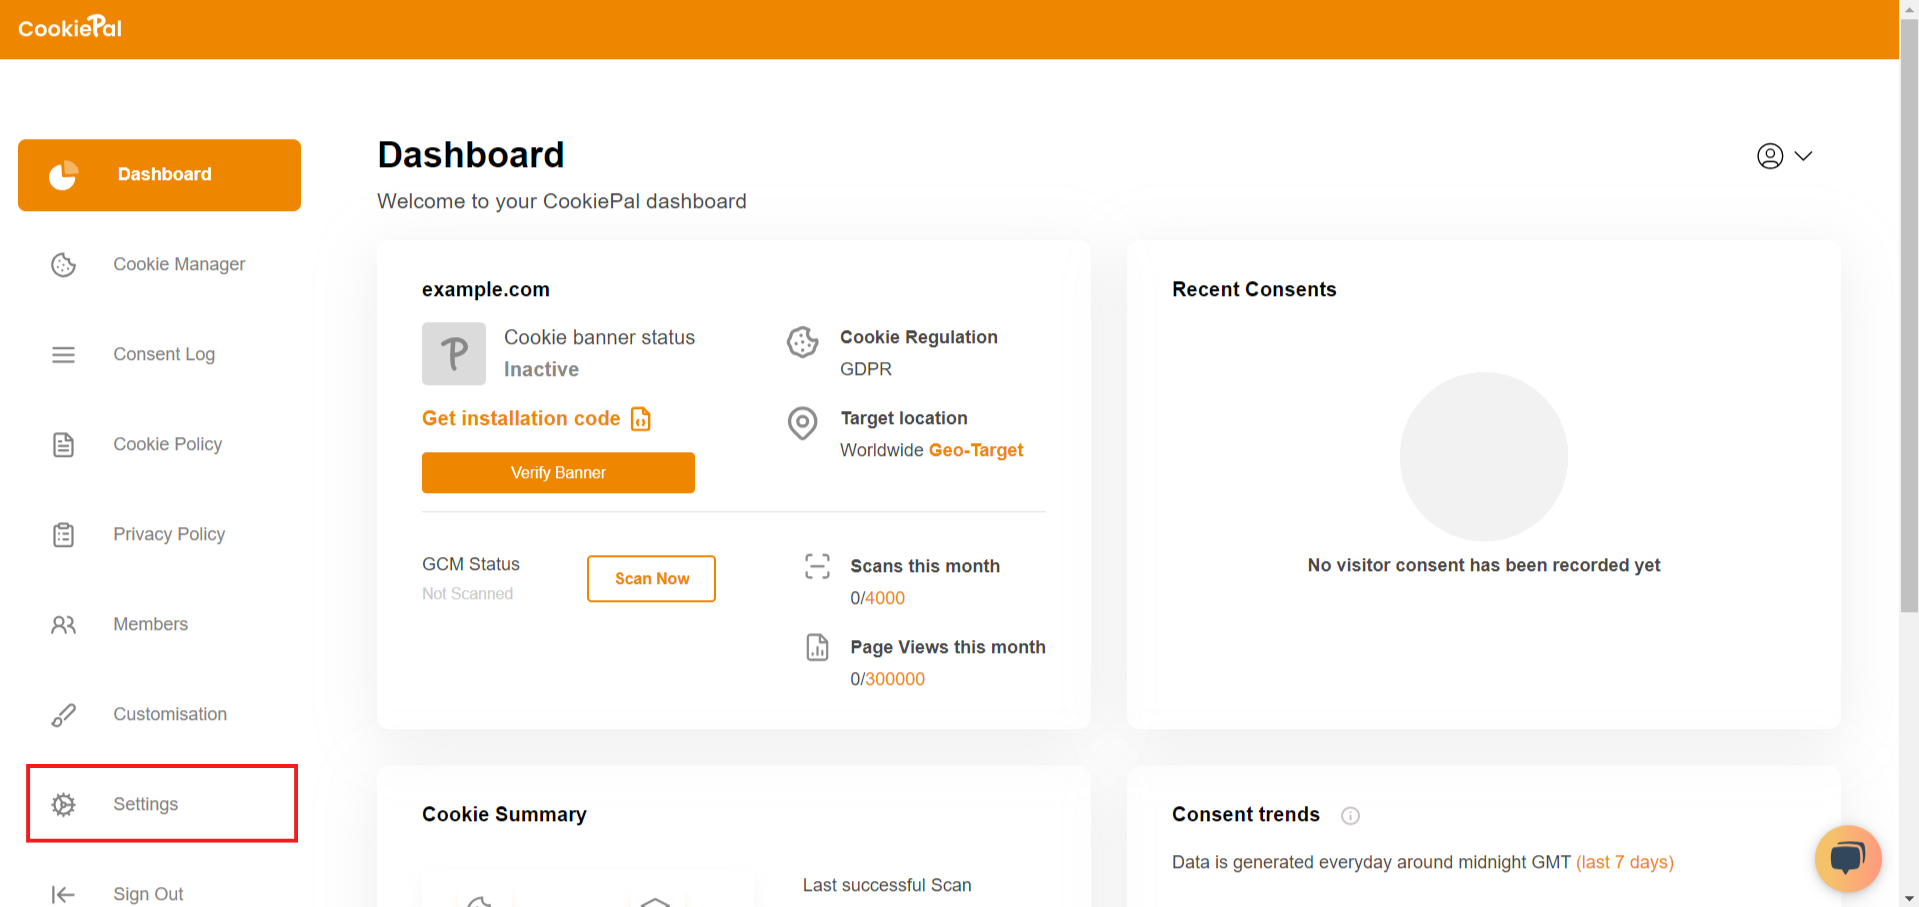
Access Settings: Open the settings page in your CookiePal dashboard.
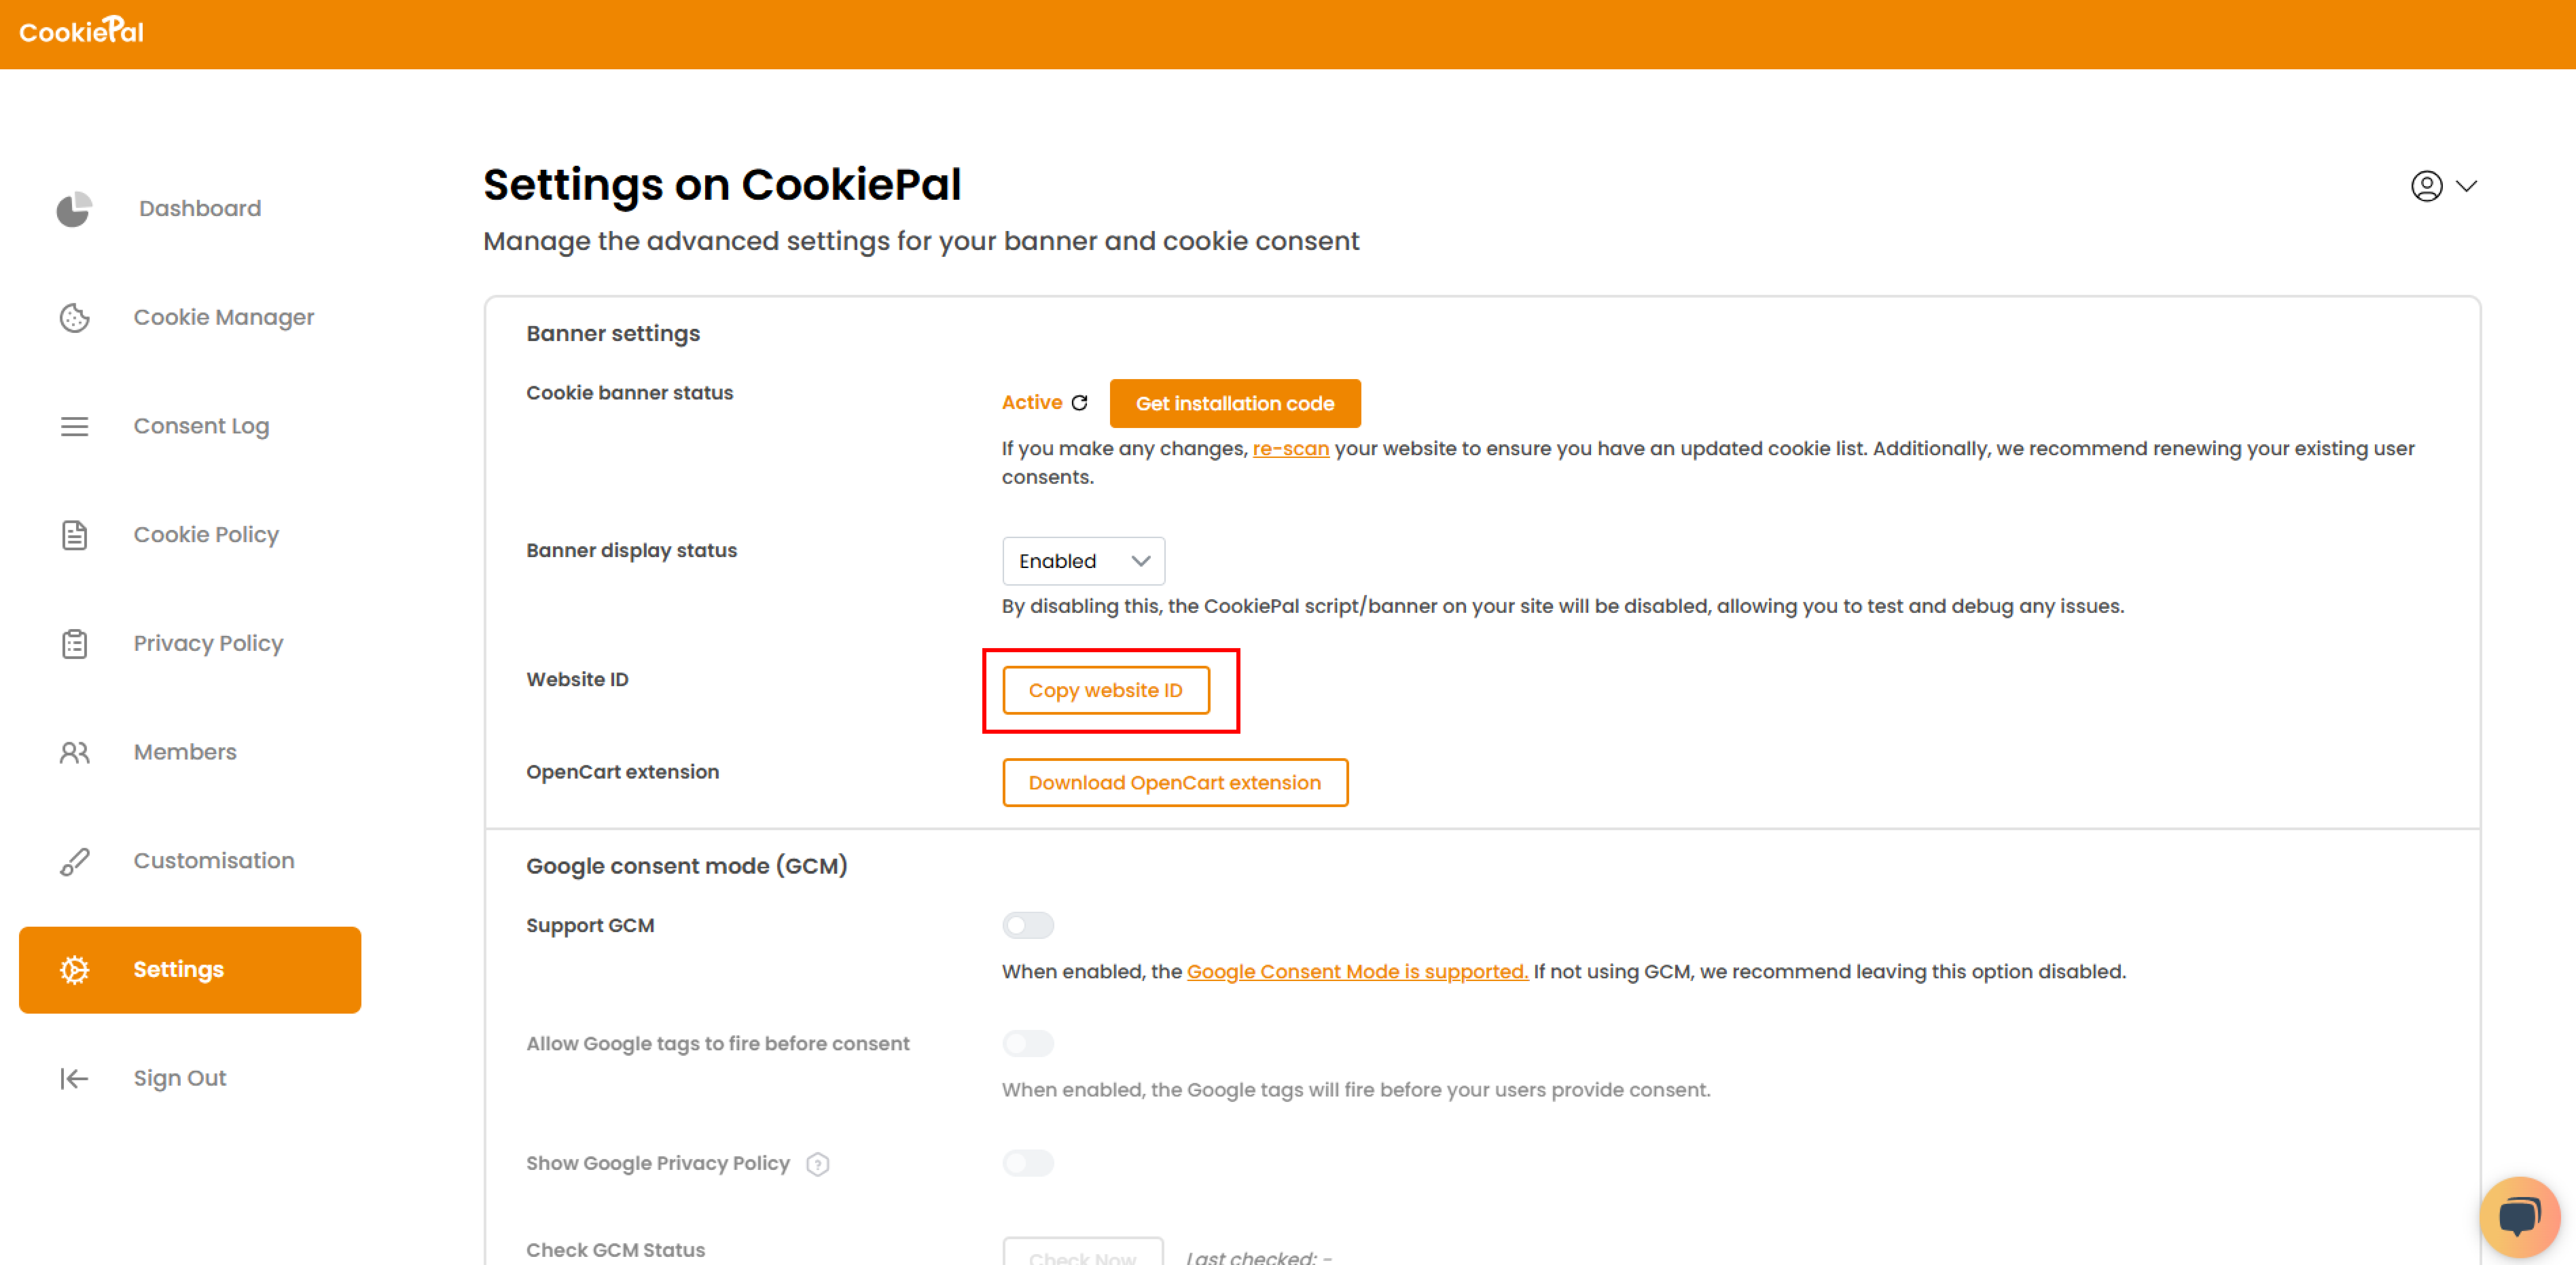
Copy Website ID: In settings, click "Copy Website ID" to save the ID for use in your integration.
Step 2: Install the CookiePal Plugin
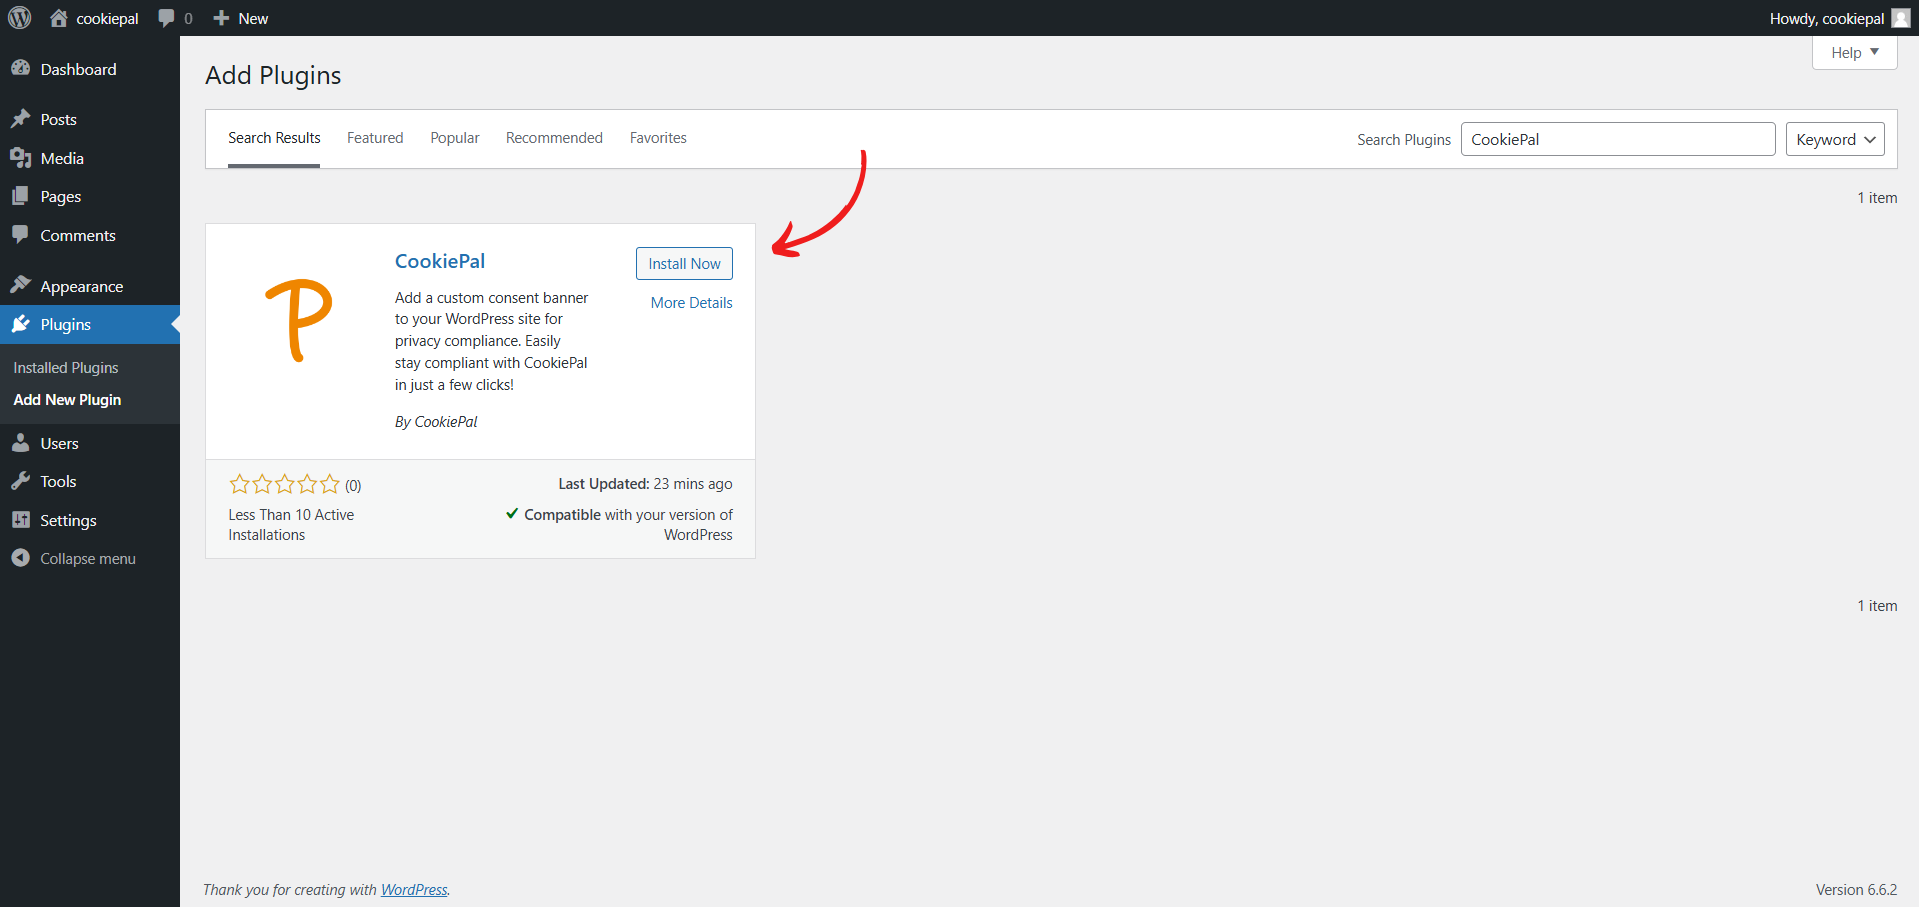
Plugin Installation: In the WordPress admin panel, go to 'Plugins' > 'Add New' and search for 'CookiePal'.
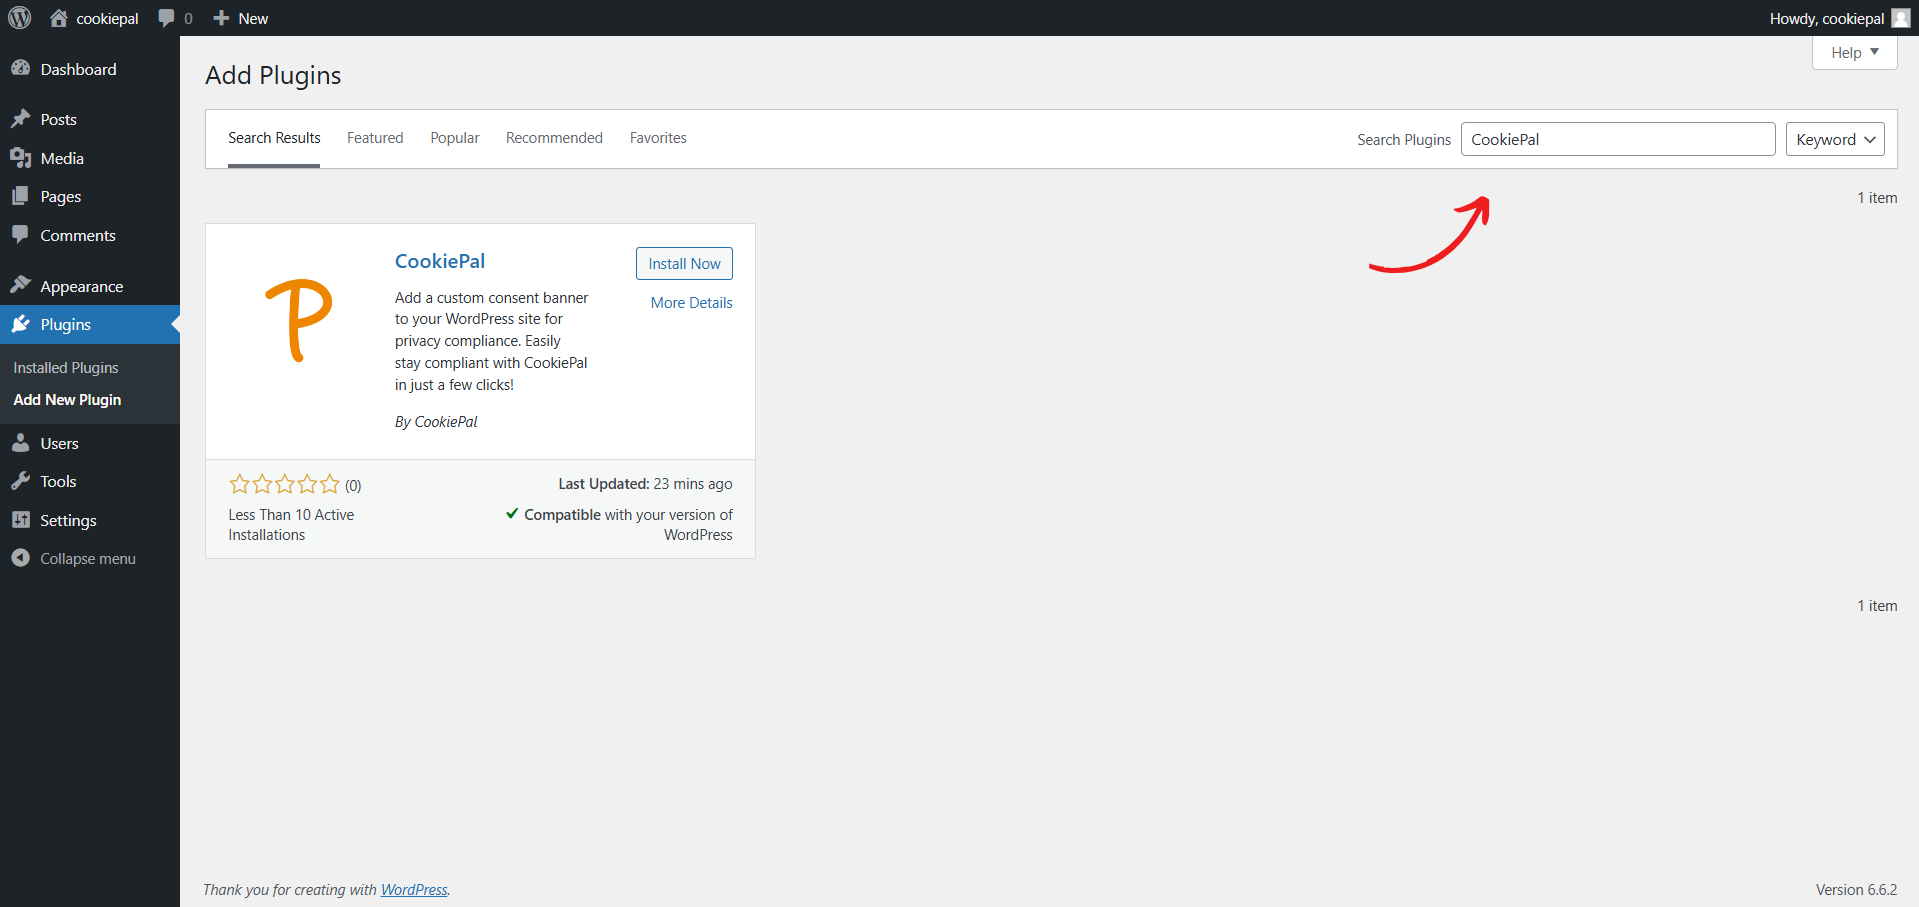
Install CookiePal: Click 'Install Now'.
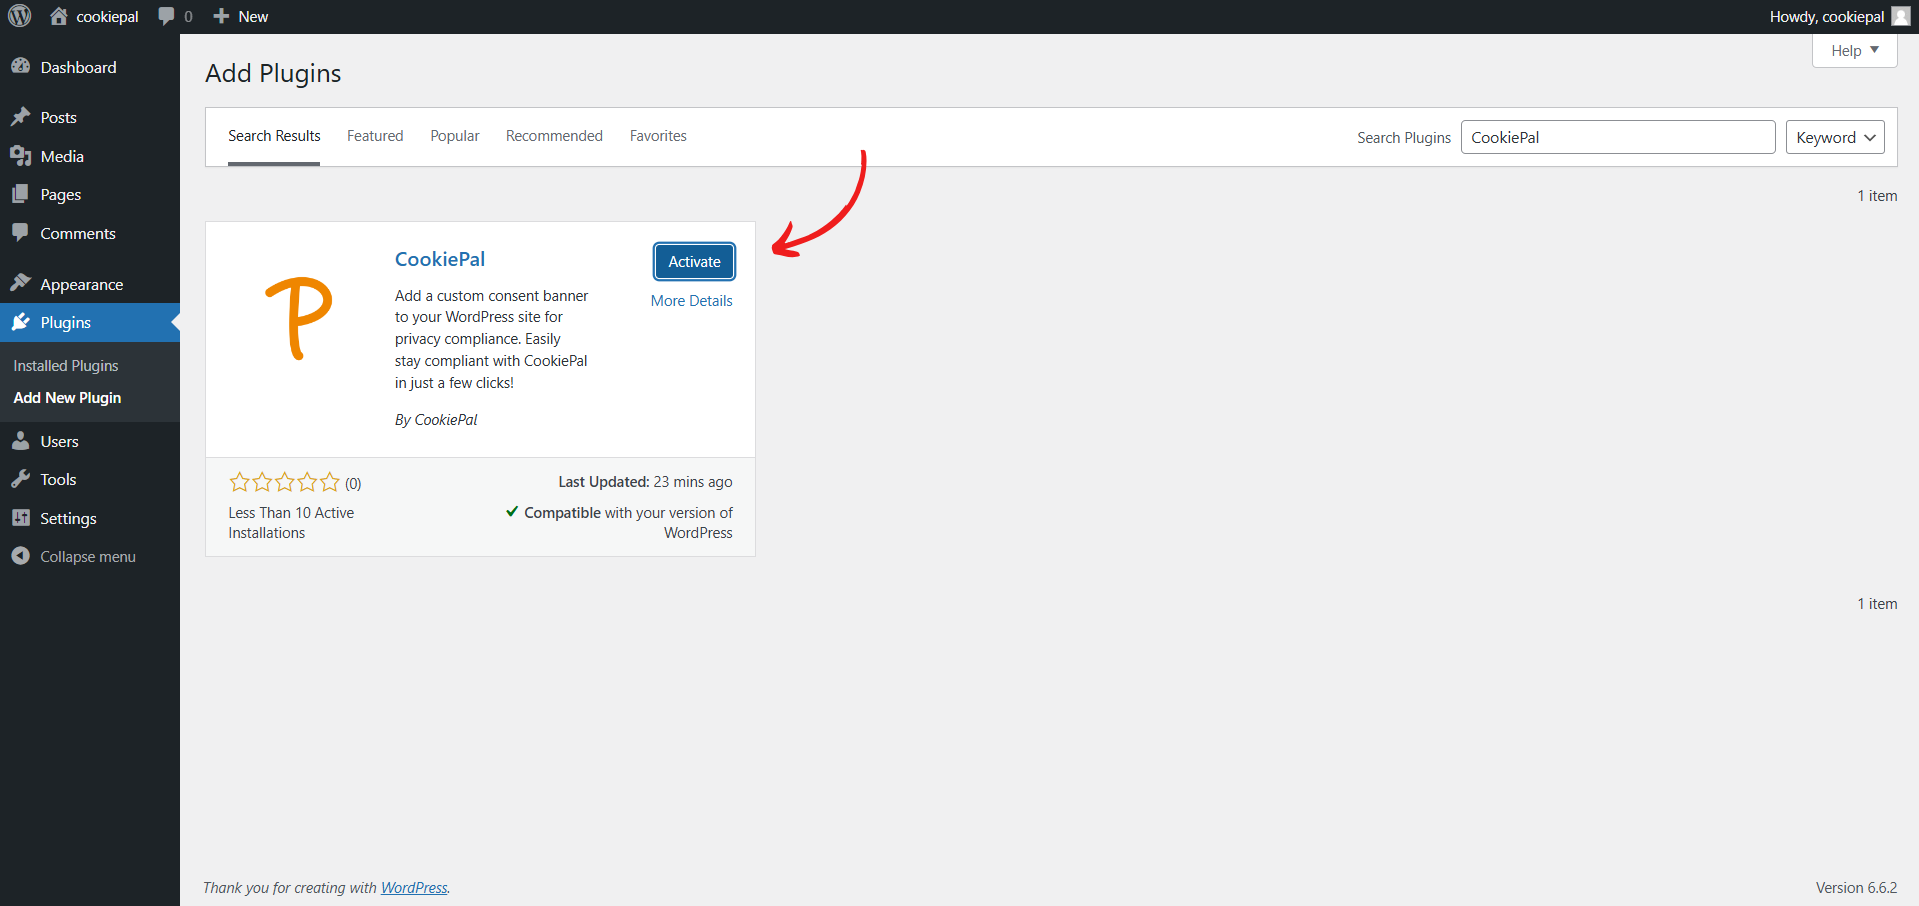
Activate Plugin: Click 'Activate'.
Step 3: Configure the CookiePal Plugin
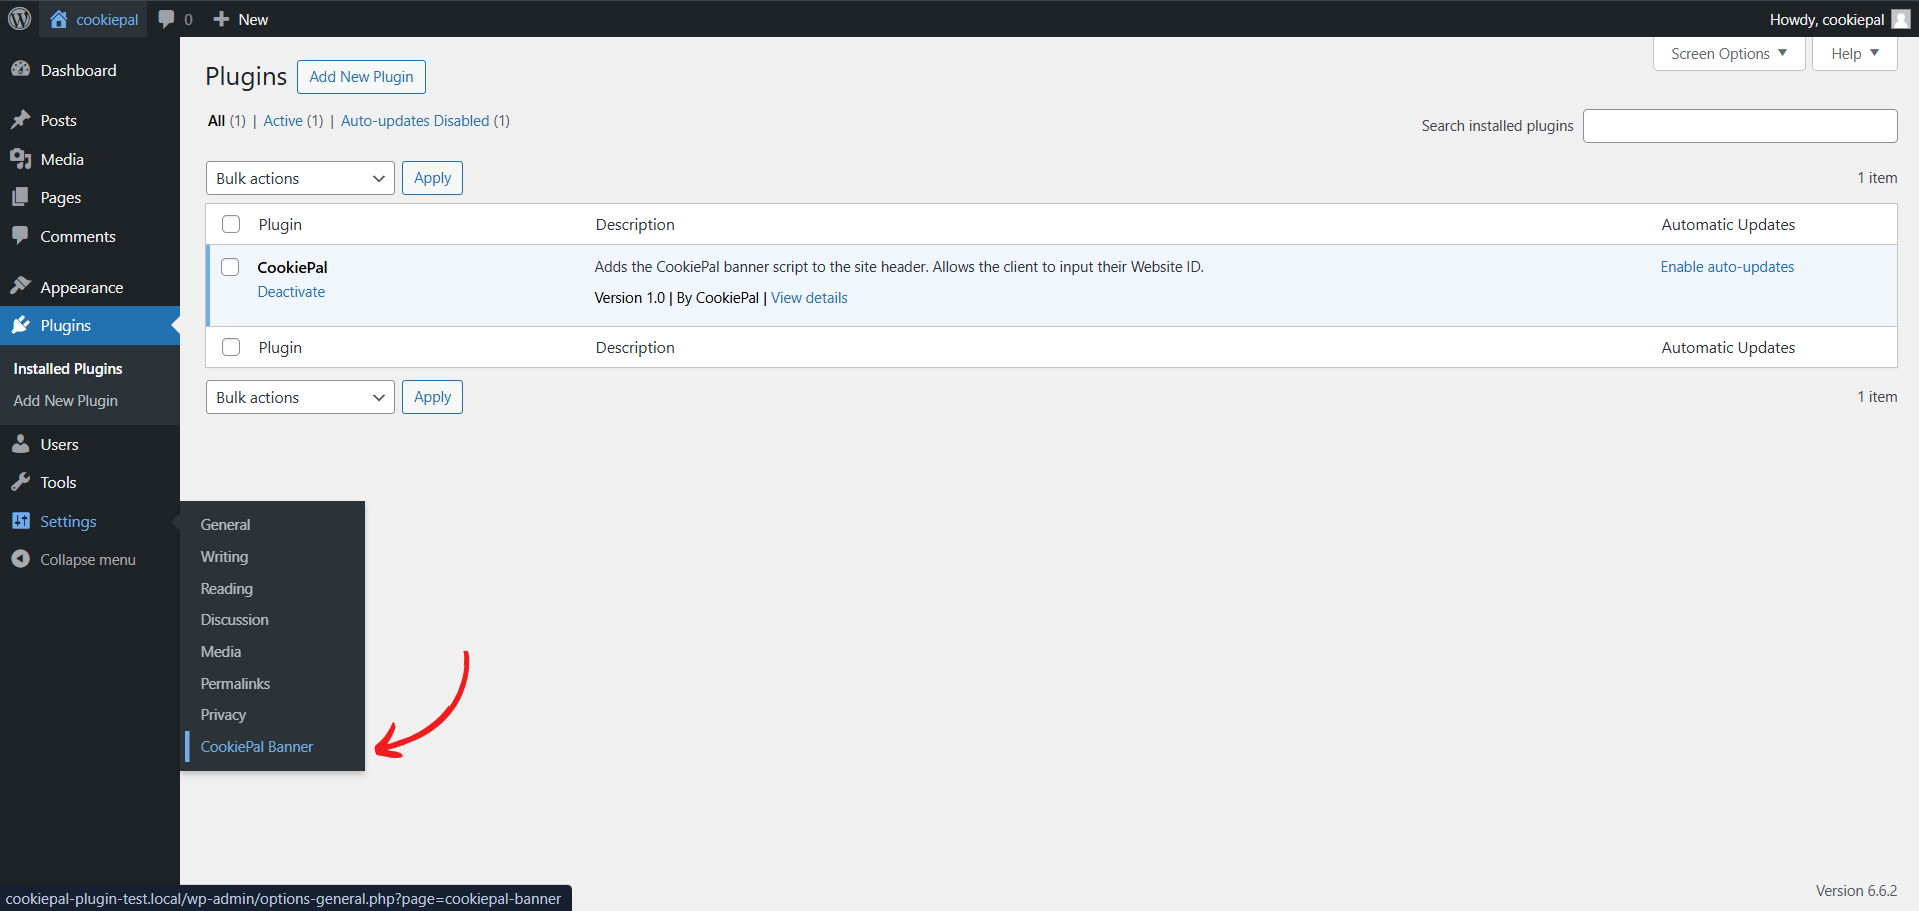
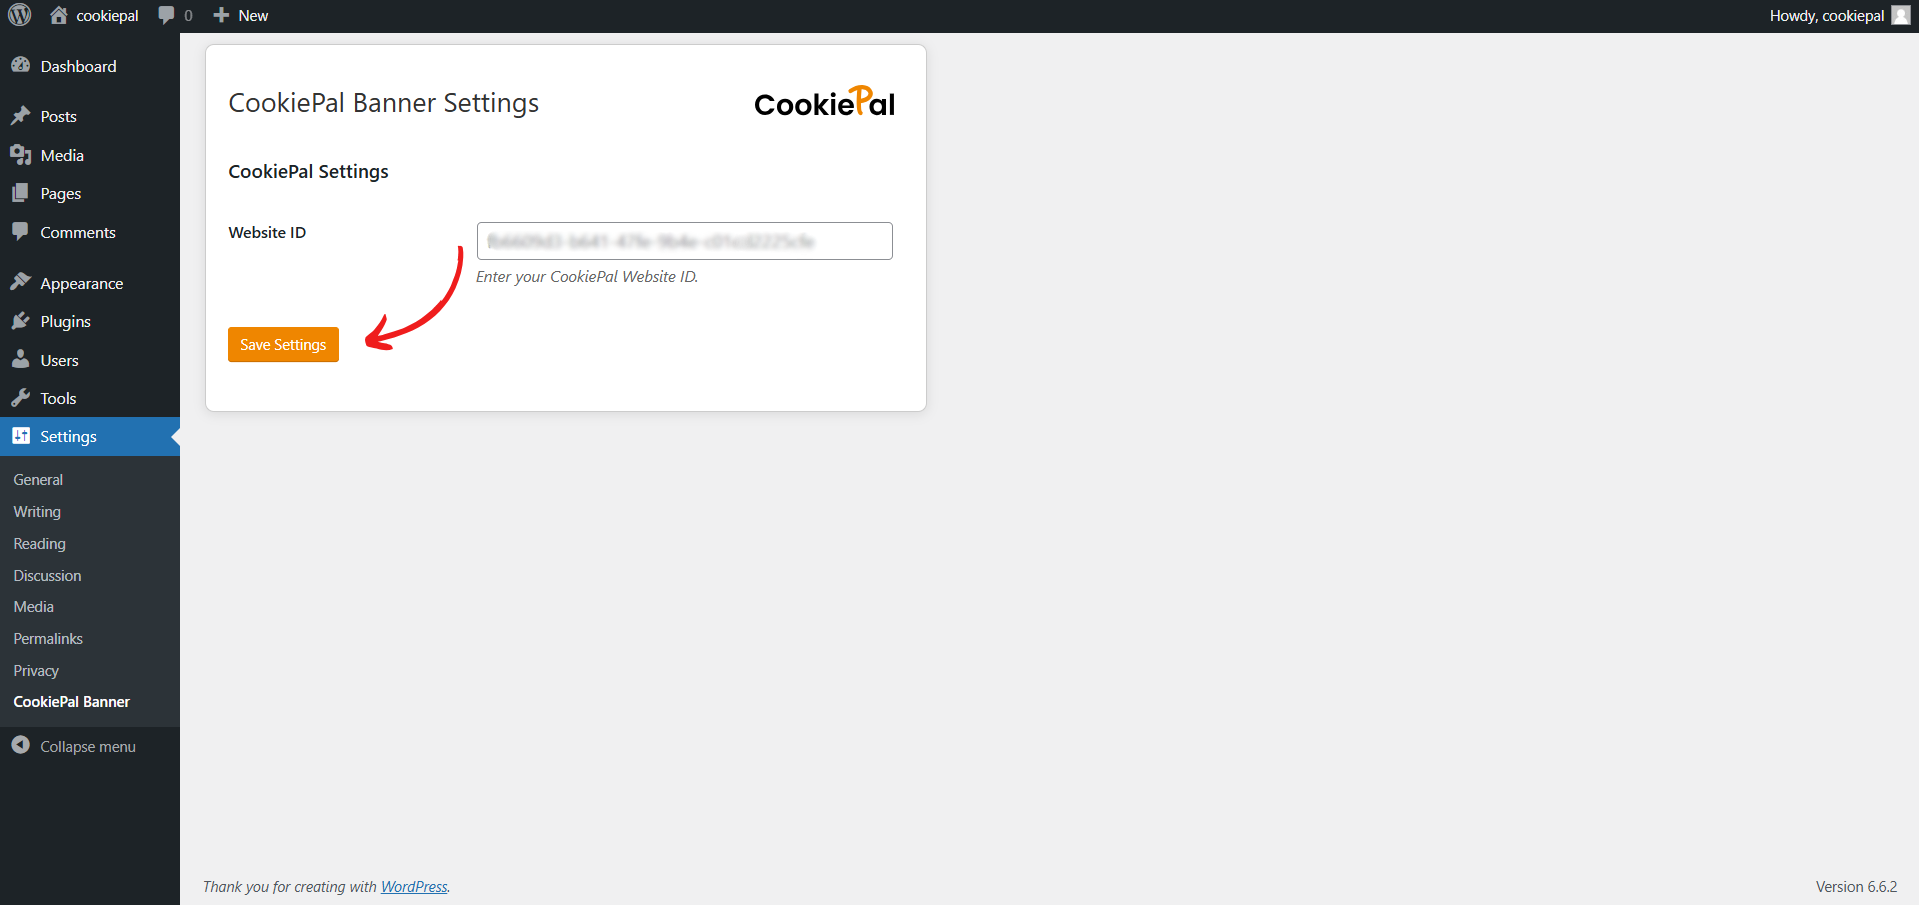
Open Plugin Settings: In the WordPress admin panel, go to "Settings" > "CookiePal Banner".
Enter Website ID: Input your website ID provided by CookiePal.
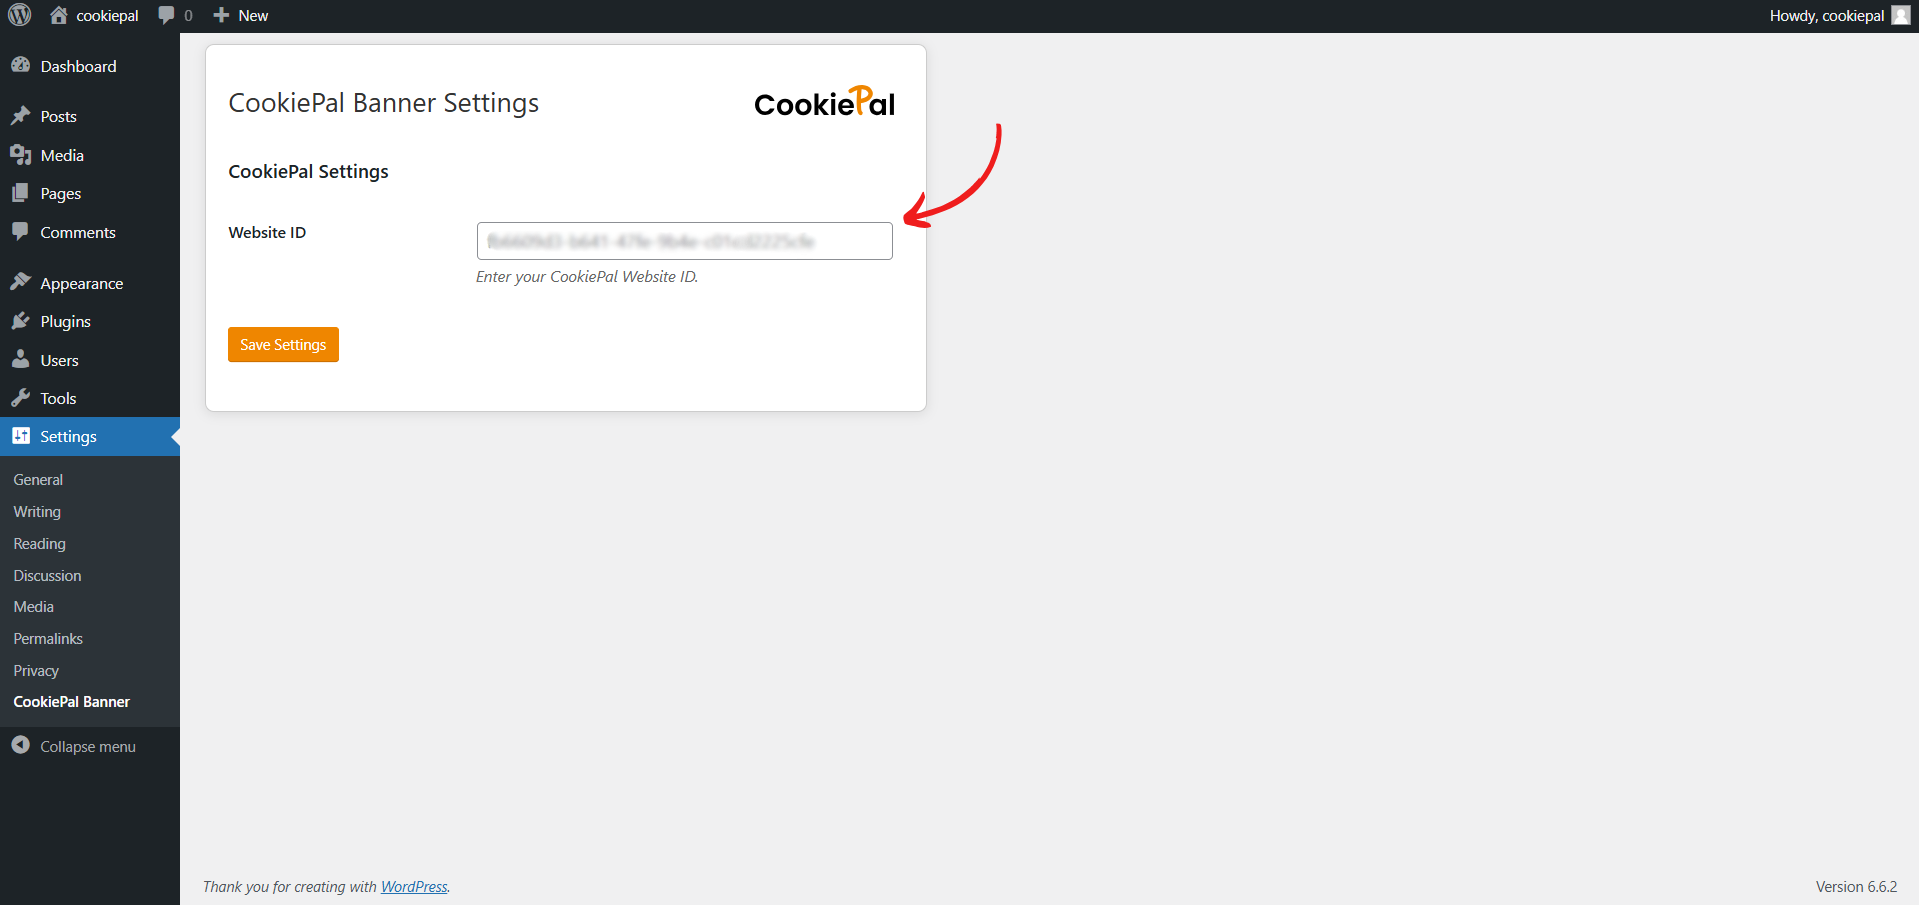
Save Changes: Click "Save Settings" to apply your changes.
Step 4: Verify the Cookie Banner
Verify Banner: Return to the CookiePal dashboard and ensure that the cookie banner is active on your website. The status should display as "Active".
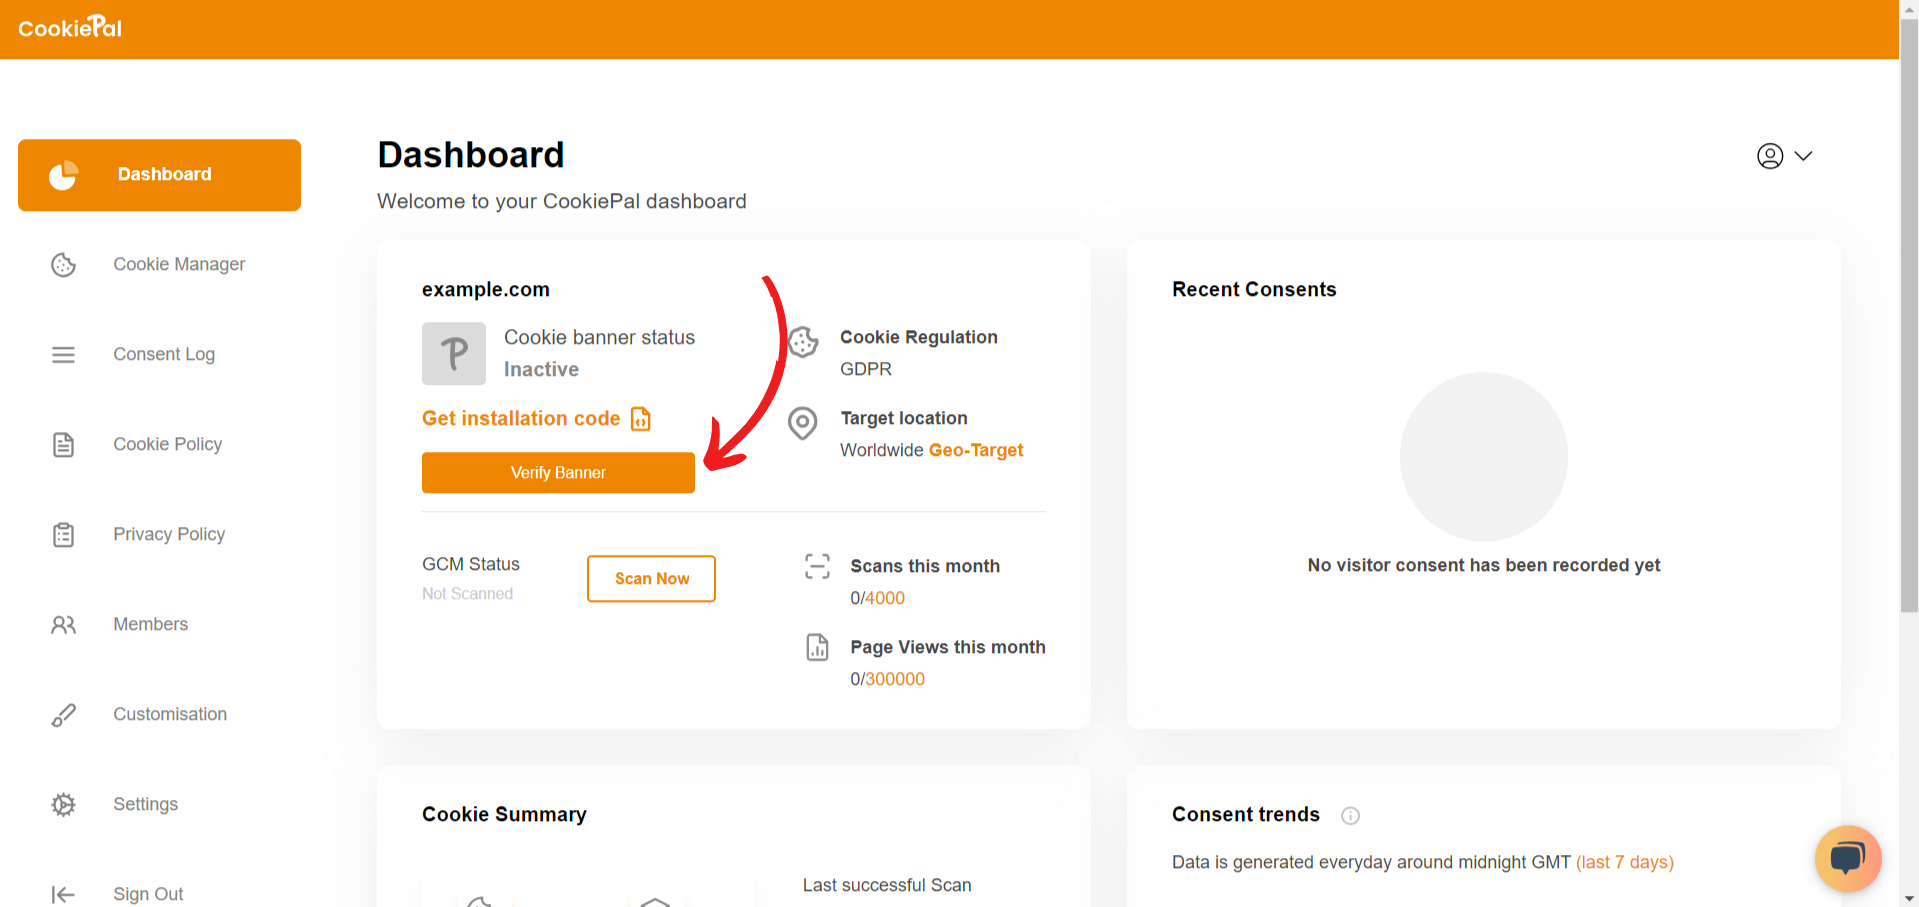
Test Implementation: Visit your website to confirm that the cookie consent banner is visible and functioning correctly.

Sign in: Go to CookiePal and sign in to your account.