Integrate CookiePal with PrestaShop via module
Welcome to CookiePal! This guide will walk you through how to integrate CookiePal on your website.
Integrate CookiePal with PrestaShop
CookiePal helps you ensure your PrestaShop website complies with GDPR and other privacy regulations by managing cookie consent for your users. This guide will walk you through the steps to integrate CookiePal with your PrestaShop site.
Step-by-Step Guide
Step 1: Sign up/Create a CookiePal Account
1. Sign up for CookiePal.

2. After confirming your email, you will be directed to customise your banner. Select your preferences.

3. Customise your banner/logo colours.
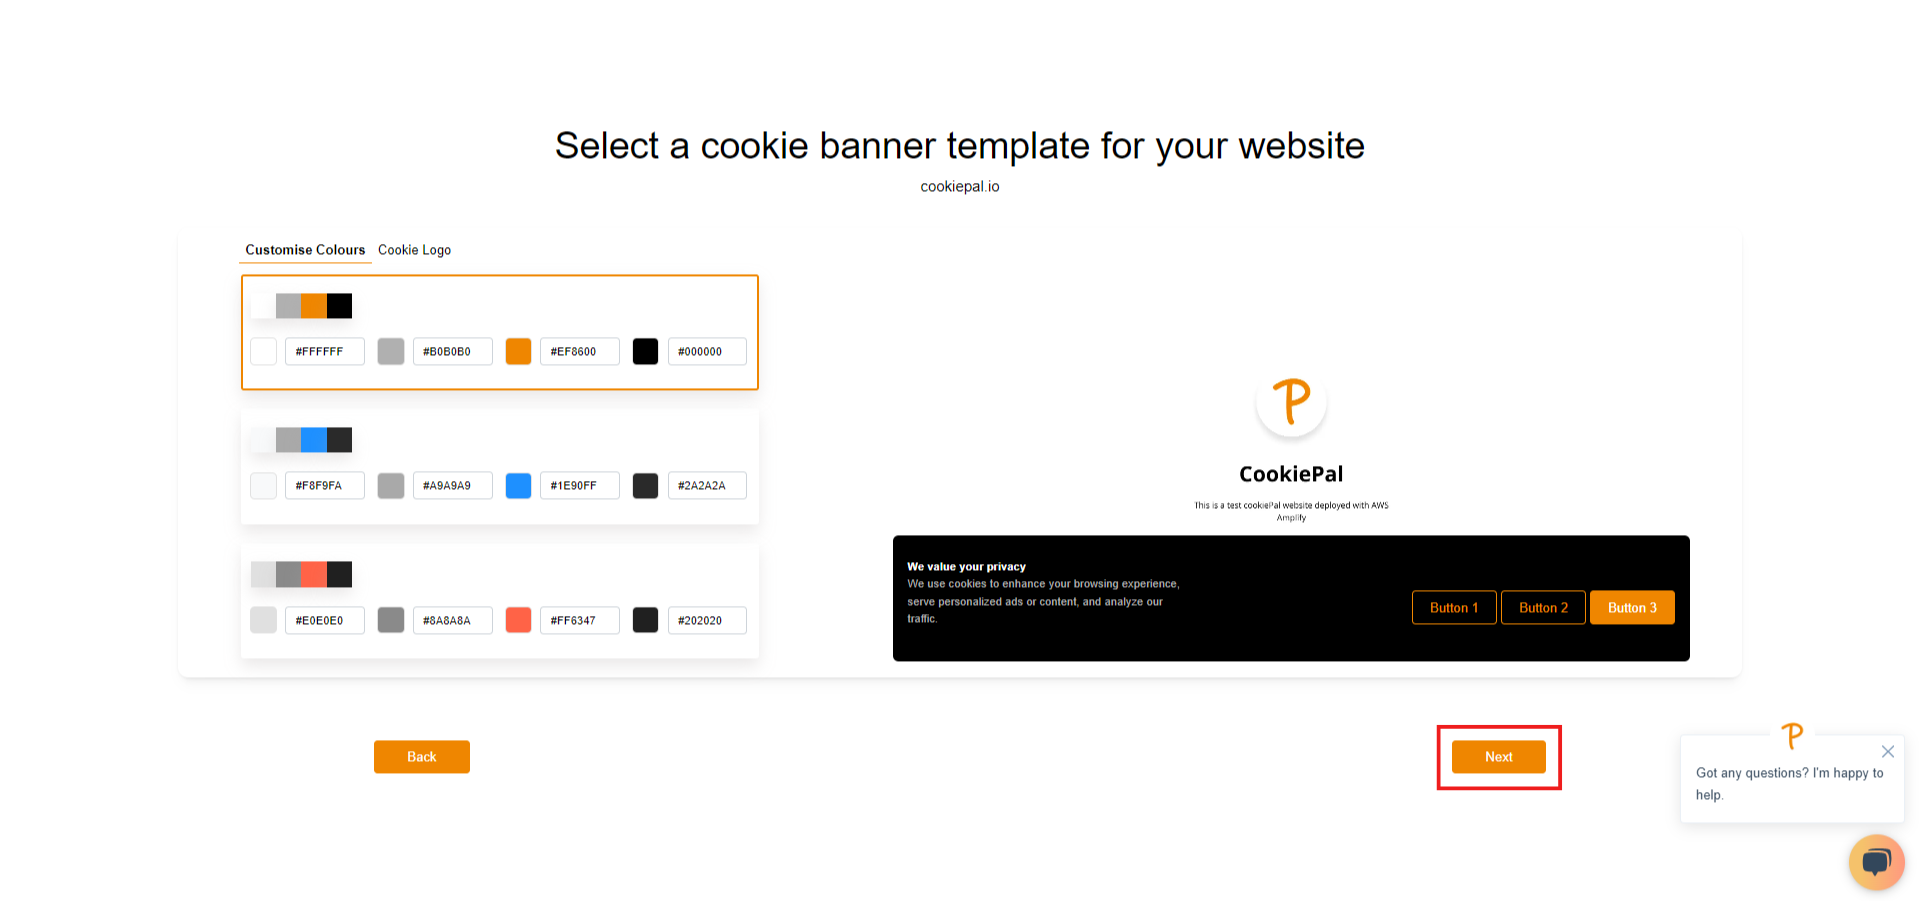
4. Customise your banner types and positions.
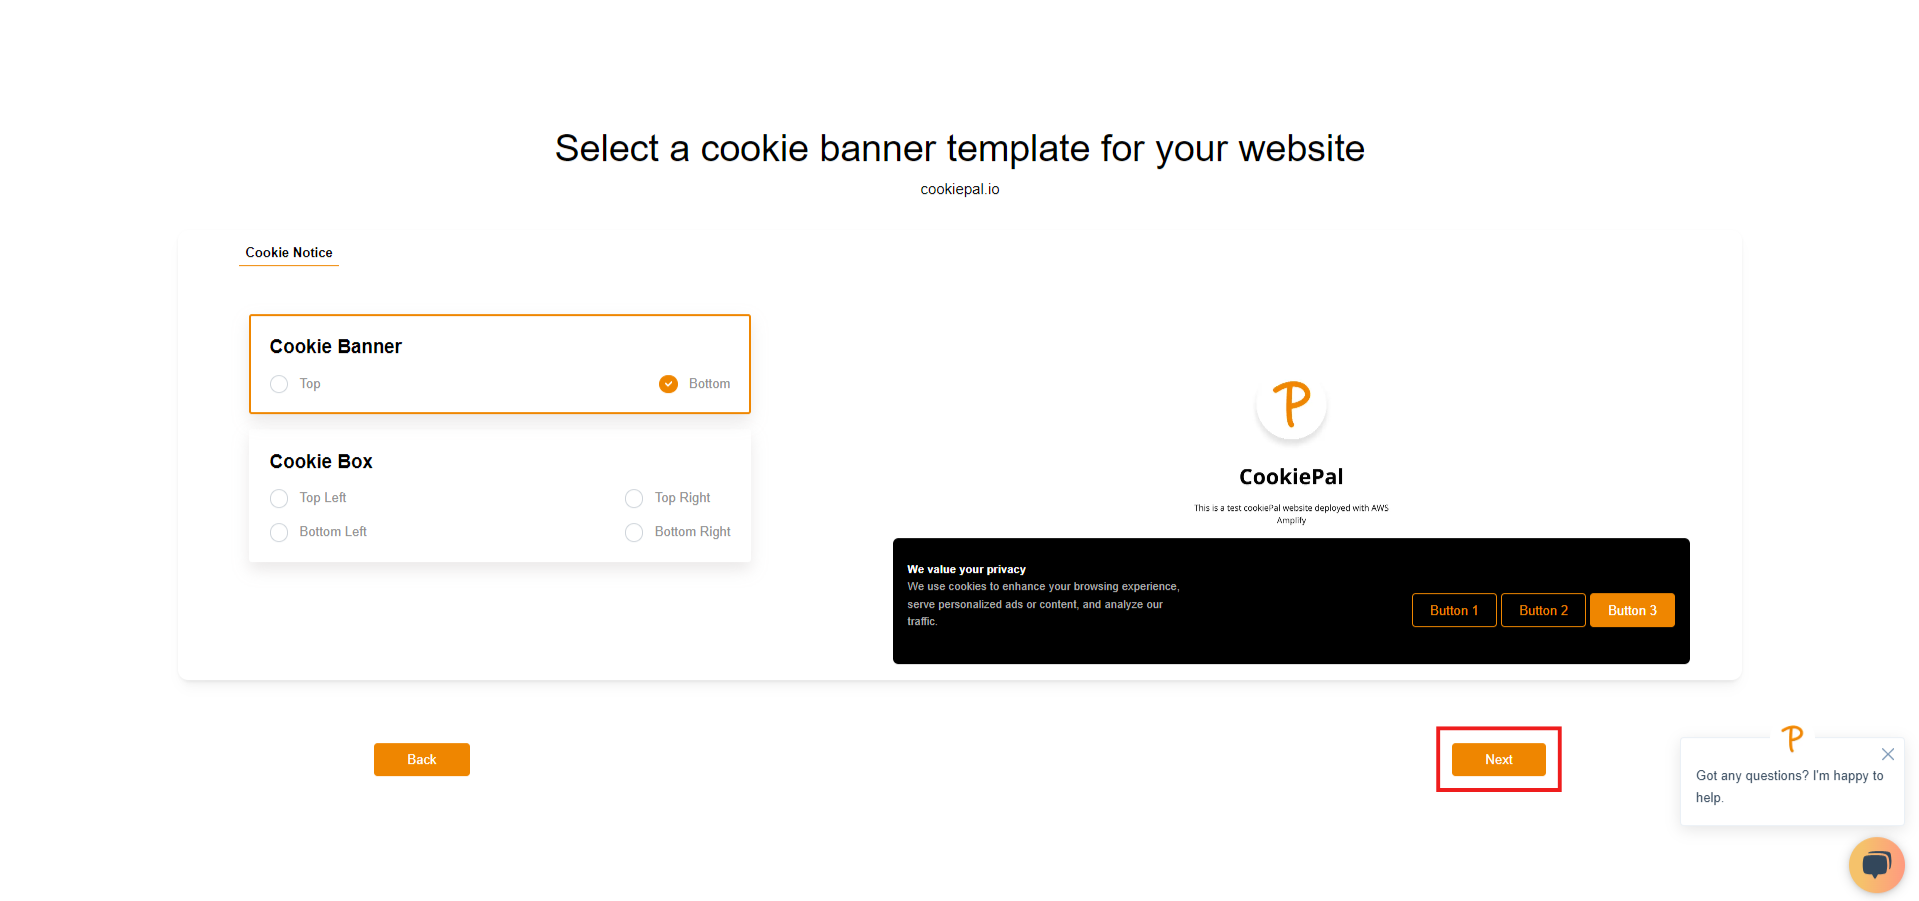
5. Customise your preferences centre.
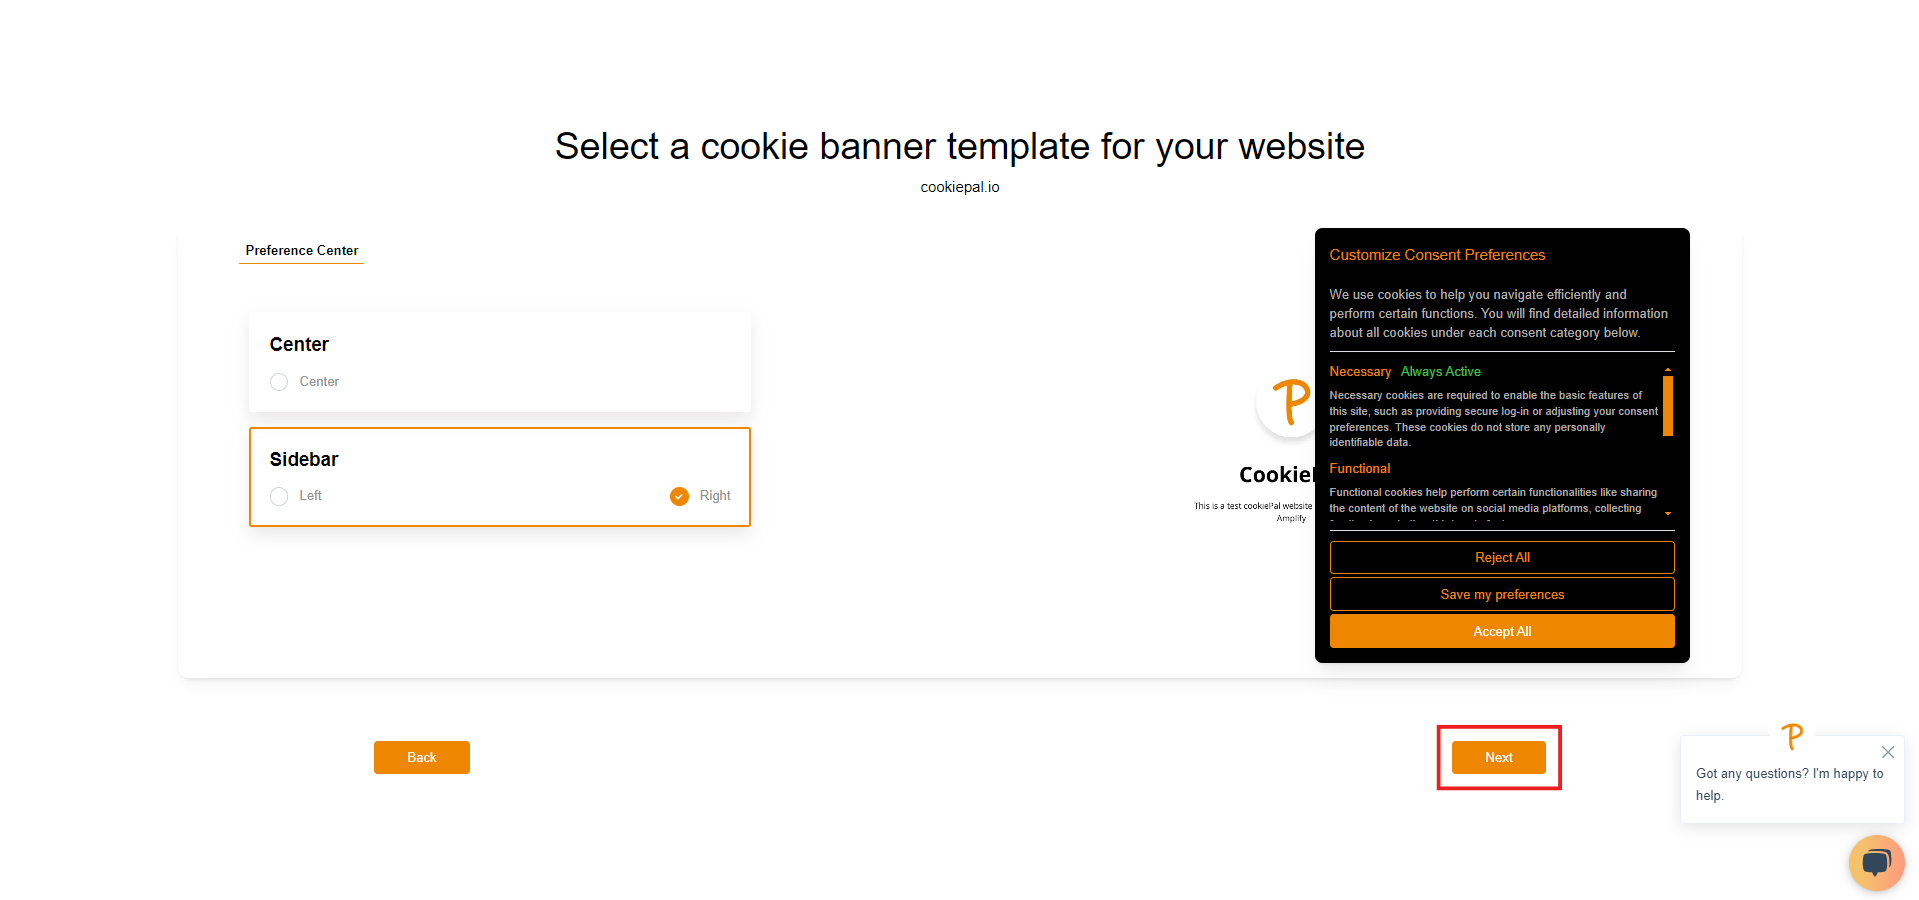
You can adjust these settings anytime on the Customisation page.
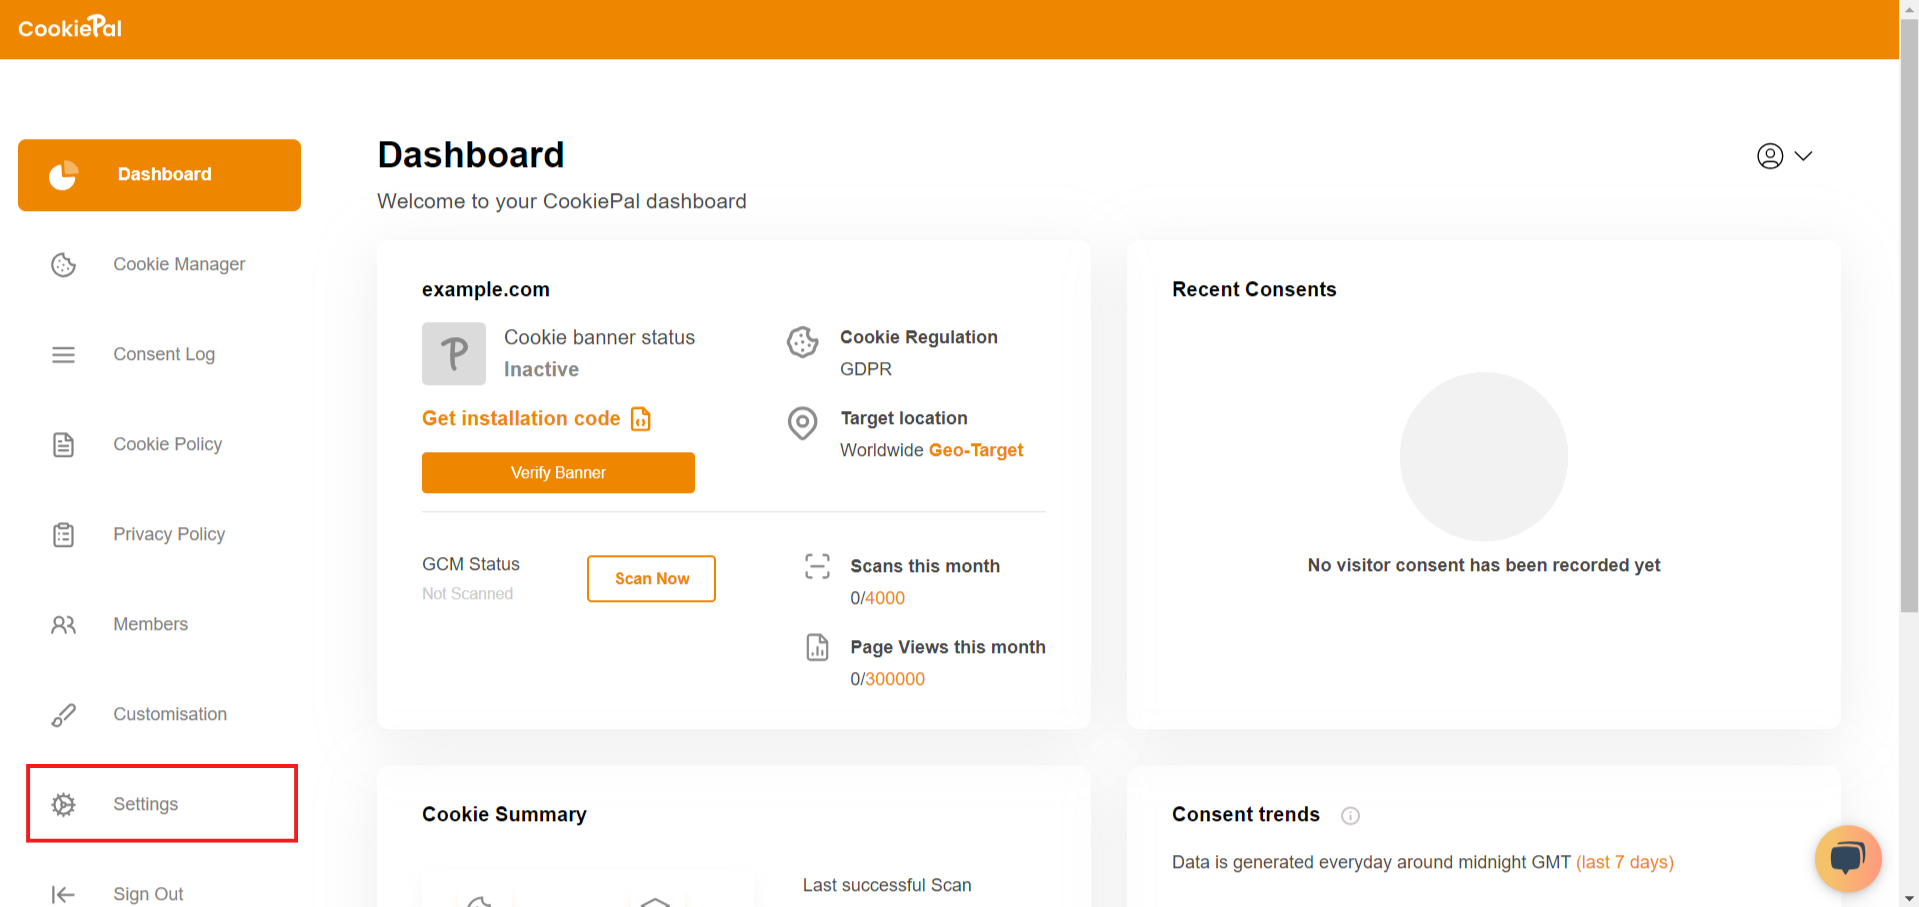
6. To configure CookiePal with PrestaShop, go to the dashboard.
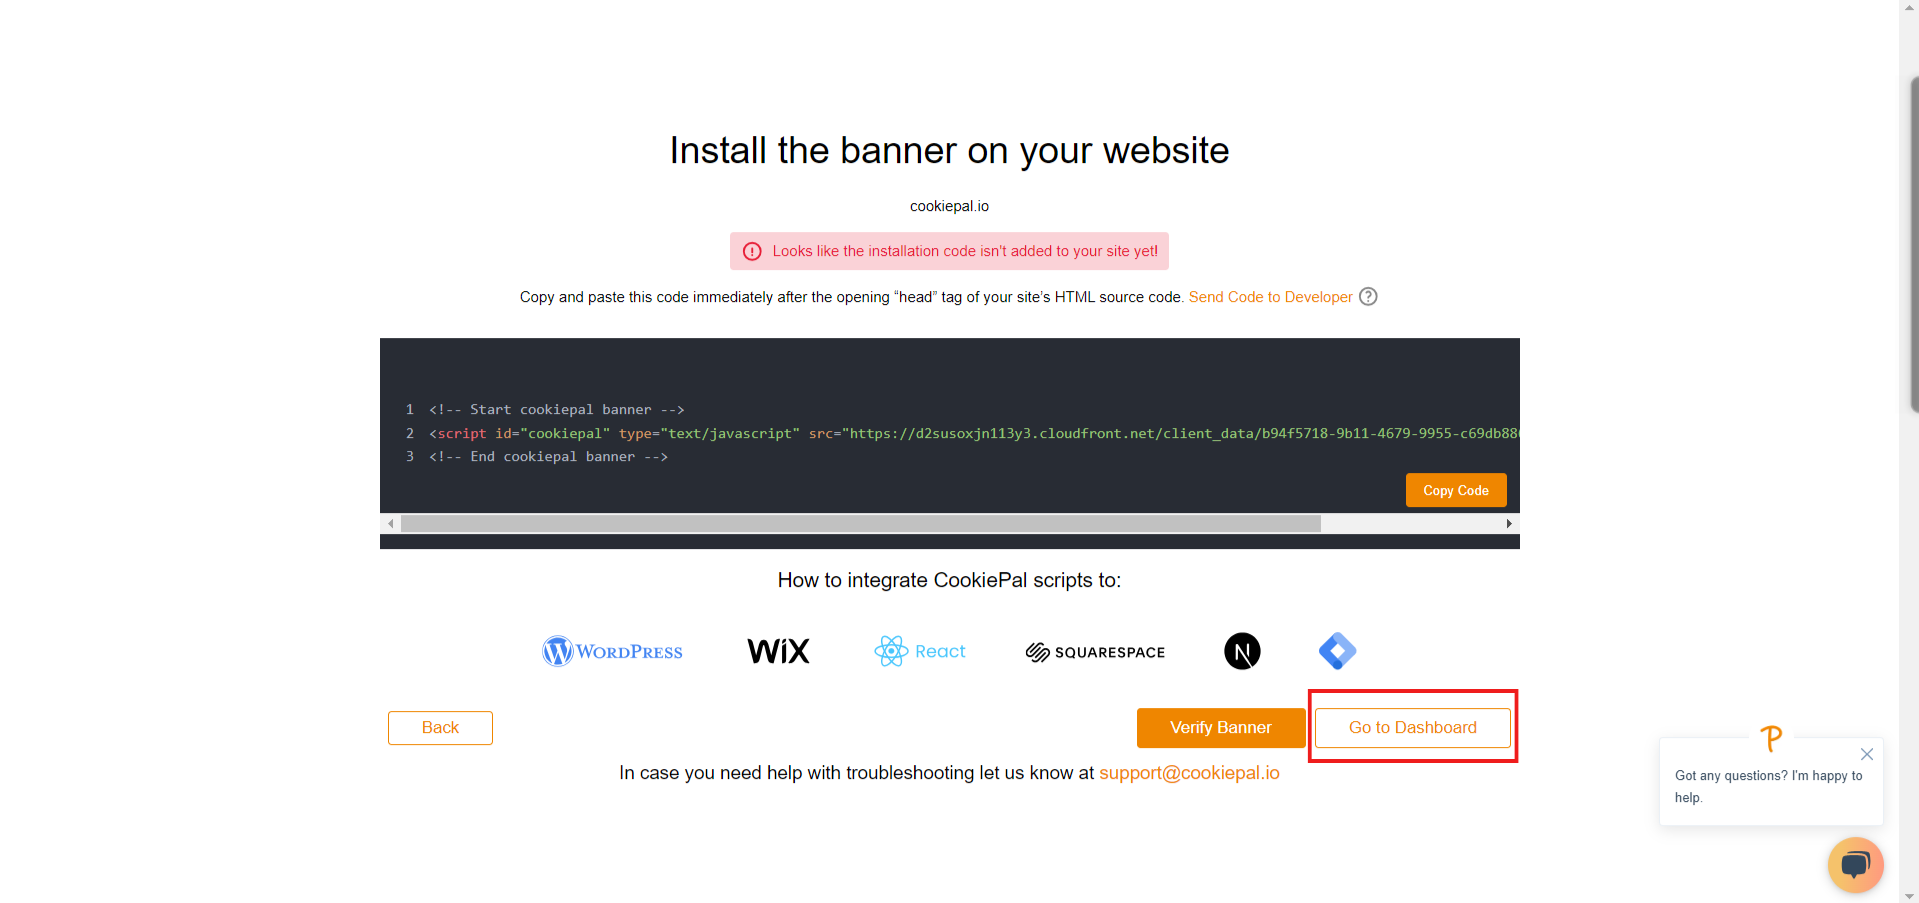
7. Go to "Settings".
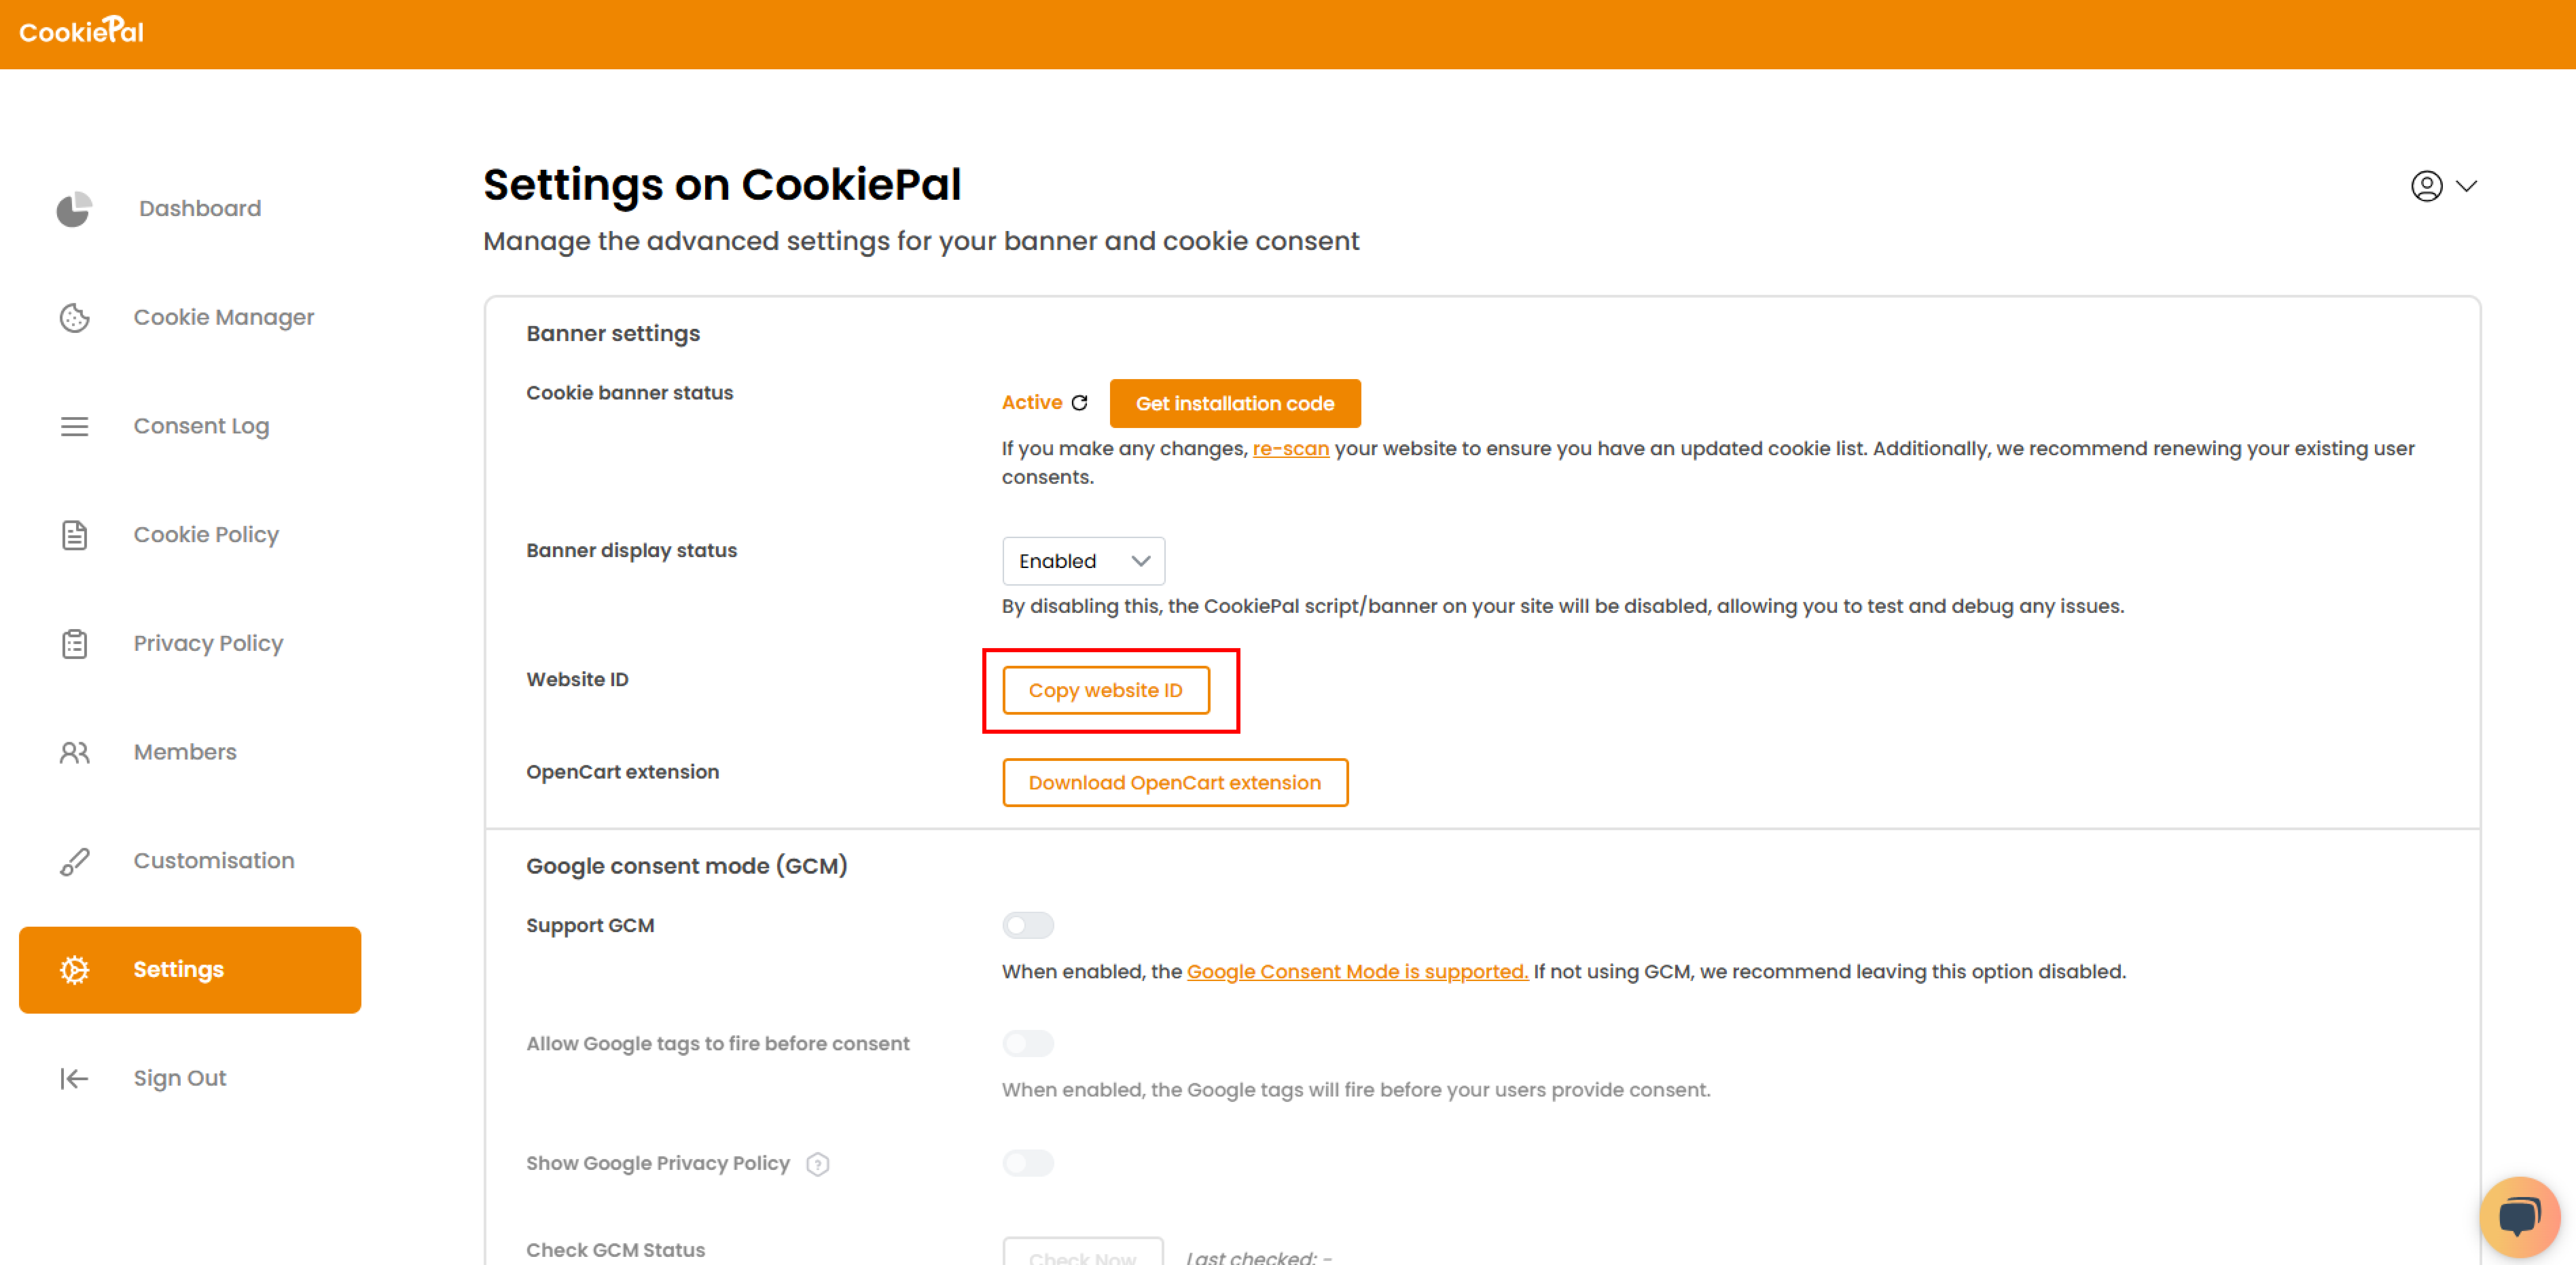
8. Copy your website ID.
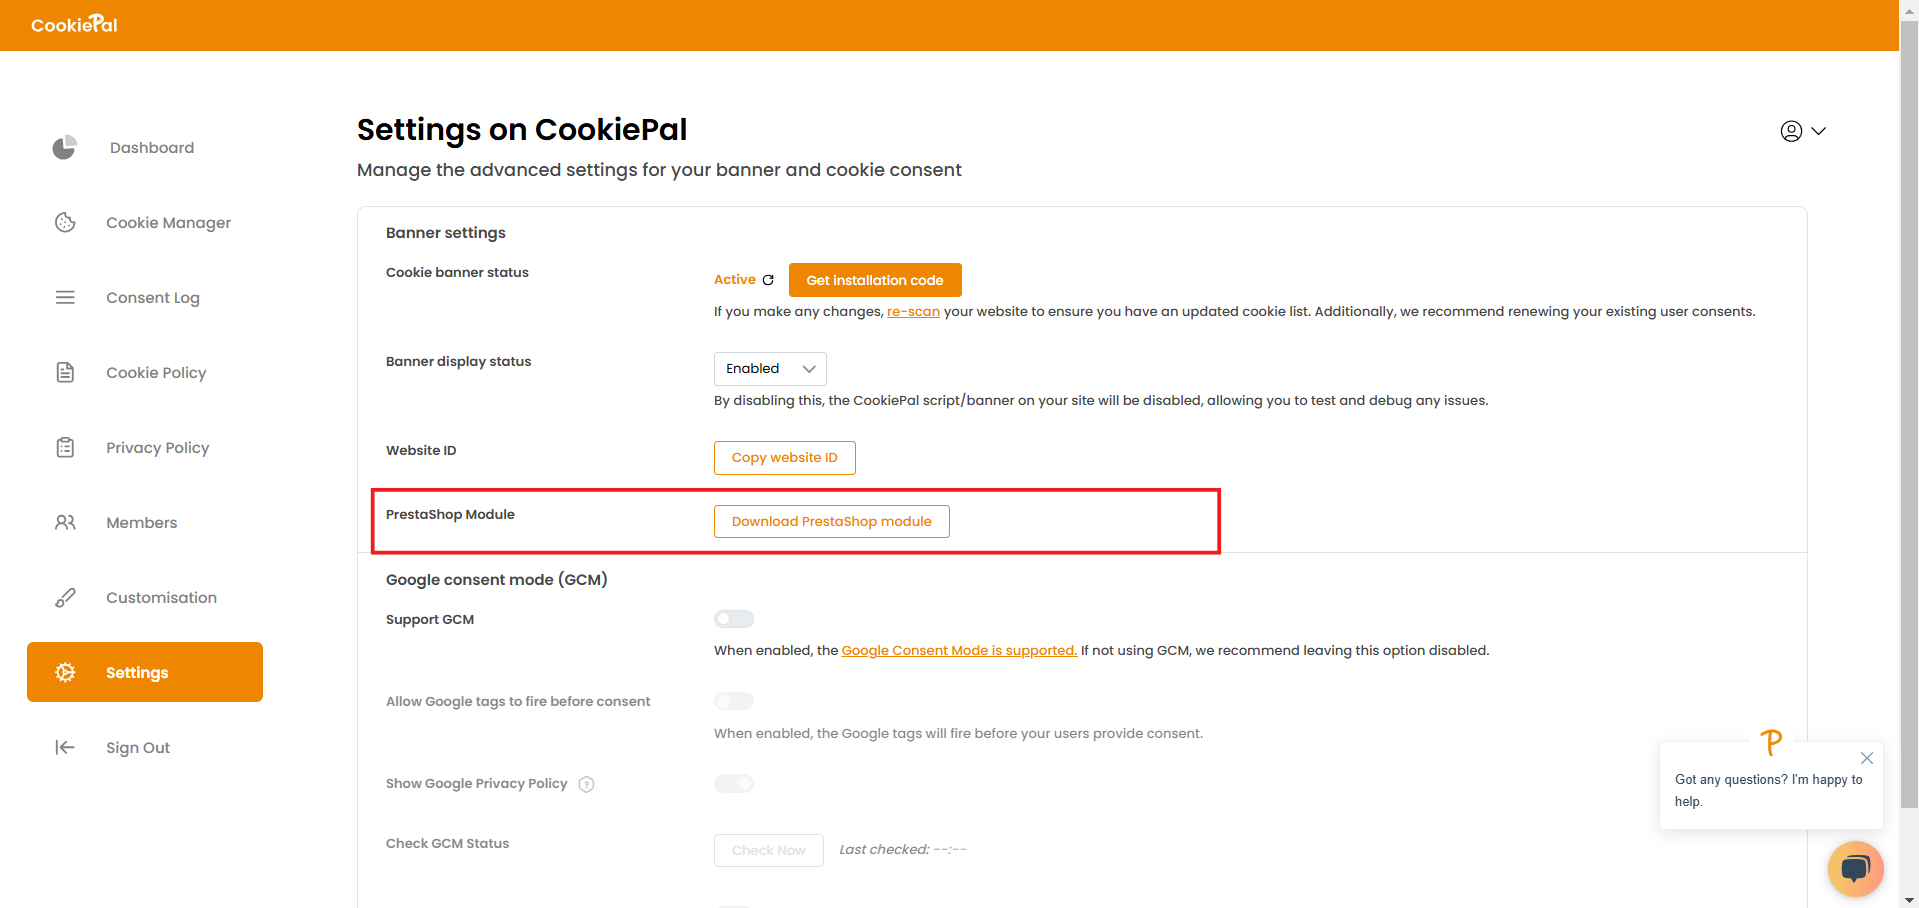
Step 2: Download the PrestaShop Module
In your CookiePal settings, download the PrestaShop module directly or use the Download PrestaShop Module link to begin.
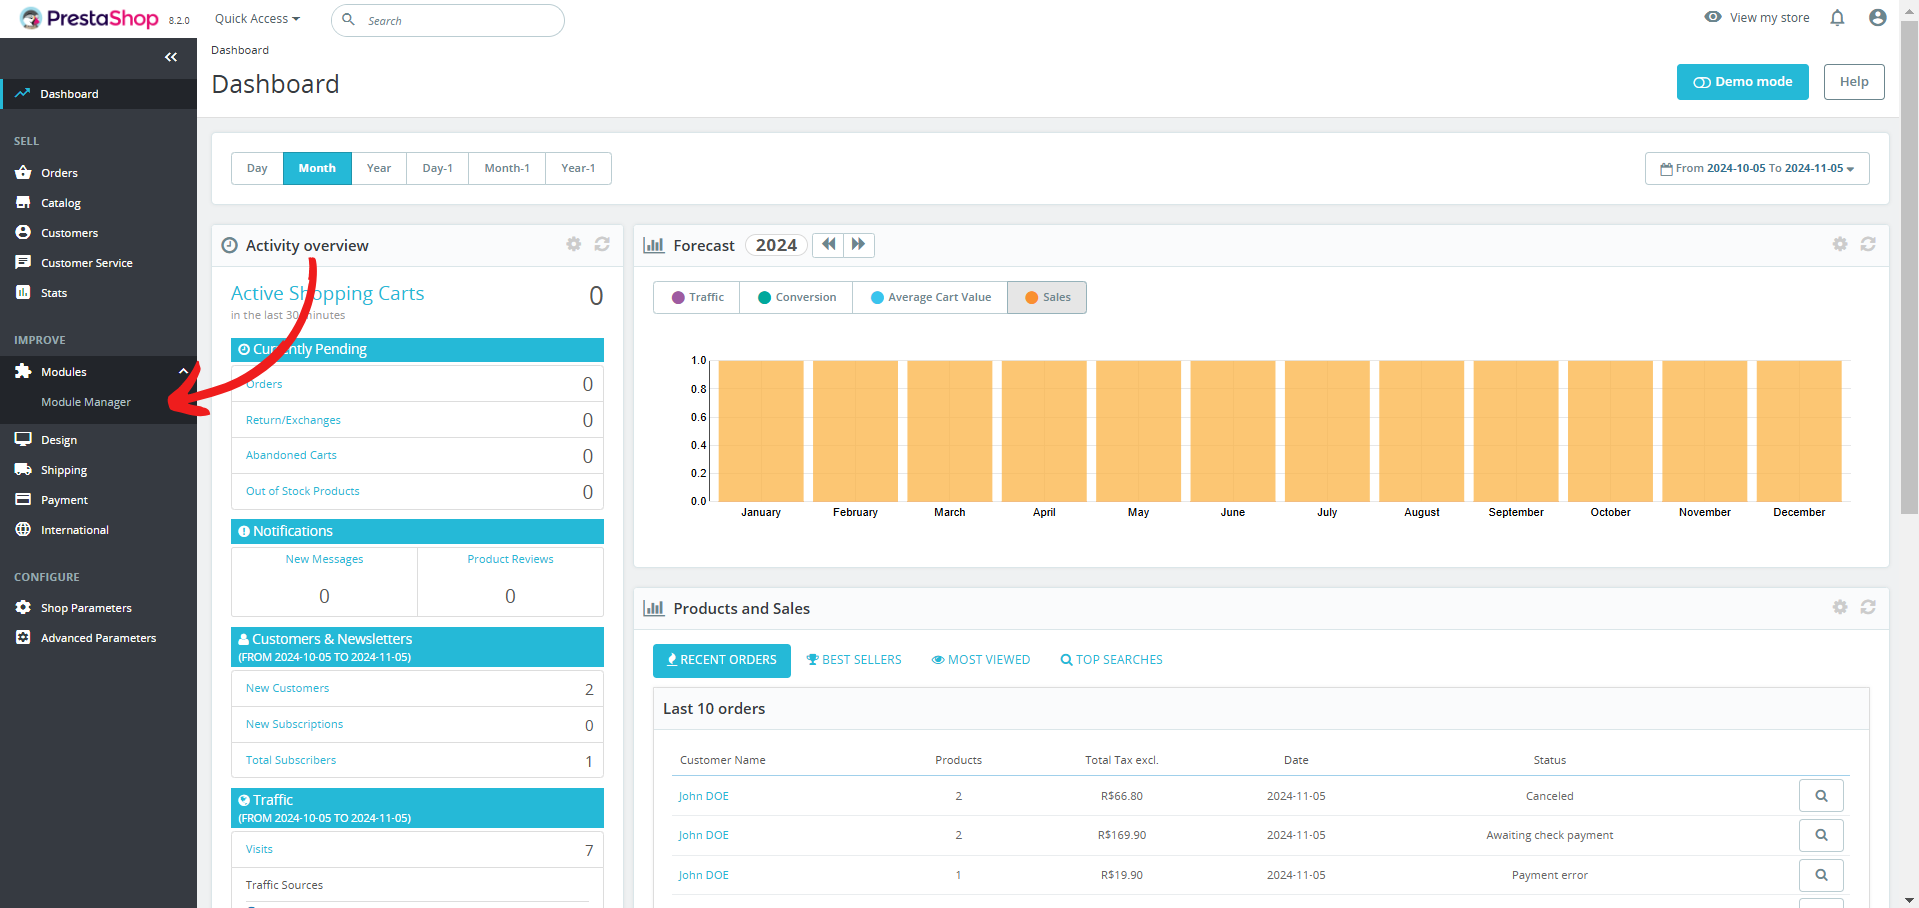
Step 3: Set Up Your Module
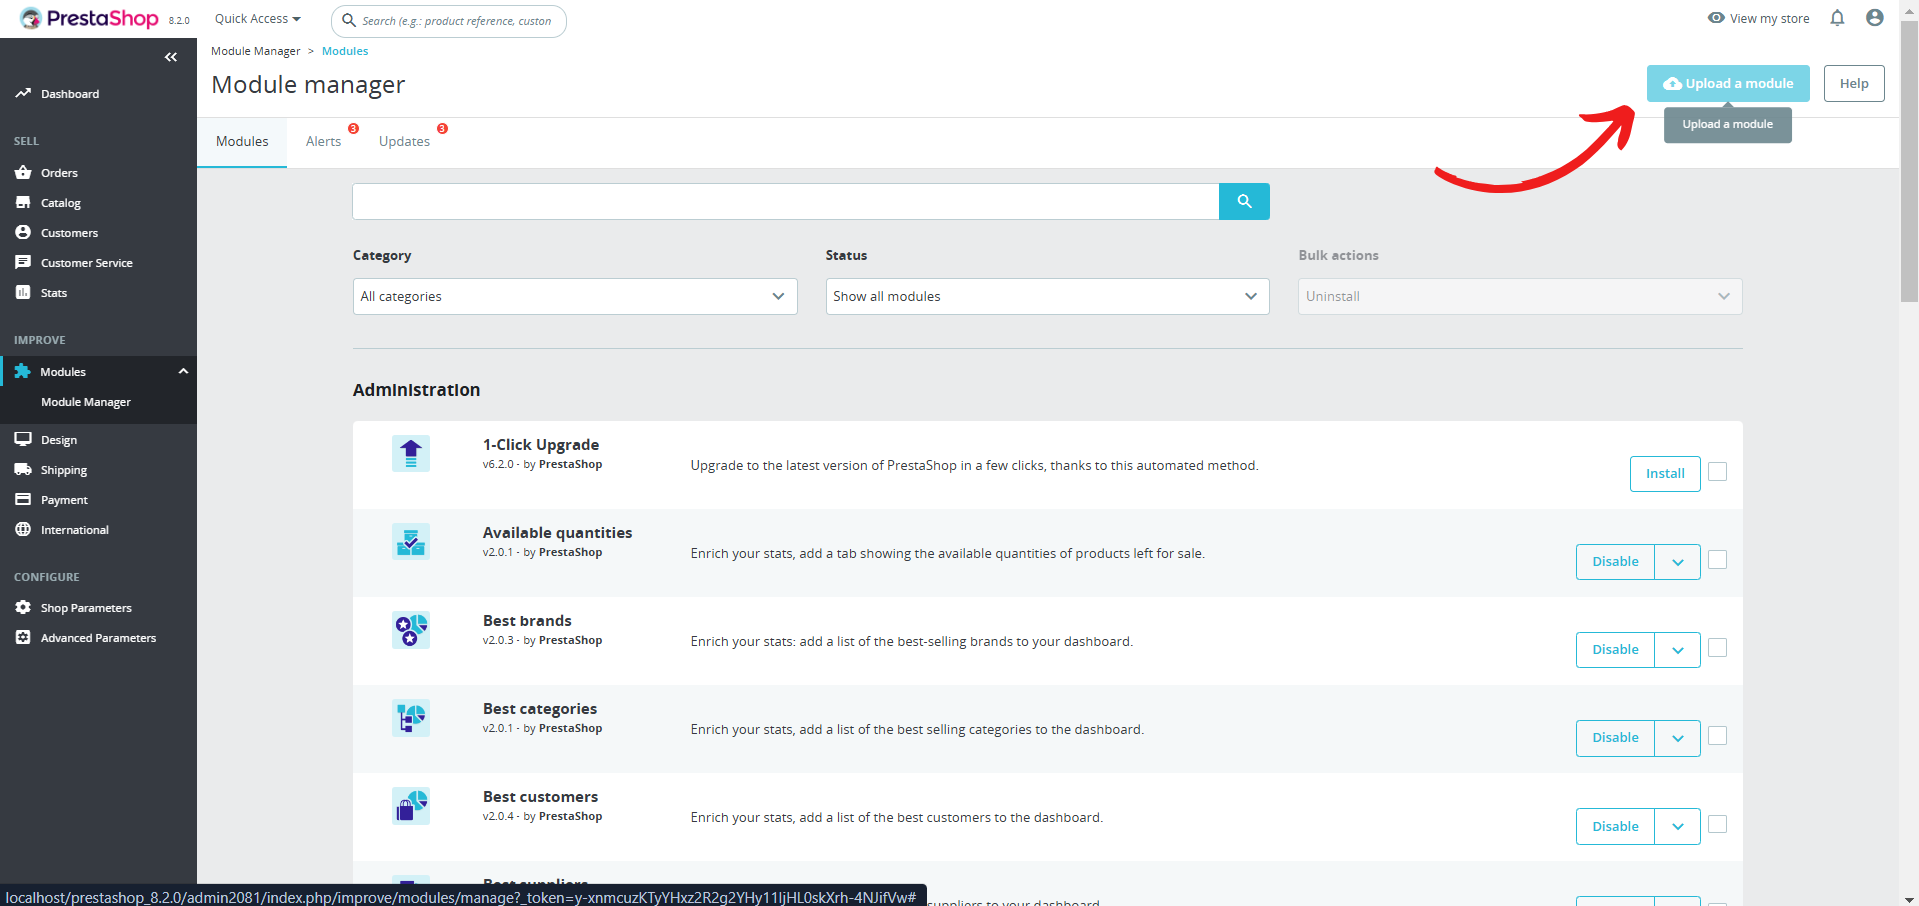
Navigate to Settings: In your PrestaShop dashboard, click on "Module Manager".
Upload CookiePal Module: Click "Upload Module".
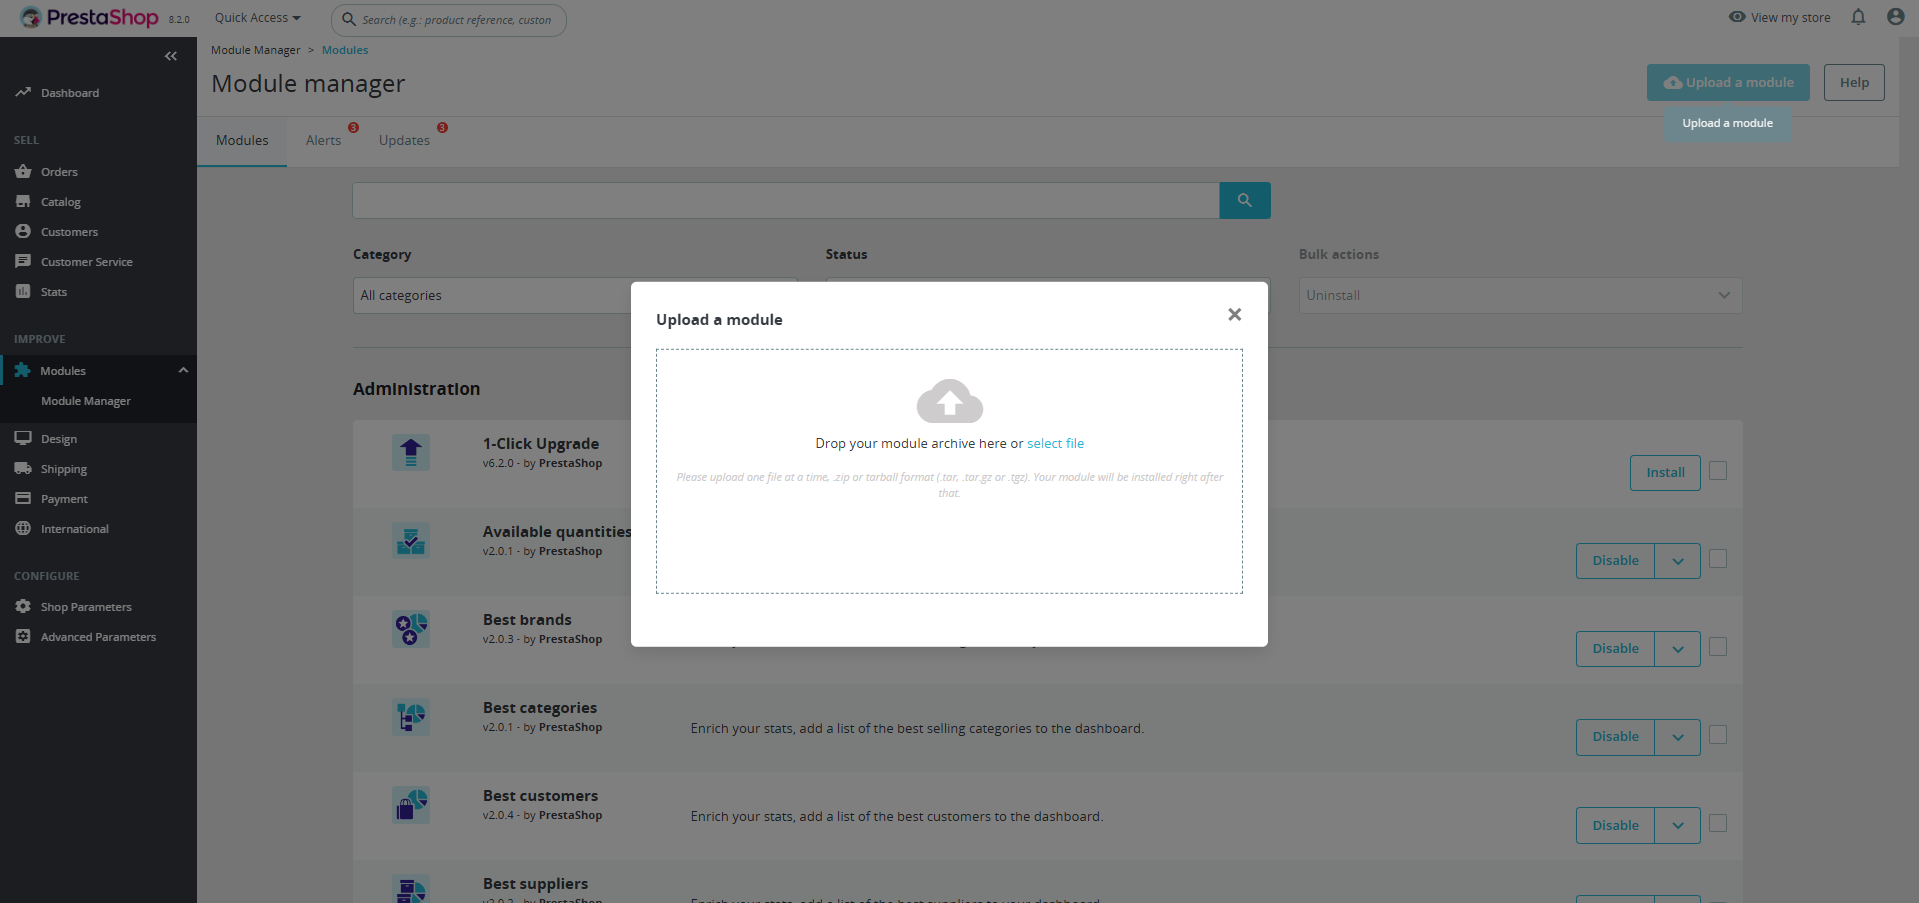
Drop Module: Drop the CookiePal module into the upload area.
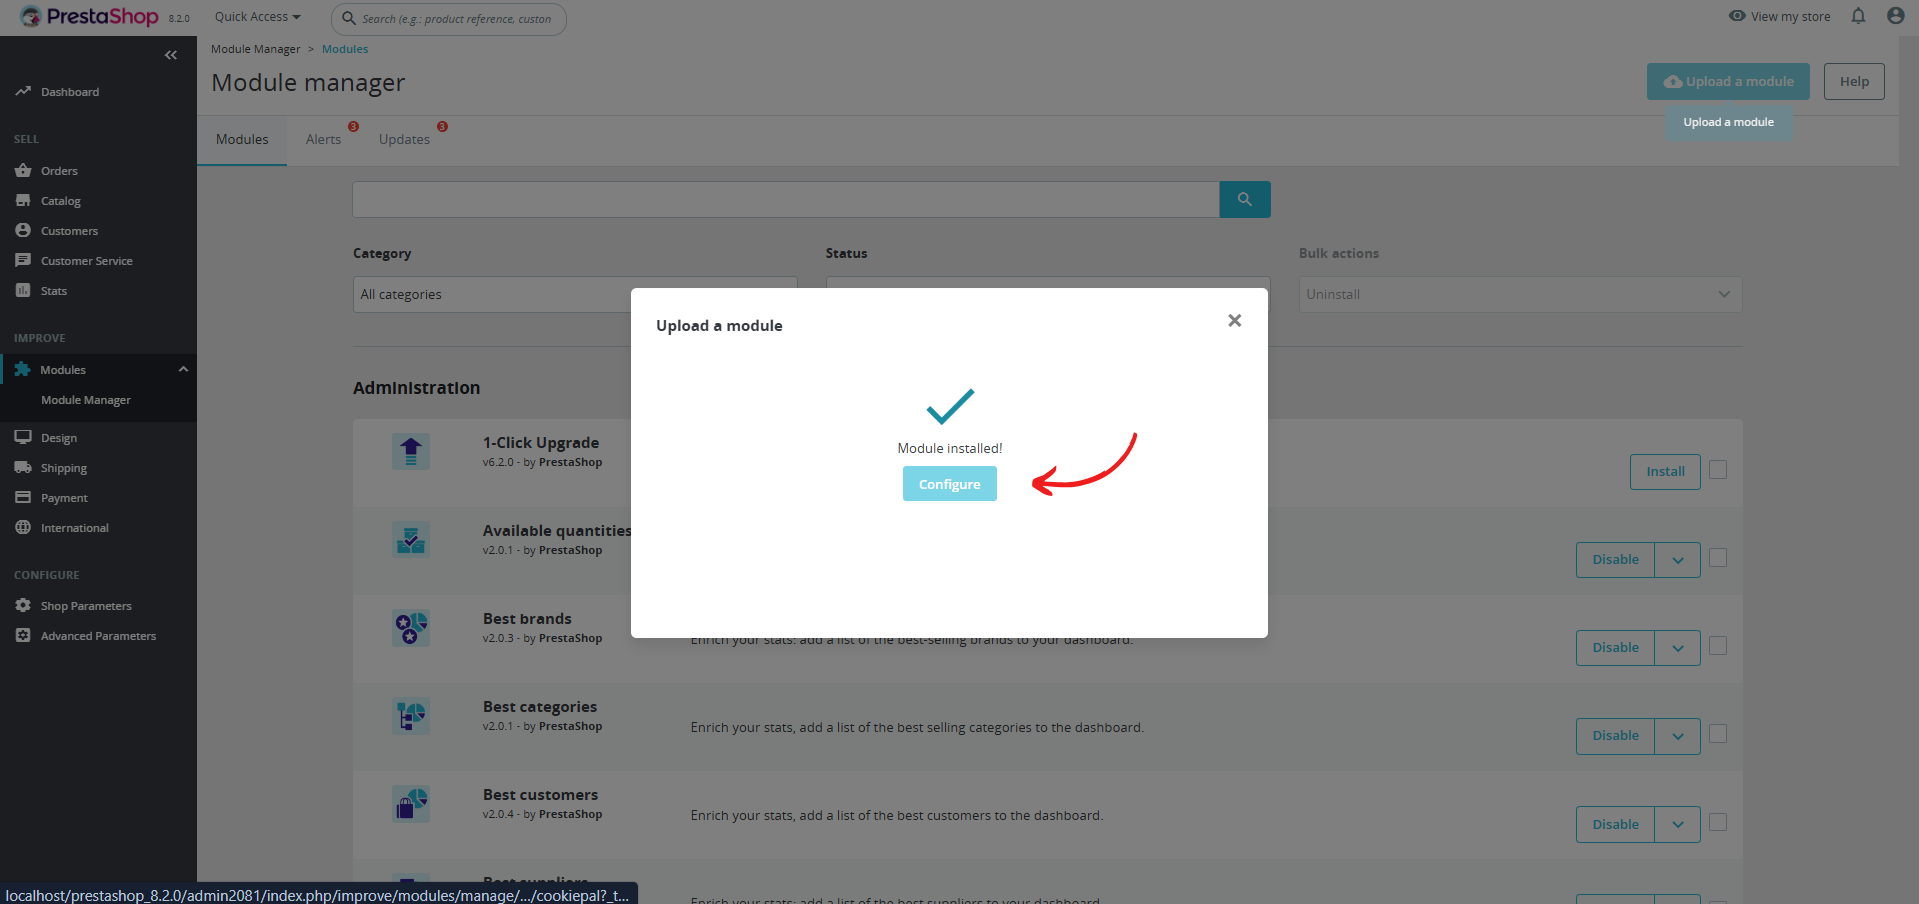
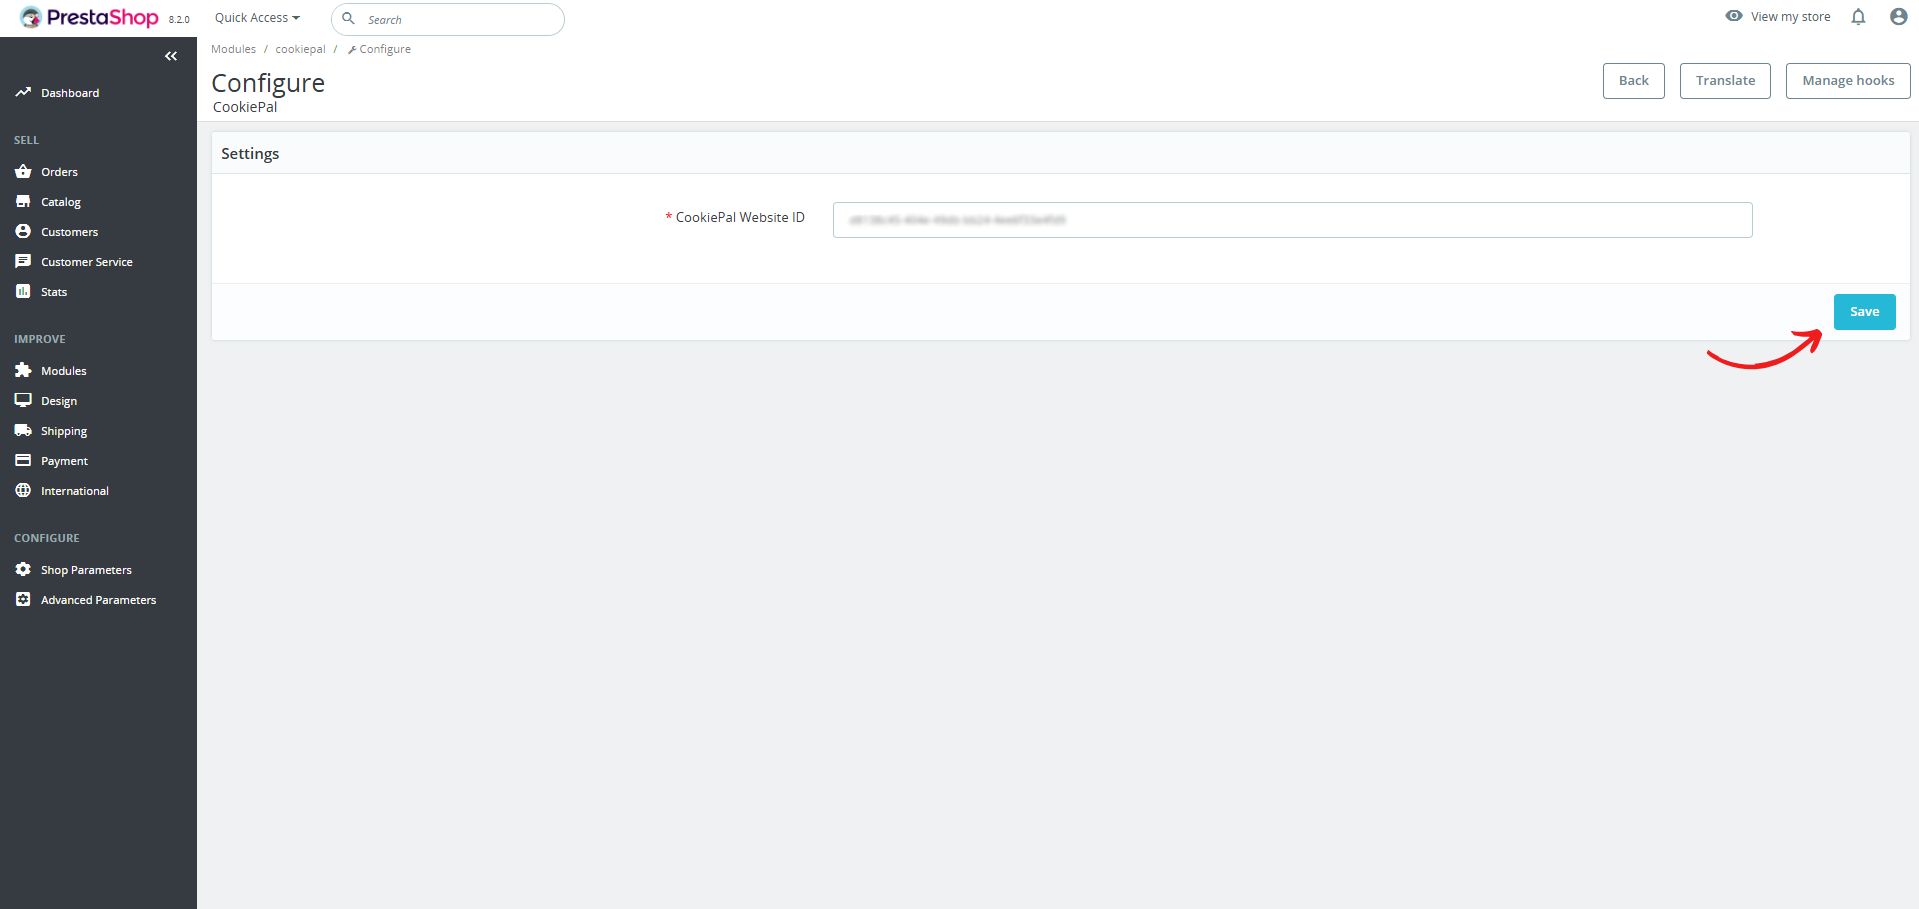
Configure Module: Click "Configure" to open the CookiePal module settings.
Website ID: Enter the website ID you copied in the first step.
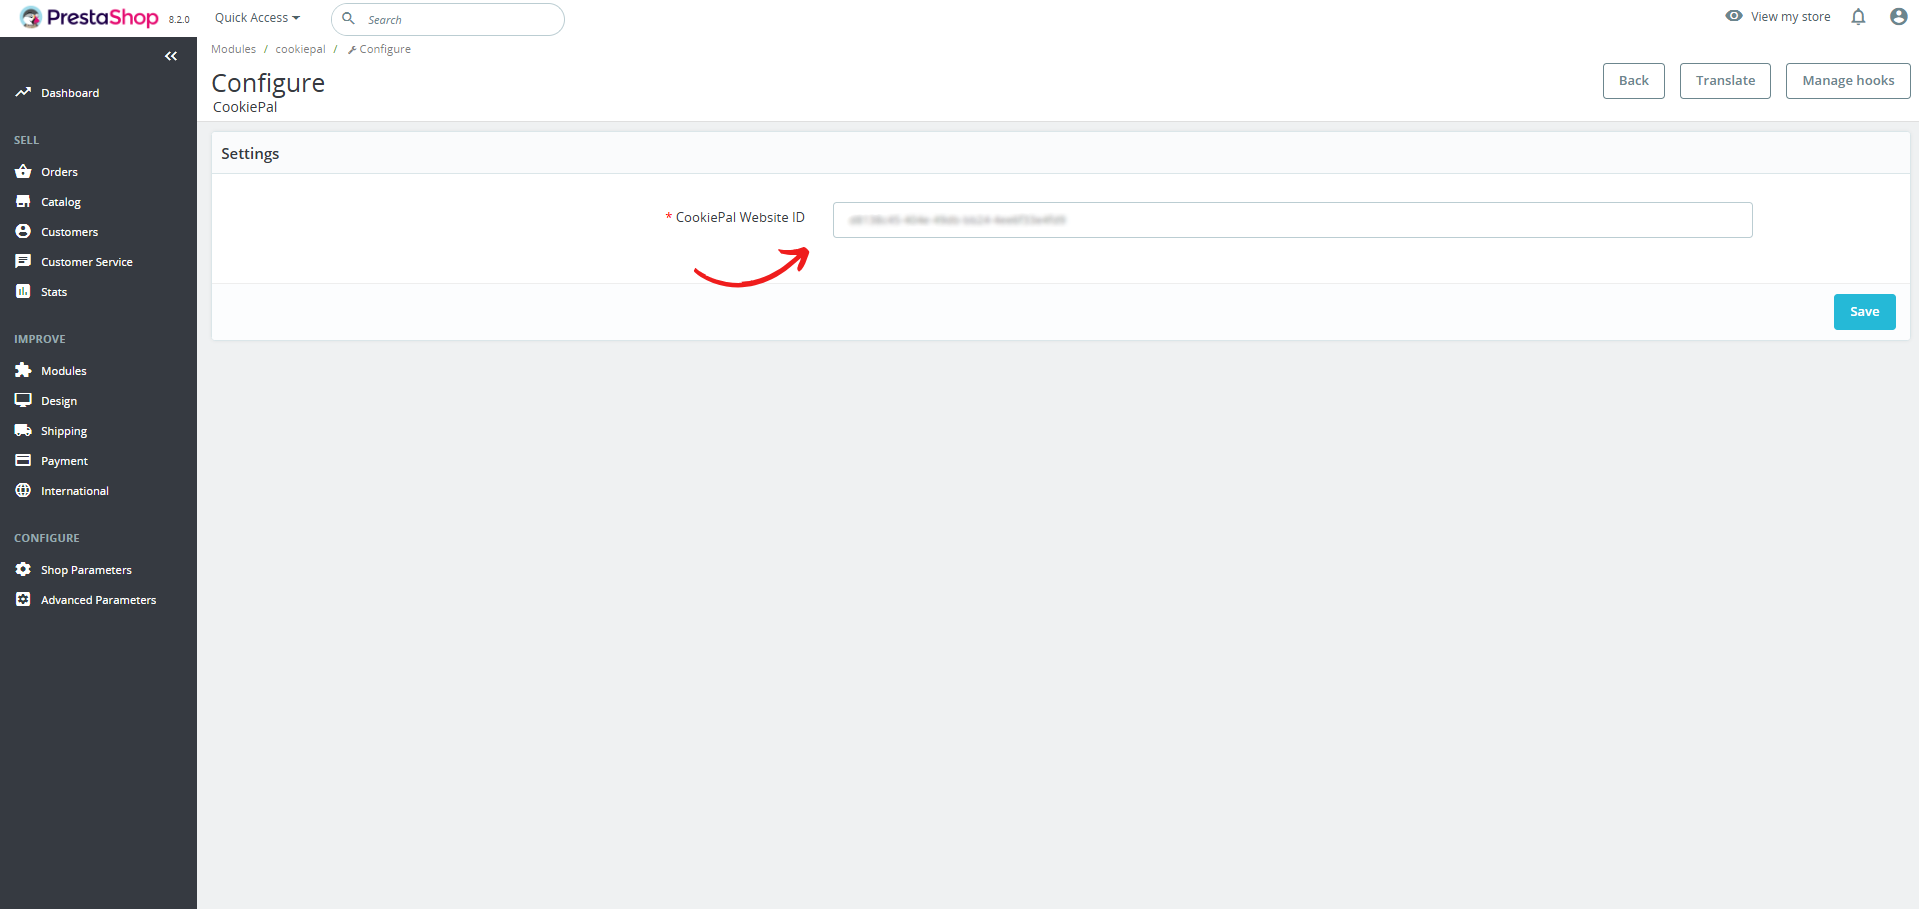
Save Settings: Click "Save" to complete your setup. The banner should now appear on your PrestaShop website.
Step 5: Verify the Cookie Banner
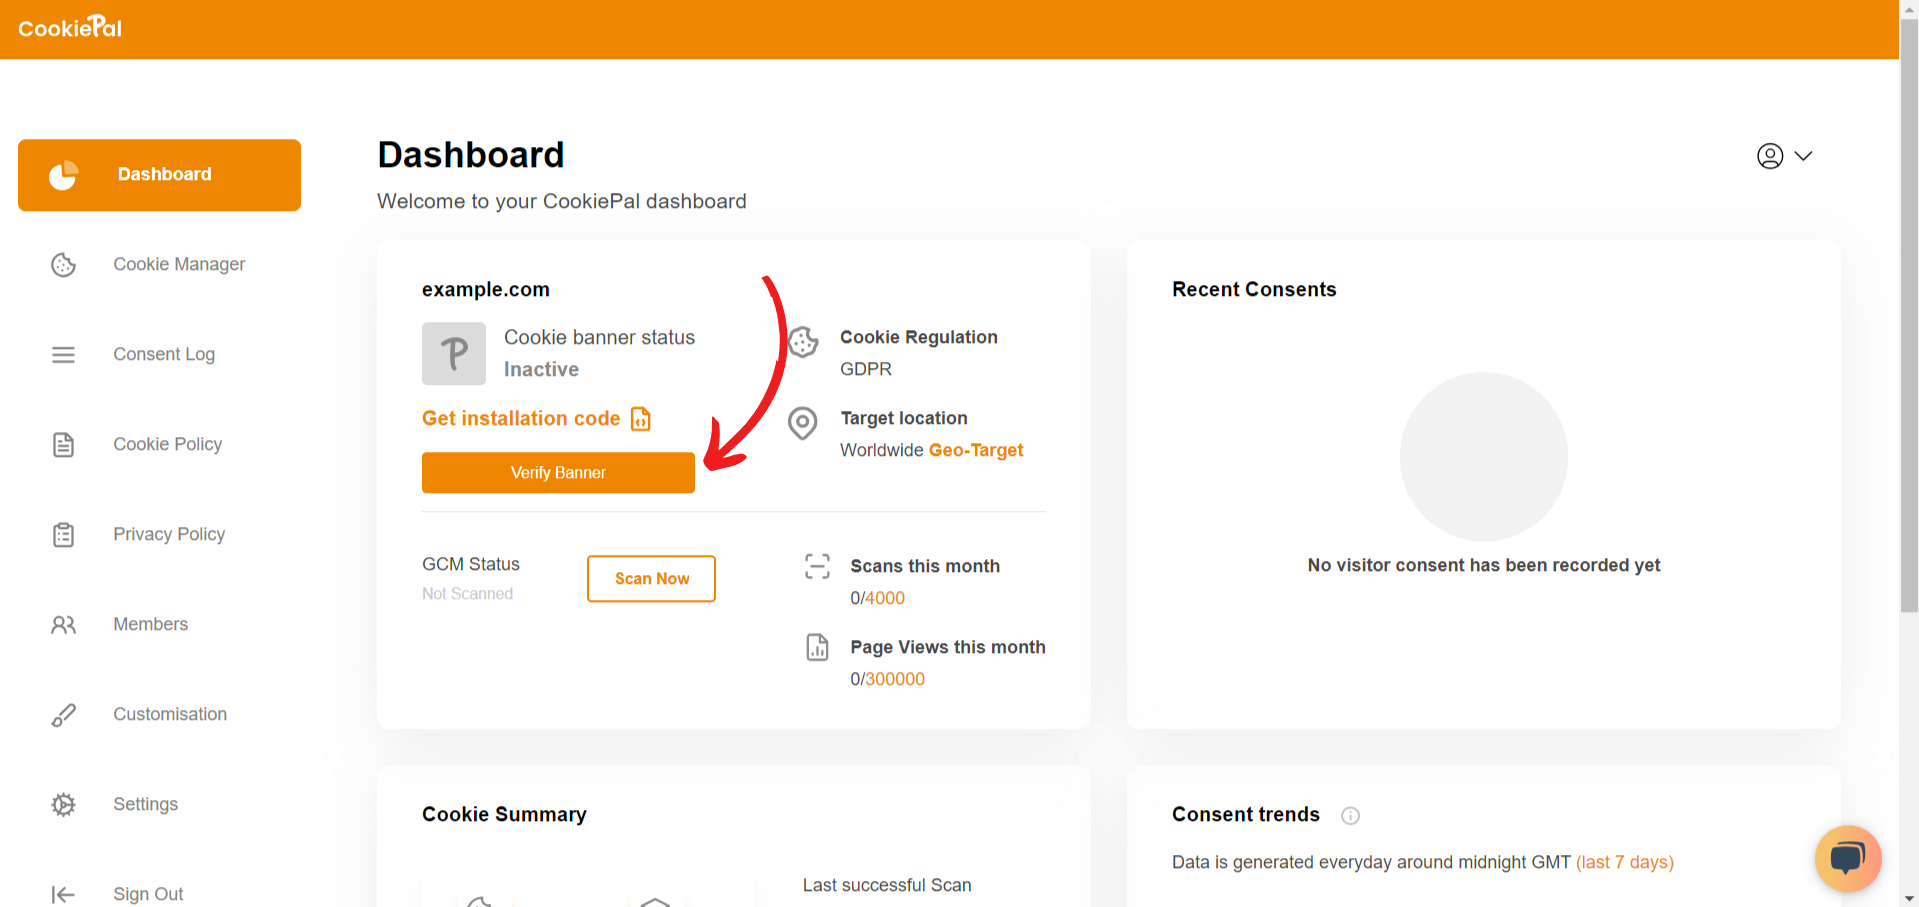
Verify Banner: Return to the CookiePal dashboard and check that the cookie banner is active on your website. The status should change to "Active".
Test Implementation: Visit your website to confirm that the cookie consent banner appears correctly and that cookies are blocked until user consent is given.

Follow these steps if you haven't set up a CookiePal account or banner.