Integrate CookiePal with Google Tag Manager via template import
Welcome to CookiePal! This guide will walk you through how to integrate Google Tag Manager on your website.
Implementing CookiePal with Google Tag Manager
This document provides a comprehensive guide for deploying the CookiePal consent management platform using Google Tag Manager ( GTM ). It covers all the steps around setting up and customising your CookiePal banner with a GTM account. It additionally links to documentation on Google Consent Mode (GCM) and how it can be implemented with CookiePal.
Step-by-Step Guide
Step 1: Sign up/create a CookiePal account and set up your banner and GTM.
1. Sign up for CookiePal.

2. After confirming your email, you will be directed to customise your banner. Select your preference.

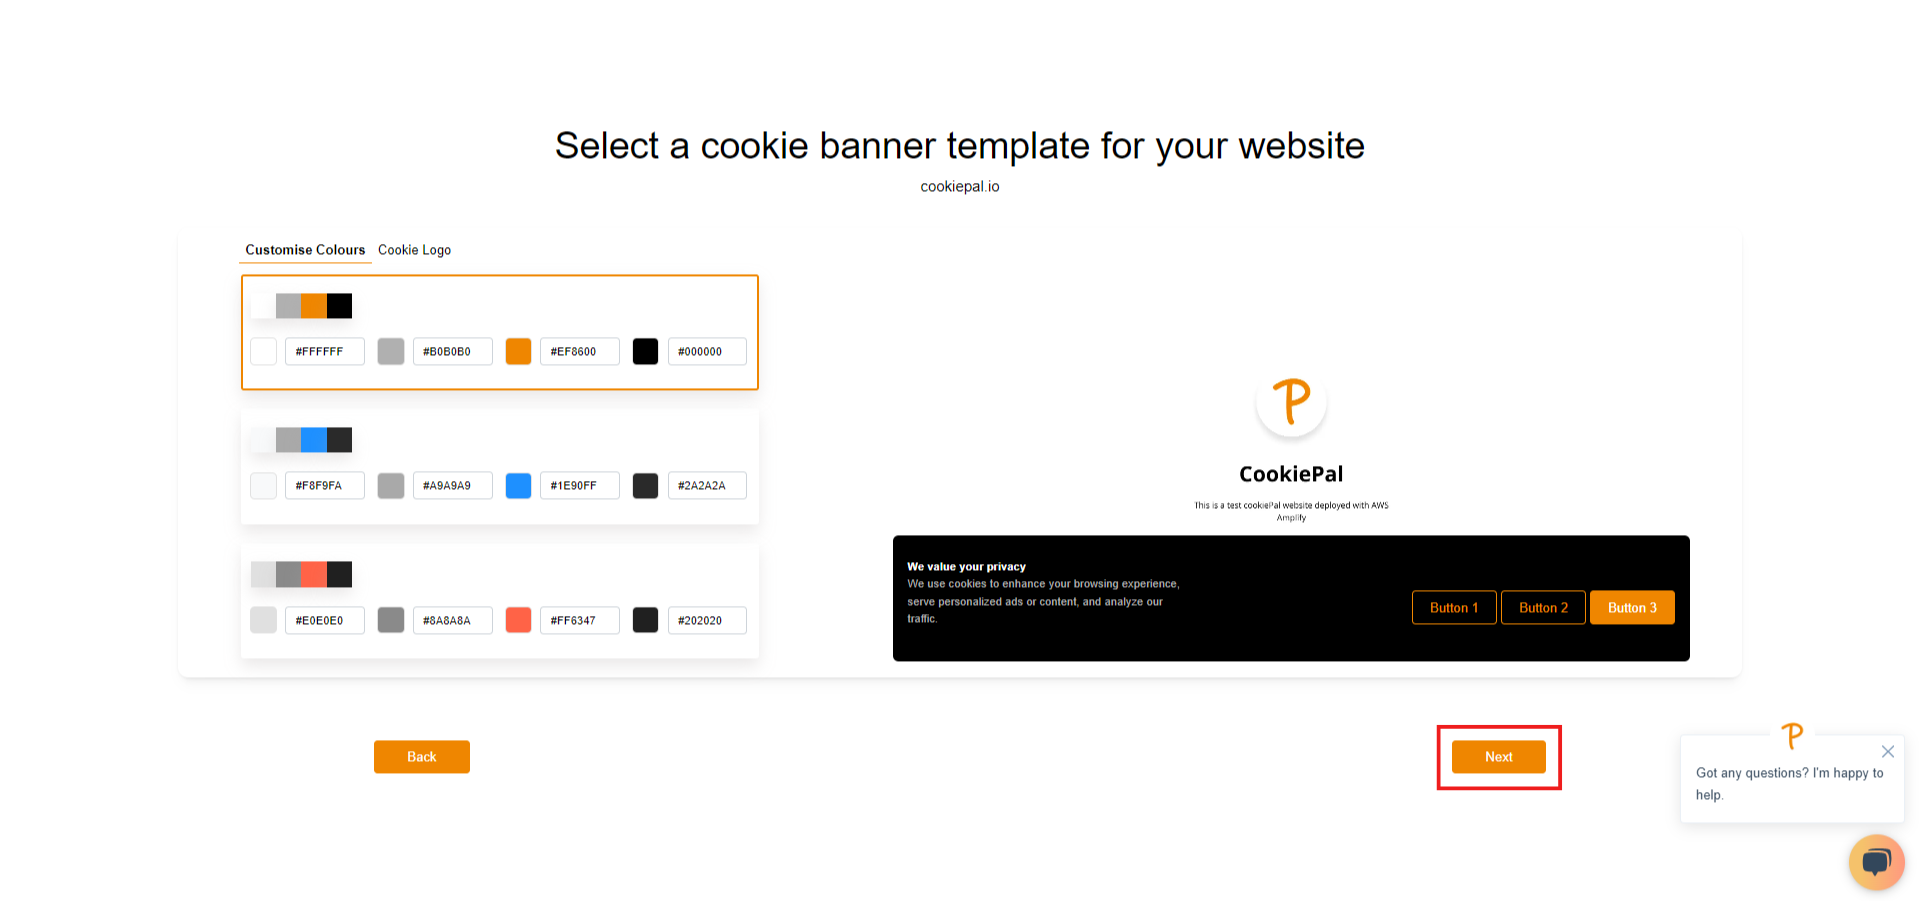
3. Customise your banner/logo colours.
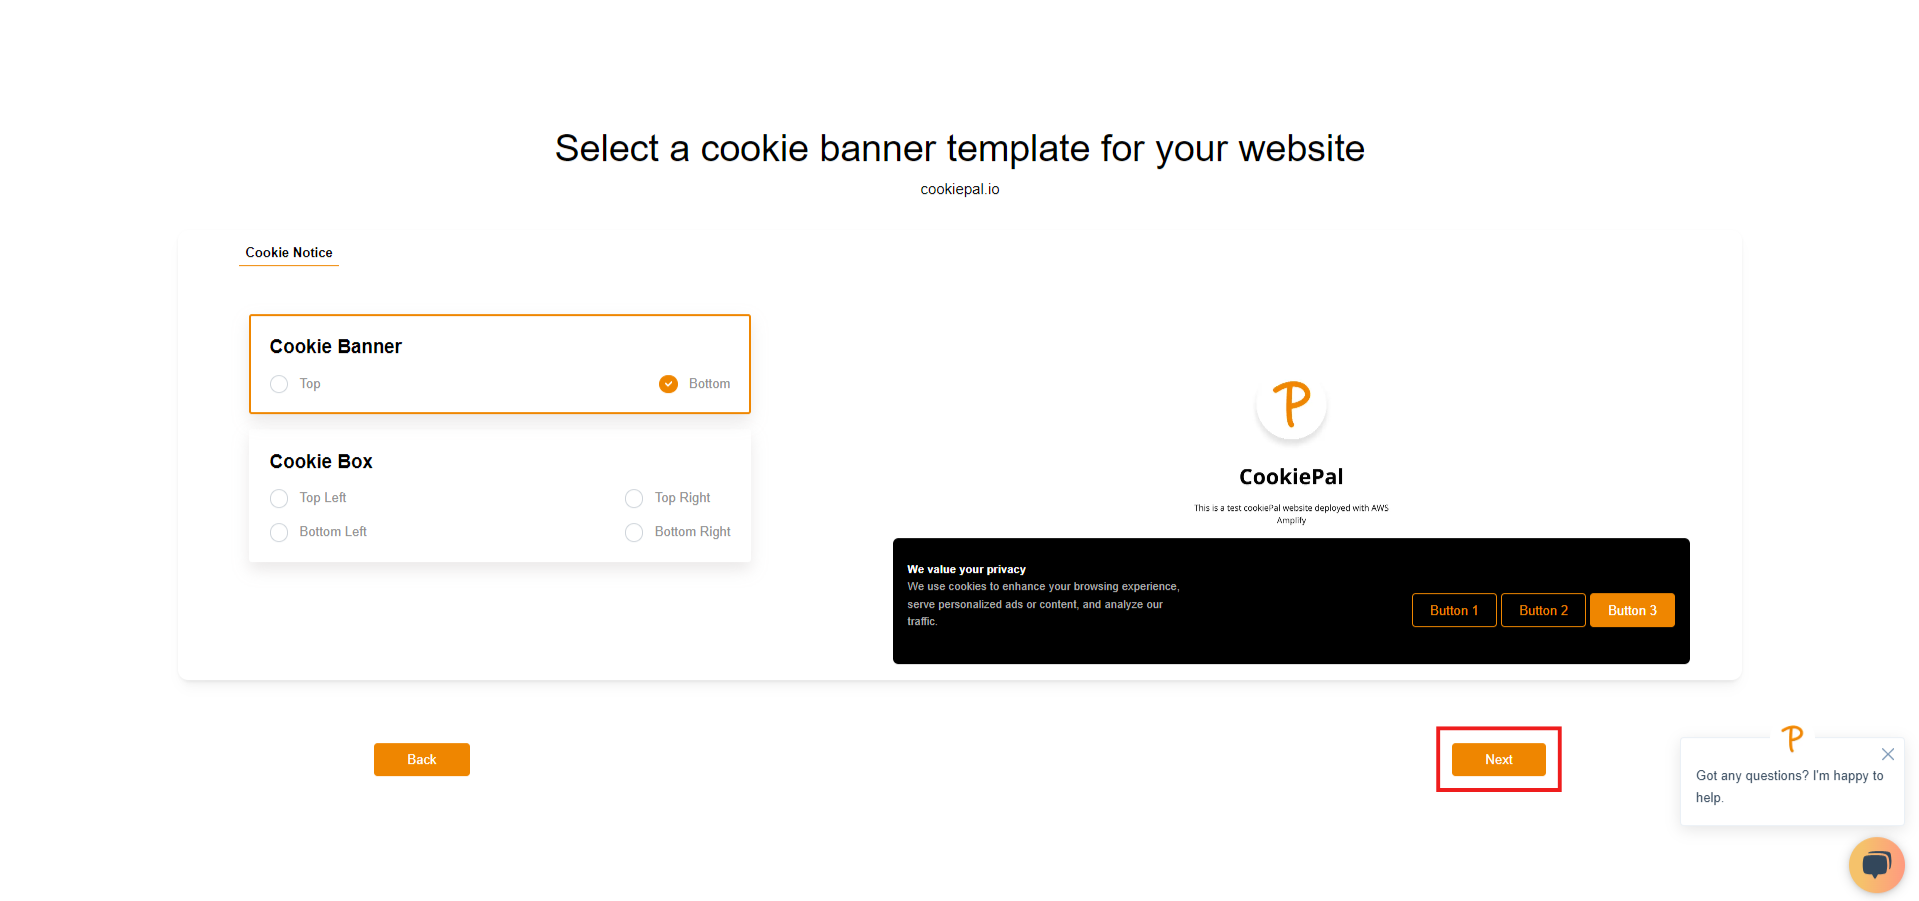
4. Customise your banner types and positions.
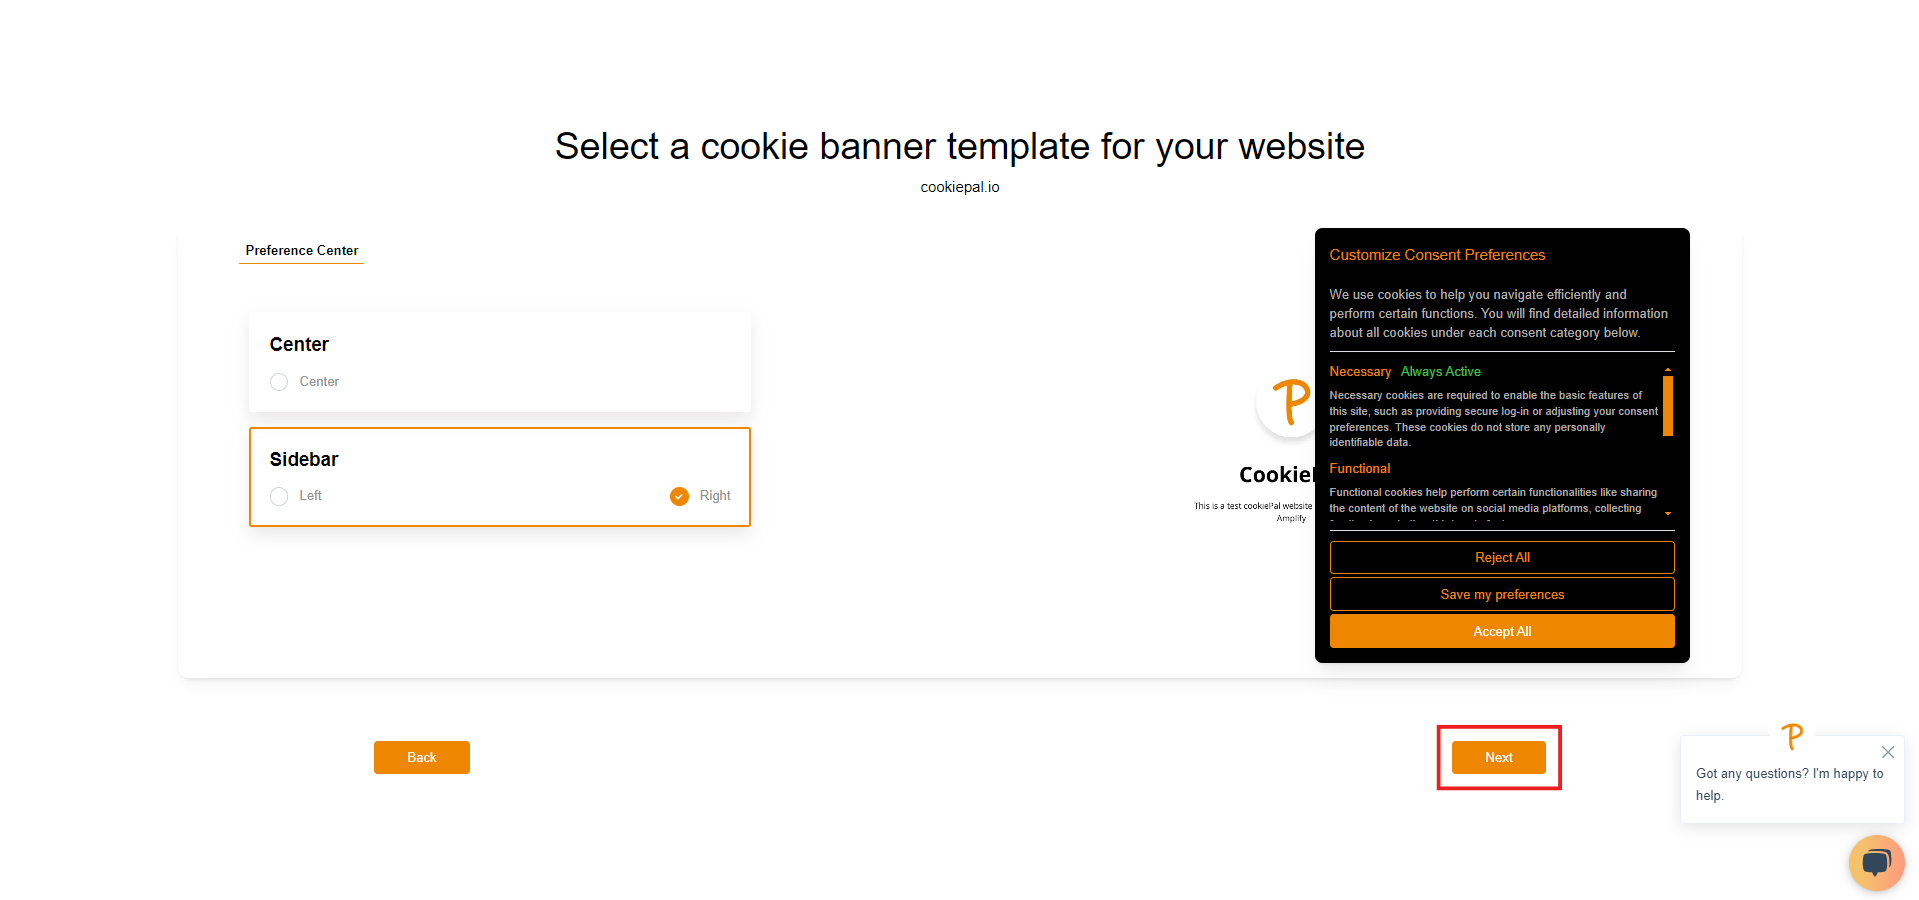
5. Customise your preference center.
Customisations can be changed later on the customization page.
6. To configure CookiePal with the Google Tag Manager , click "Yes".

7. Download the Cookiepal template.

8. Copy your Website ID.

Step 2: Sign up for Google Tag Manager and Create a New Container.
If you don’t have a Google Tag Manager account, sign up for one by visiting Google Tag Manager and following the account creation process.
The Container is where you’ll manage and deploy your website’s tags, triggers, and variables. Follow the steps below to create and install a new container.
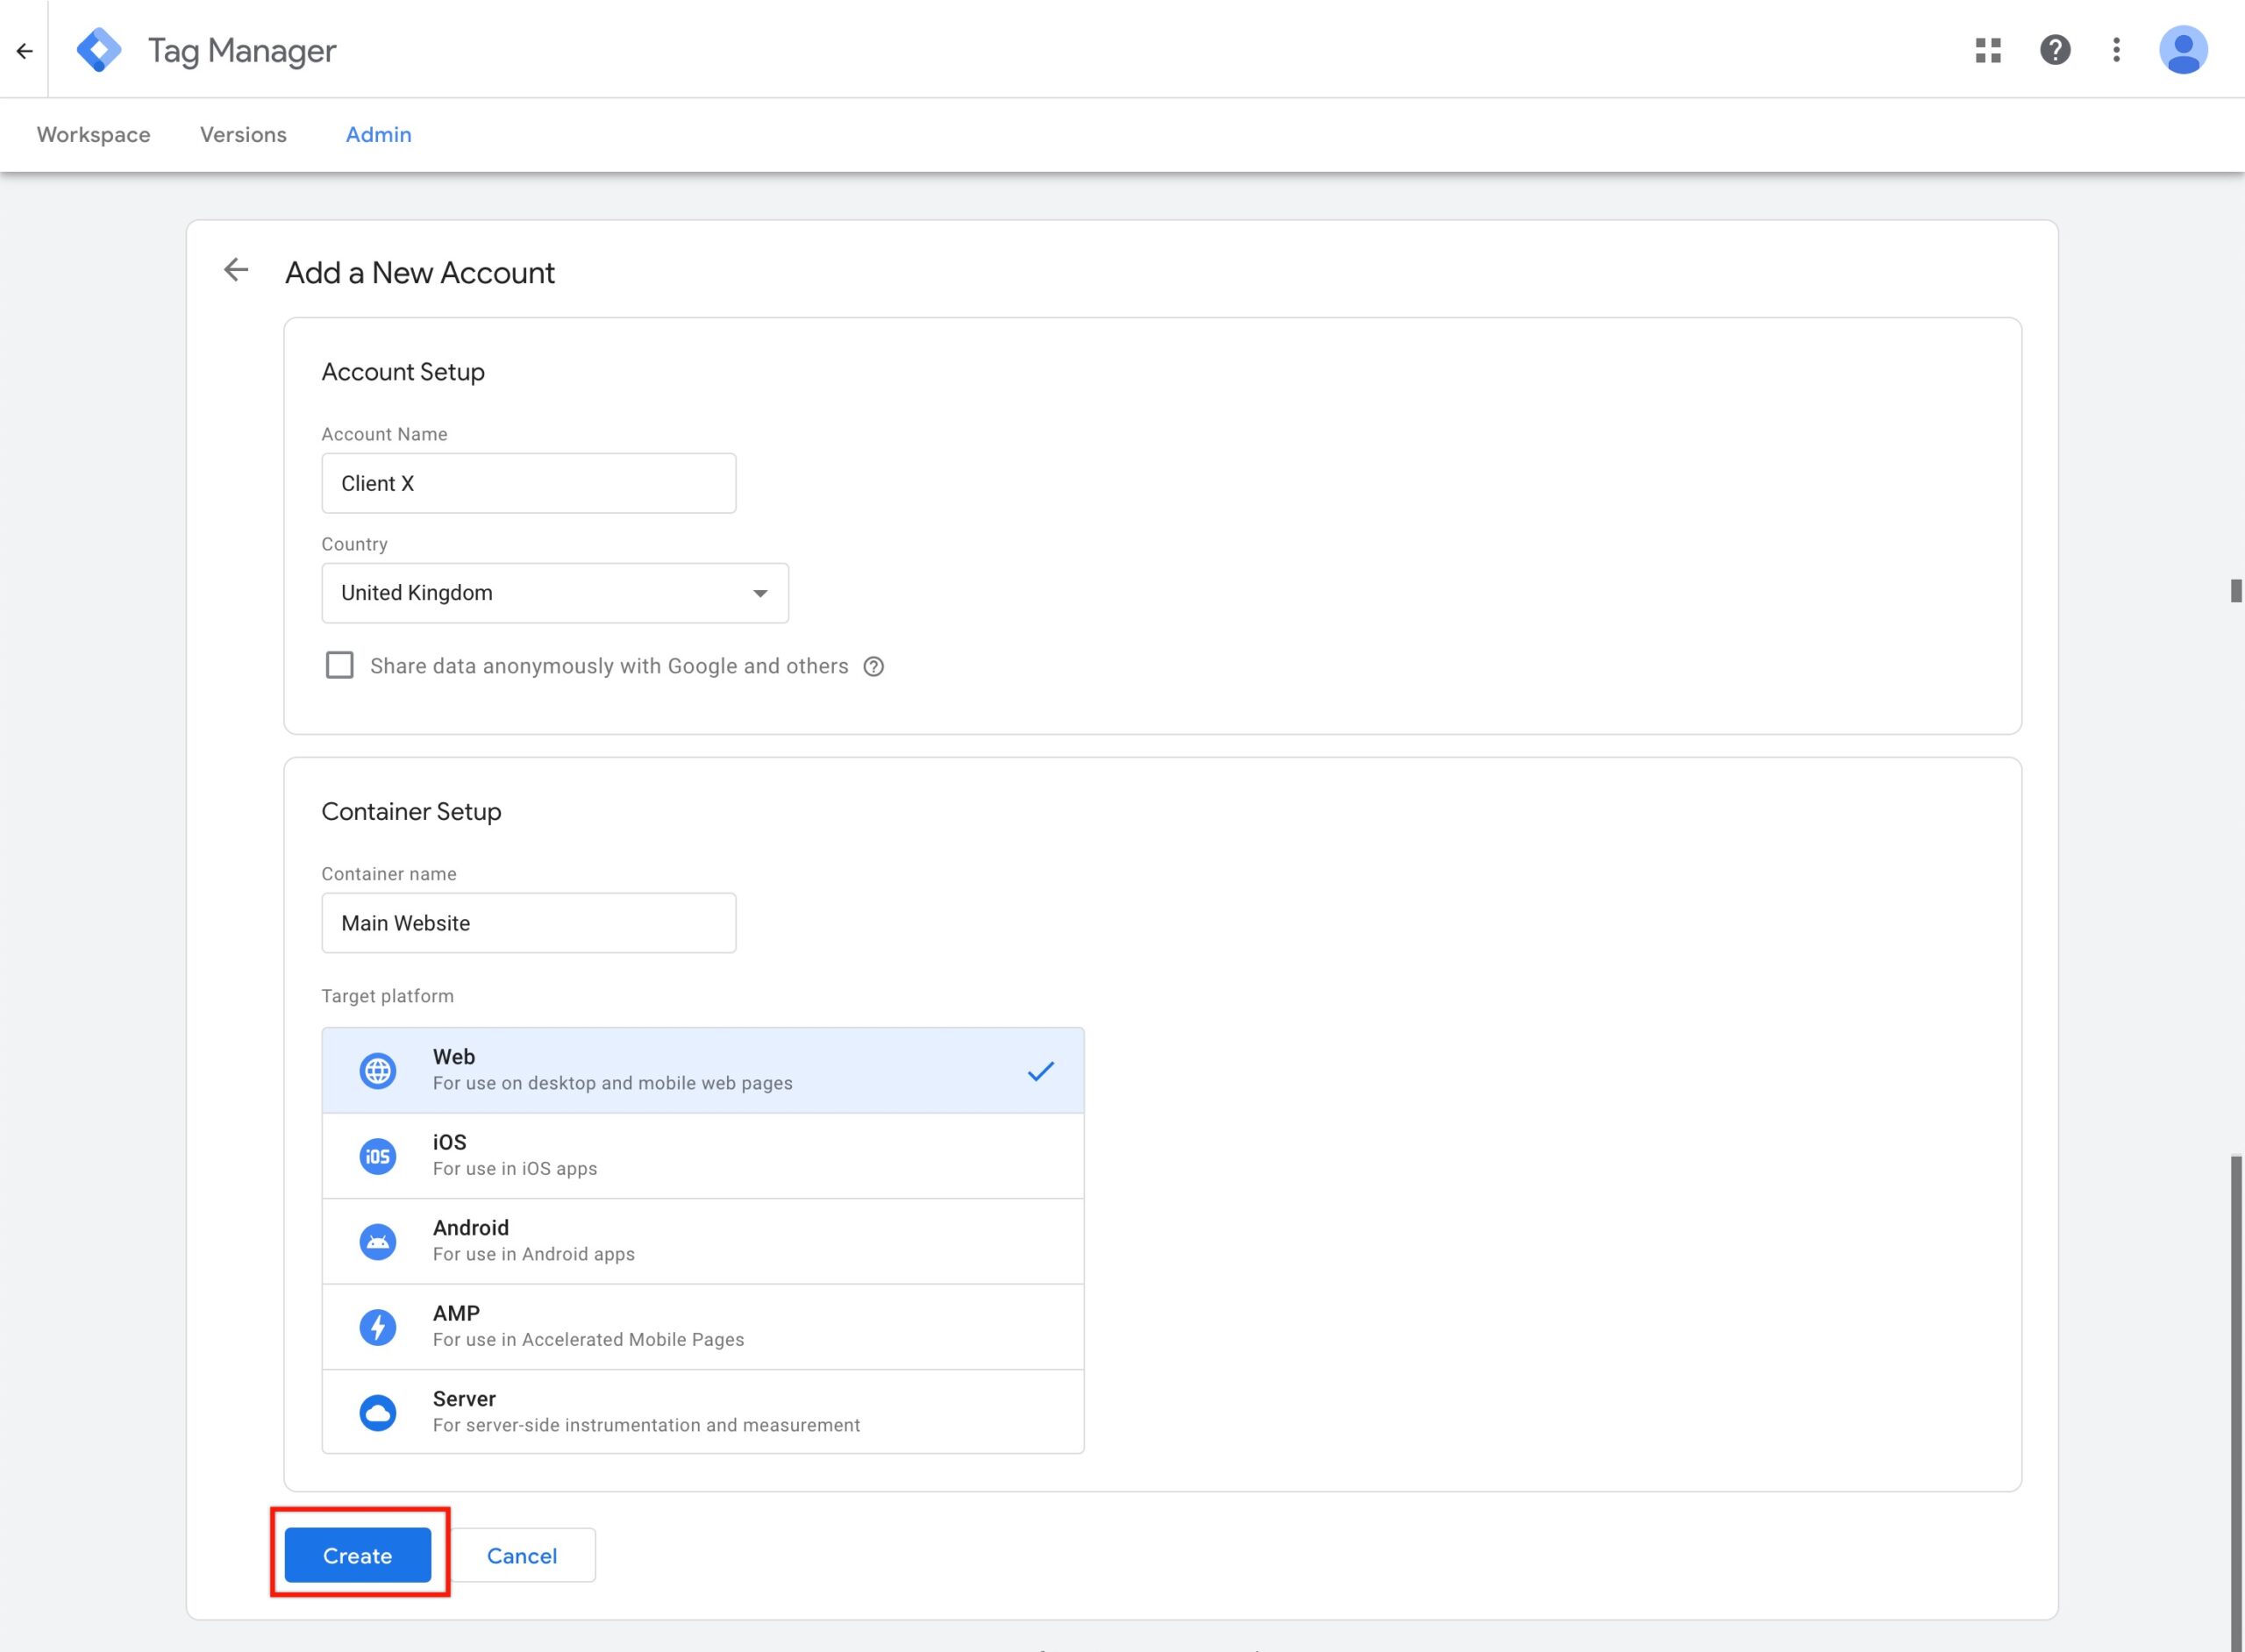
1. In Tag Manager, click the Accounts tab > Create Account.
2. Enter an Account Name and select the Country for the account.
3. Enter the Container name and select the container type.
4. To create your container, click Create and agree to the Terms of Service.
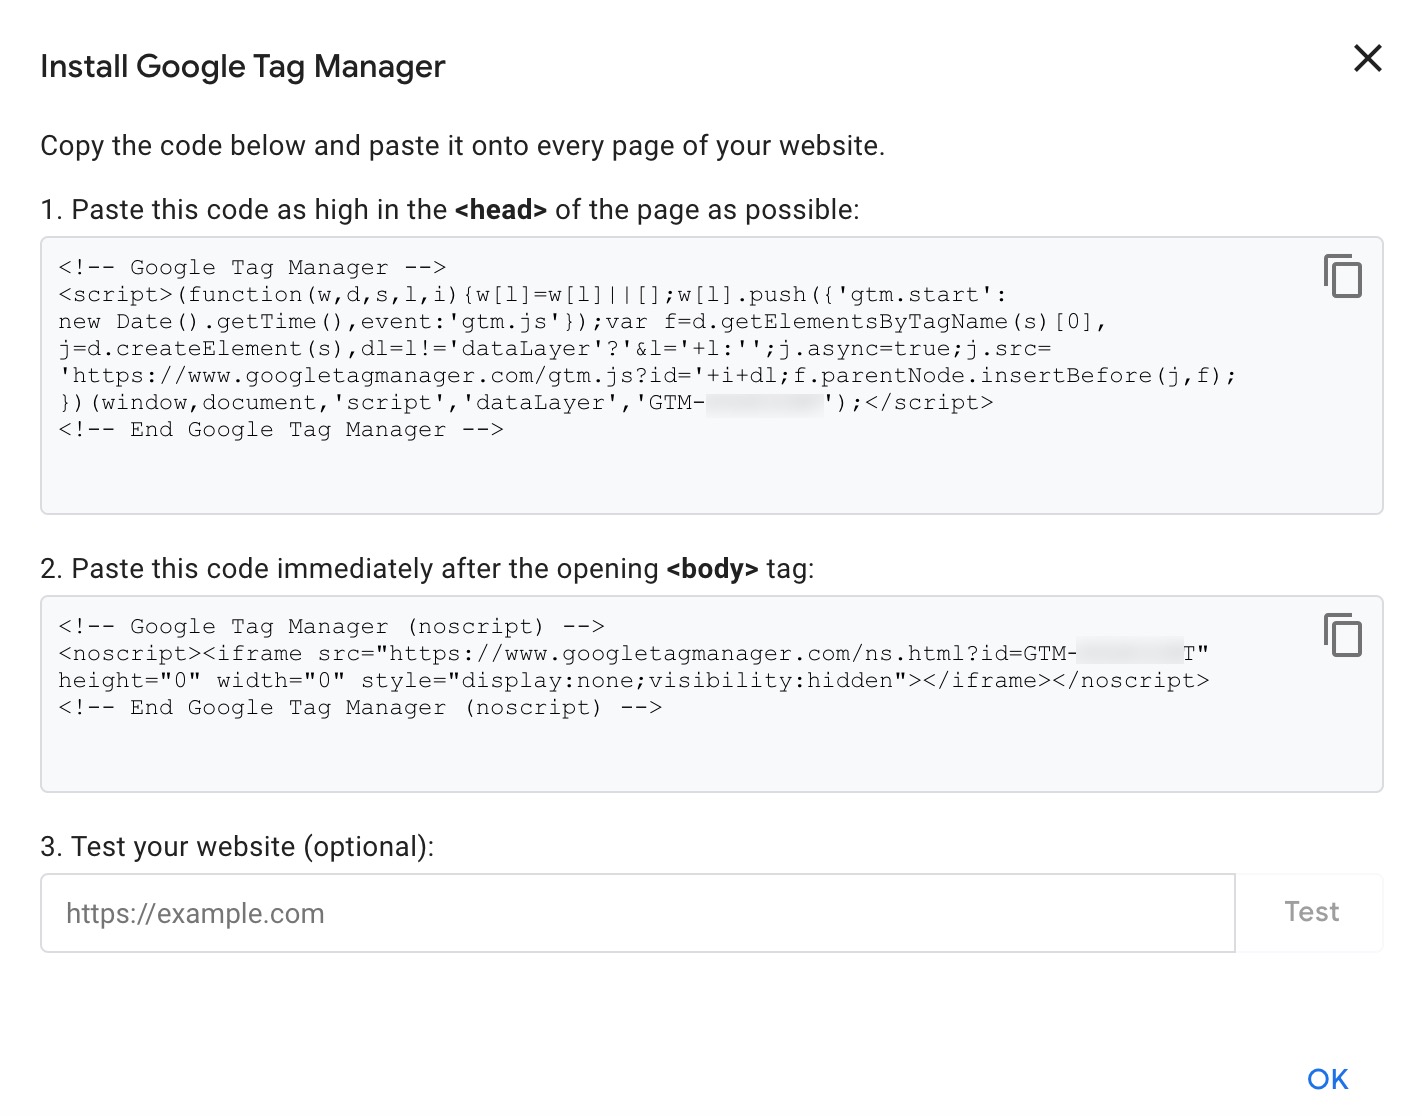
Step 3: Install the Container.
Upon container creation, a modal containing two code snippets to install on your website will appear.
Step 4: Implementing with a Custom Script
This step will guide you on how to integrate CookiePal into consent mode without using the CookiePal GTM template. If you prefer to add with the CookiePal CMP template, follow step 5
1. Copy the custom script and paste above the Google Tag Manager script and CookiePal script
1<script>
2    window.dataLayer = window.dataLayer || [];
3    function gtag() {
4        dataLayer.push(arguments);
5    }
6    gtag("consent", "default", {
7        ad_storage: "denied",
8        ad_user_data: "denied",
9        ad_personalization: "denied",
10        analytics_storage: "denied",
11        functionality_storage: "denied",
12        personalization_storage: "denied",
13        security_storage: "granted",
14        wait_for_update: 2000,
15    });
16    gtag("set", "ads_data_redaction", true);
17    gtag("set", "url_passthrough", true);
18</script>
If Google Tag Manager is already set up on your website, make sure to place the GTM script immediately below the Custom Consent Mode Script and above the CookiePal script.
If Google Tag Manager is not yet installed on your website, please follow these steps.
1. Insert the GTM script between the Custom Consent Mode Script and the CookiePal script. Also, make sure to add the <noscript> element immediately after the opening <body> tag.
Proper script loading order is essential for their correct operation, so adhere to the specified sequence based on your consent mode setup.
For Advanced Consent Mode
1. Custom Consent Mode script
2. gtag / GTM script
3. CookiePal script
For Basic Consent Mode
1. Custom Consent Mode script
2. CookiePal script
3. gtag / GTM script
Step 5: Adding CookiePal CMP Template.
The CookiePal Google Consent Mode functionality handles injecting the required CookiePal script within Google Tag Manager automatically. Manually adding the CookiePal script to the head tag of your website can cause tag conflicts with the built-in consent workflow in GTM .
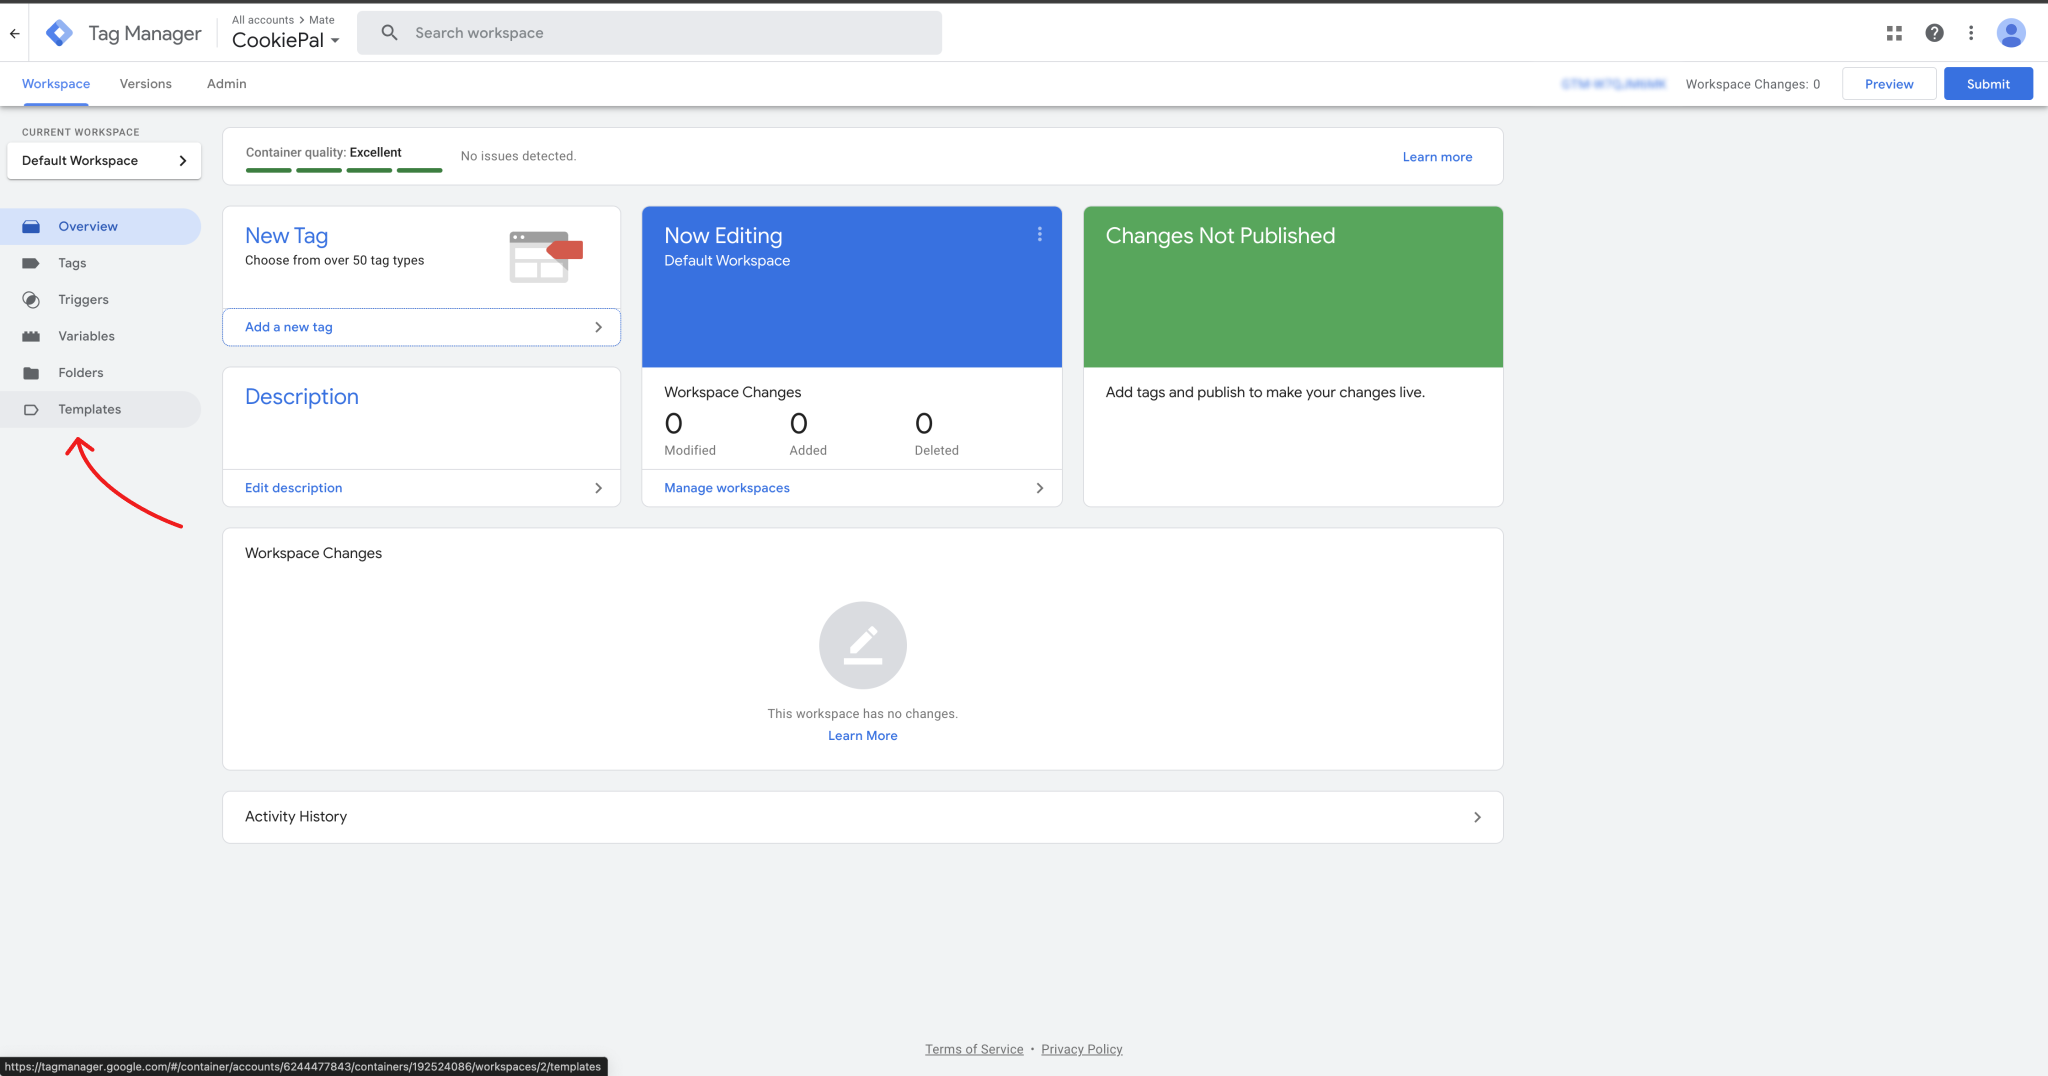
To add the CookiePal template to your workspace, follow the steps below.
1. In your Workspace, click Templates.
2. To add a template, click New.

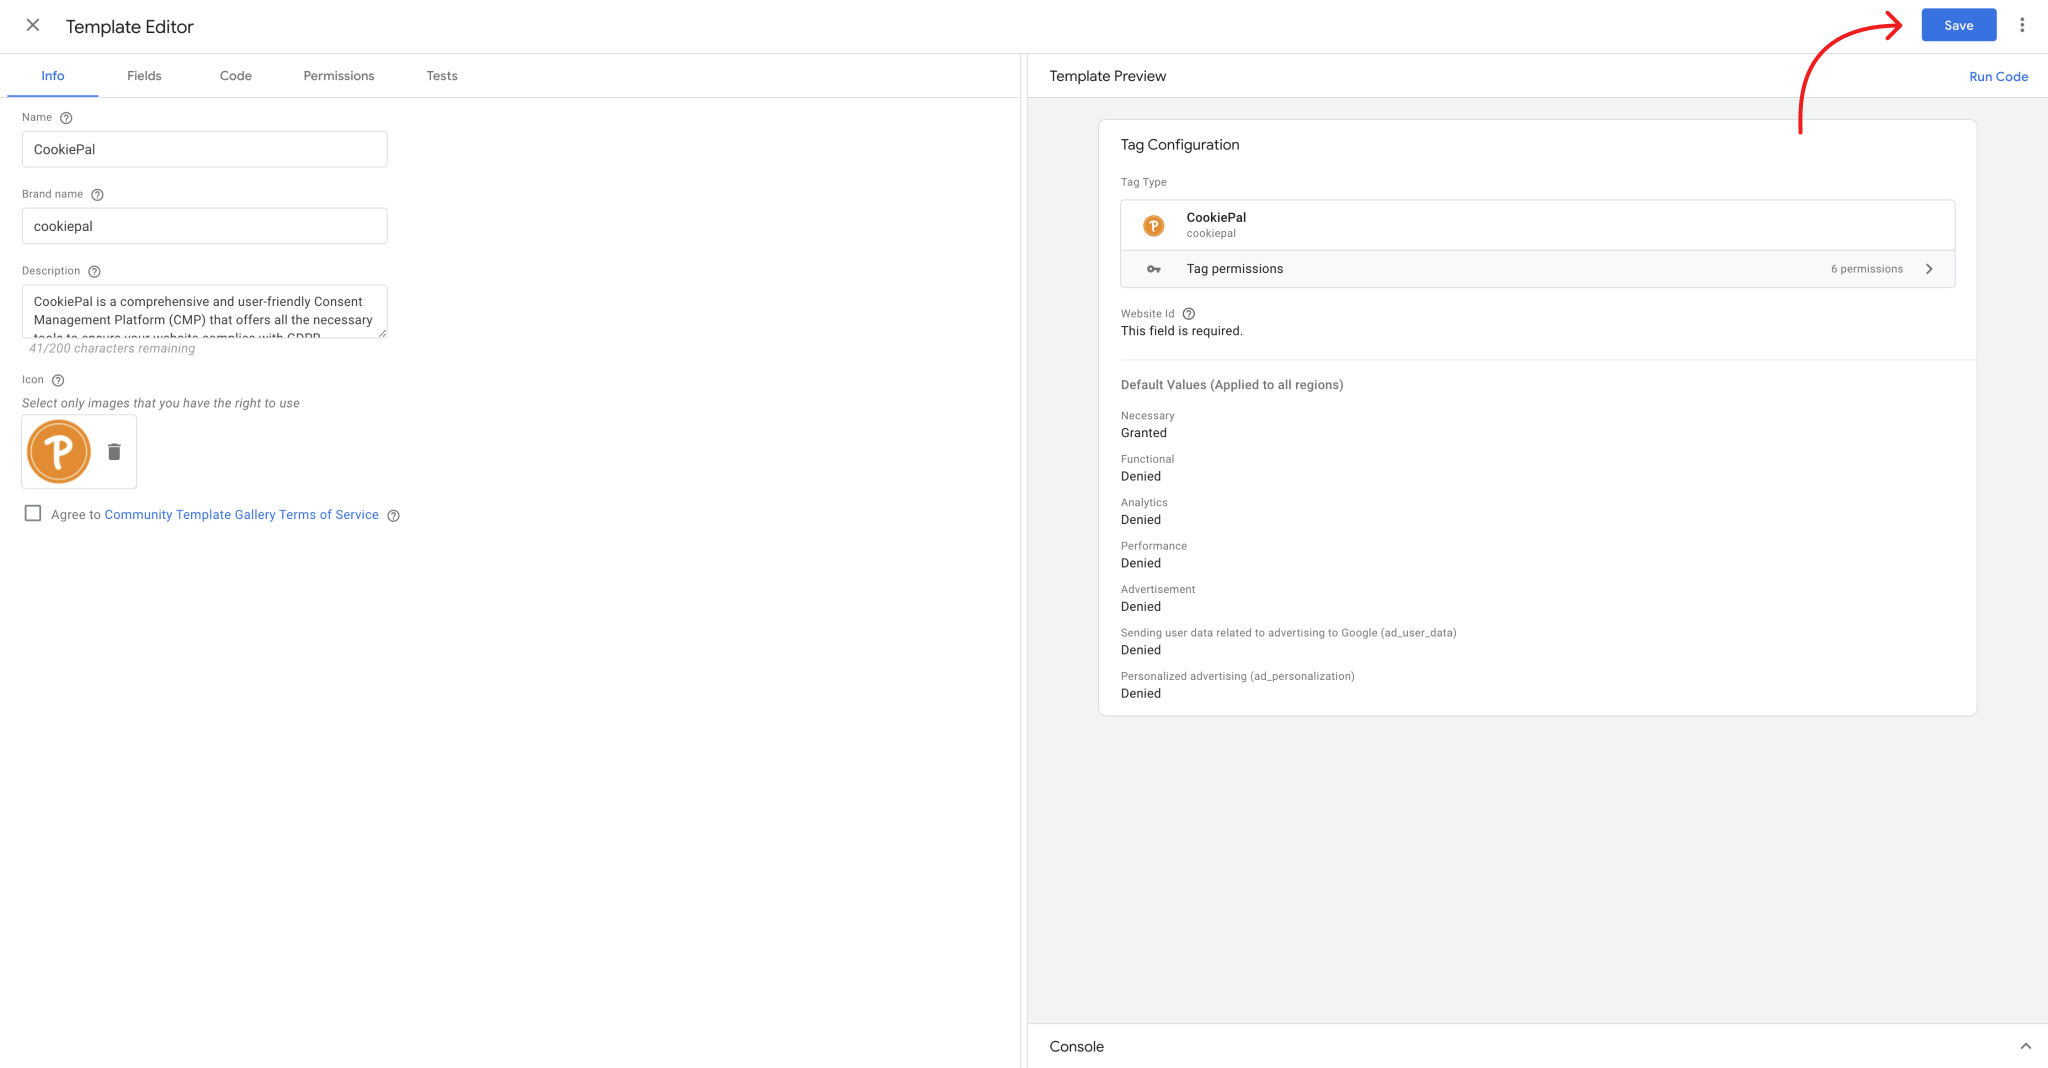
3. To import a template, click on the 3 dots top right > Click "Import" and select the CookiePal template that was downloaded.

4. Save the template by clicking the "Save" button at the top right.
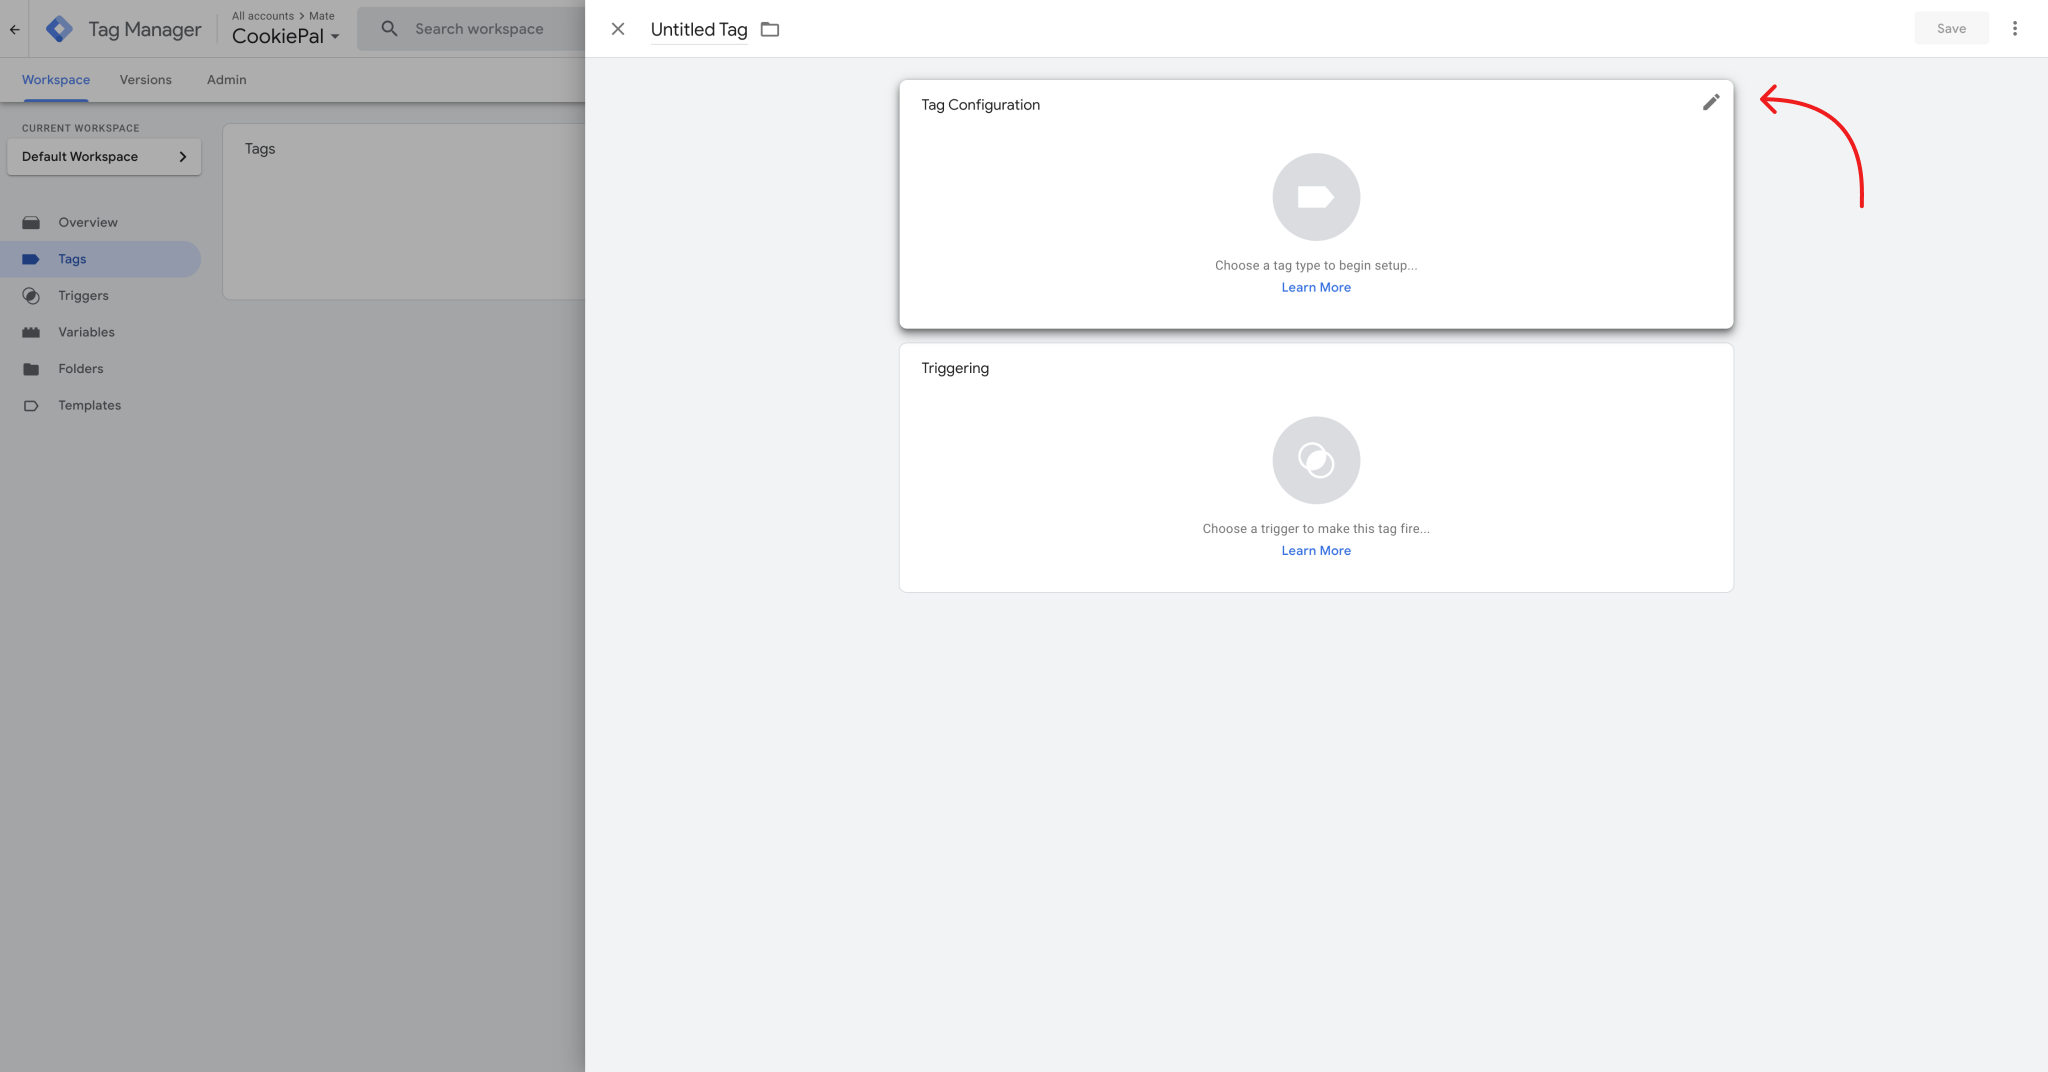
5. Click on "Tags".
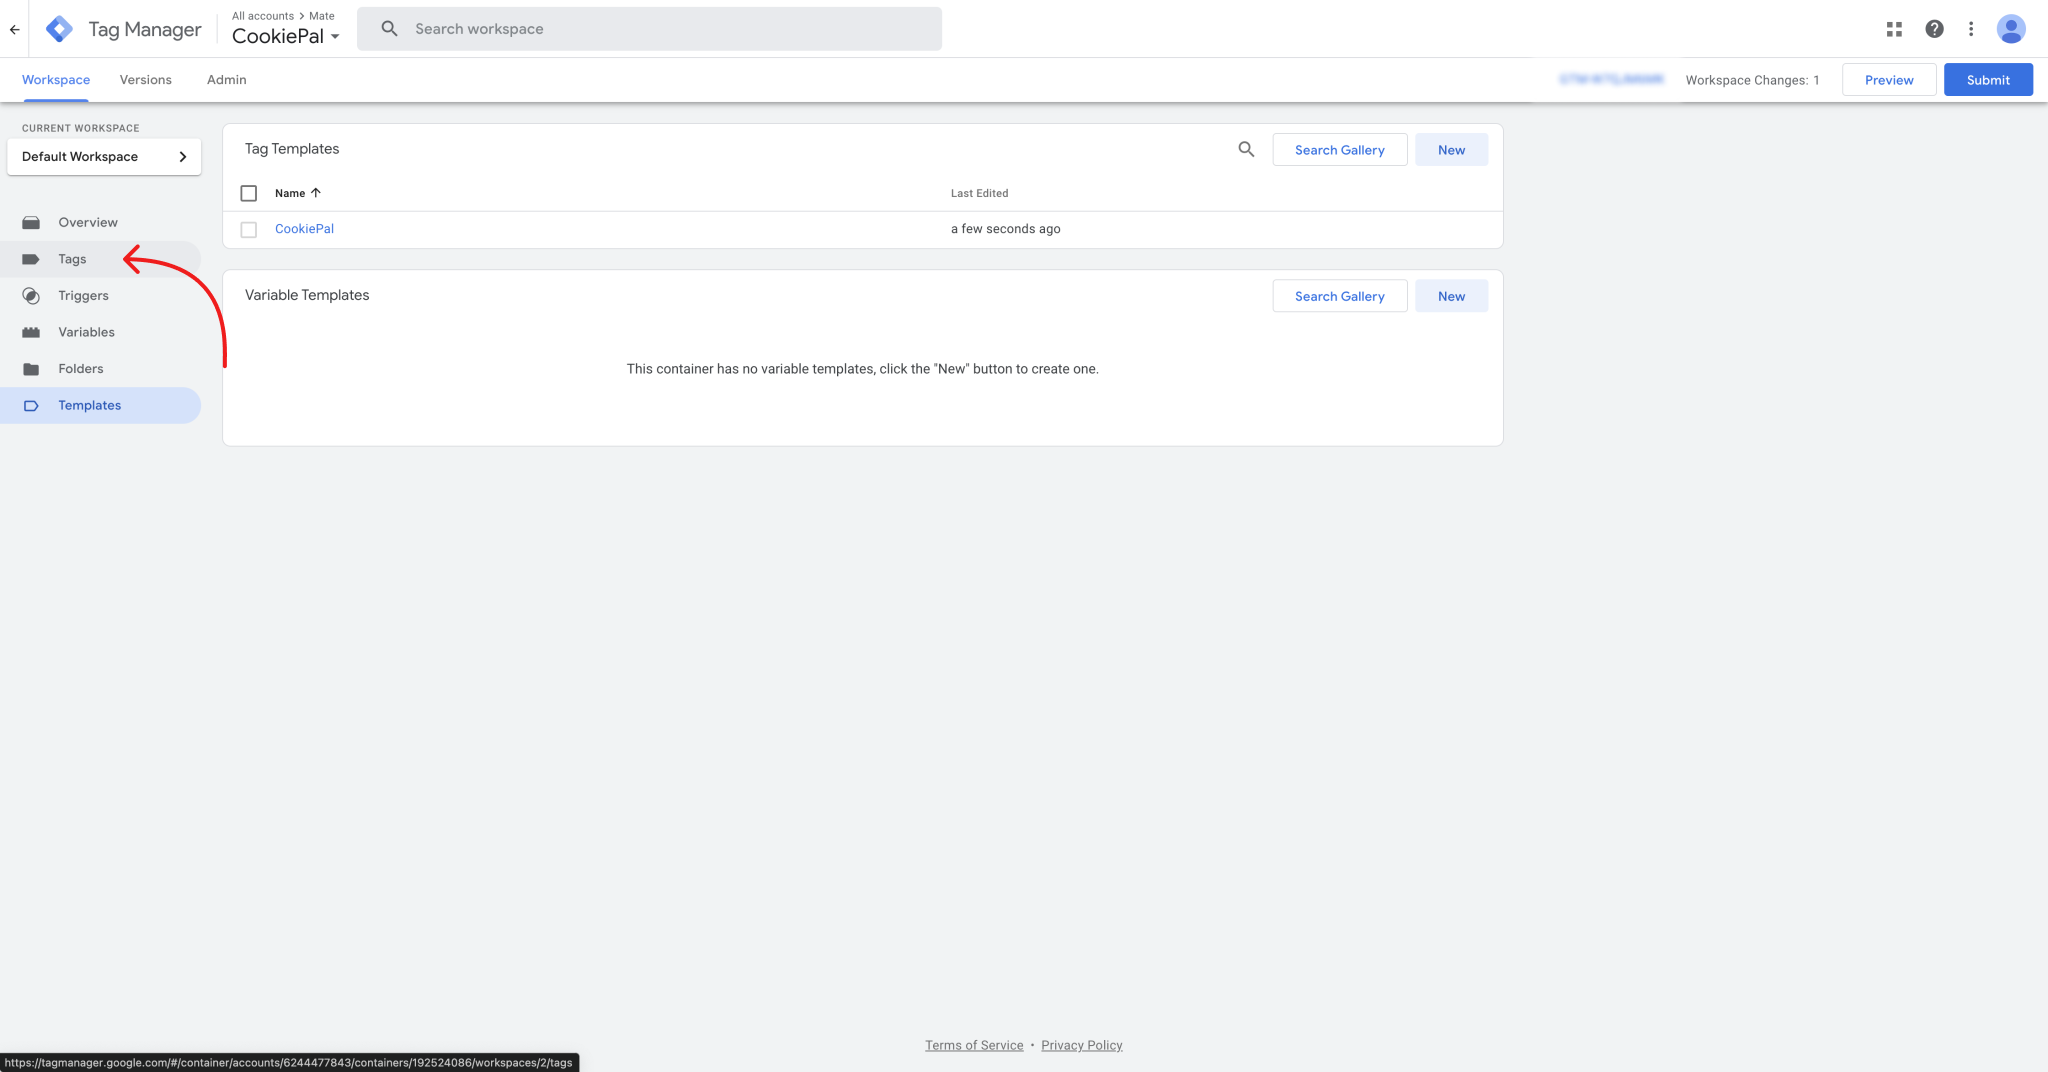
6. Click on "New".

7. Click on the edit icon.
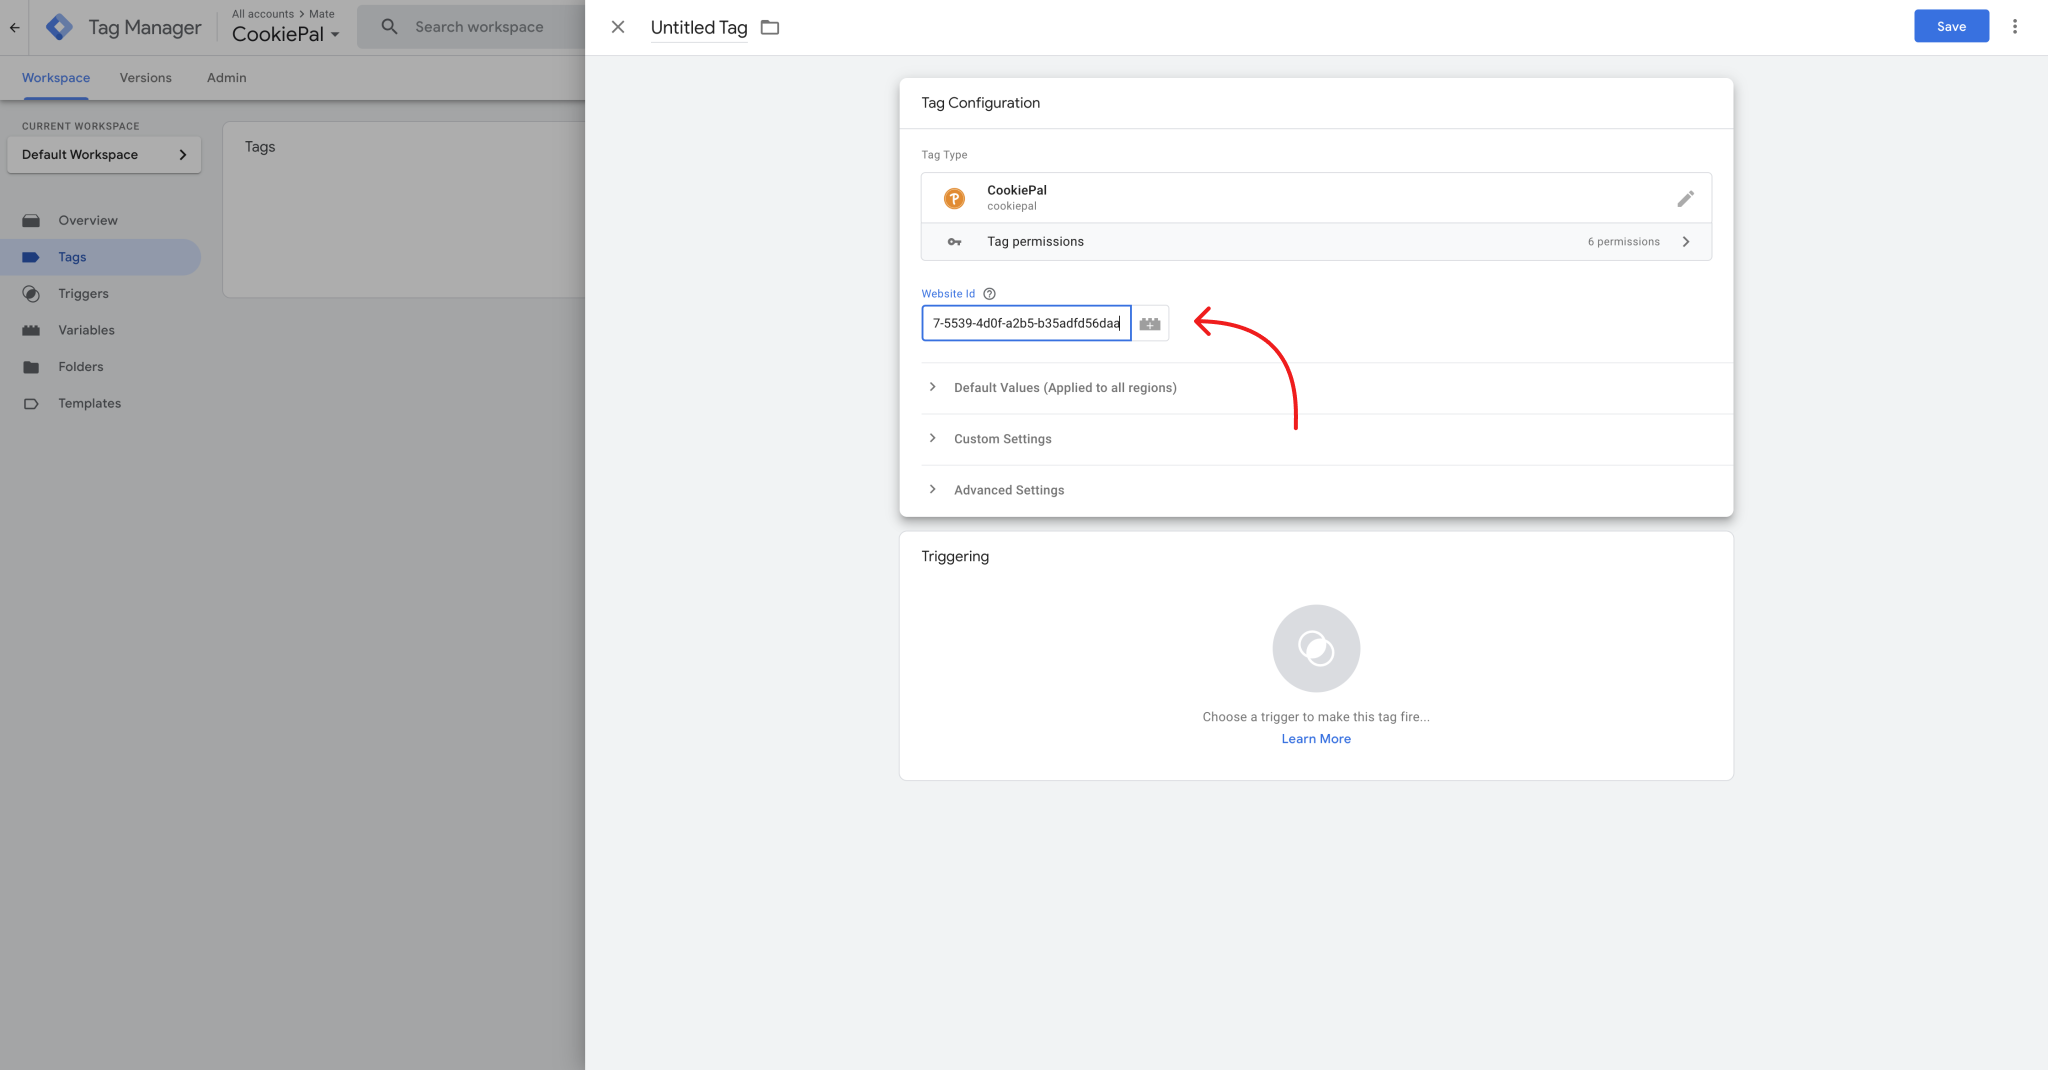
8. After that select the template that was added, it will appear as "CookiePal".

9. Enter your website ID that you copied in the CookiePal settings.
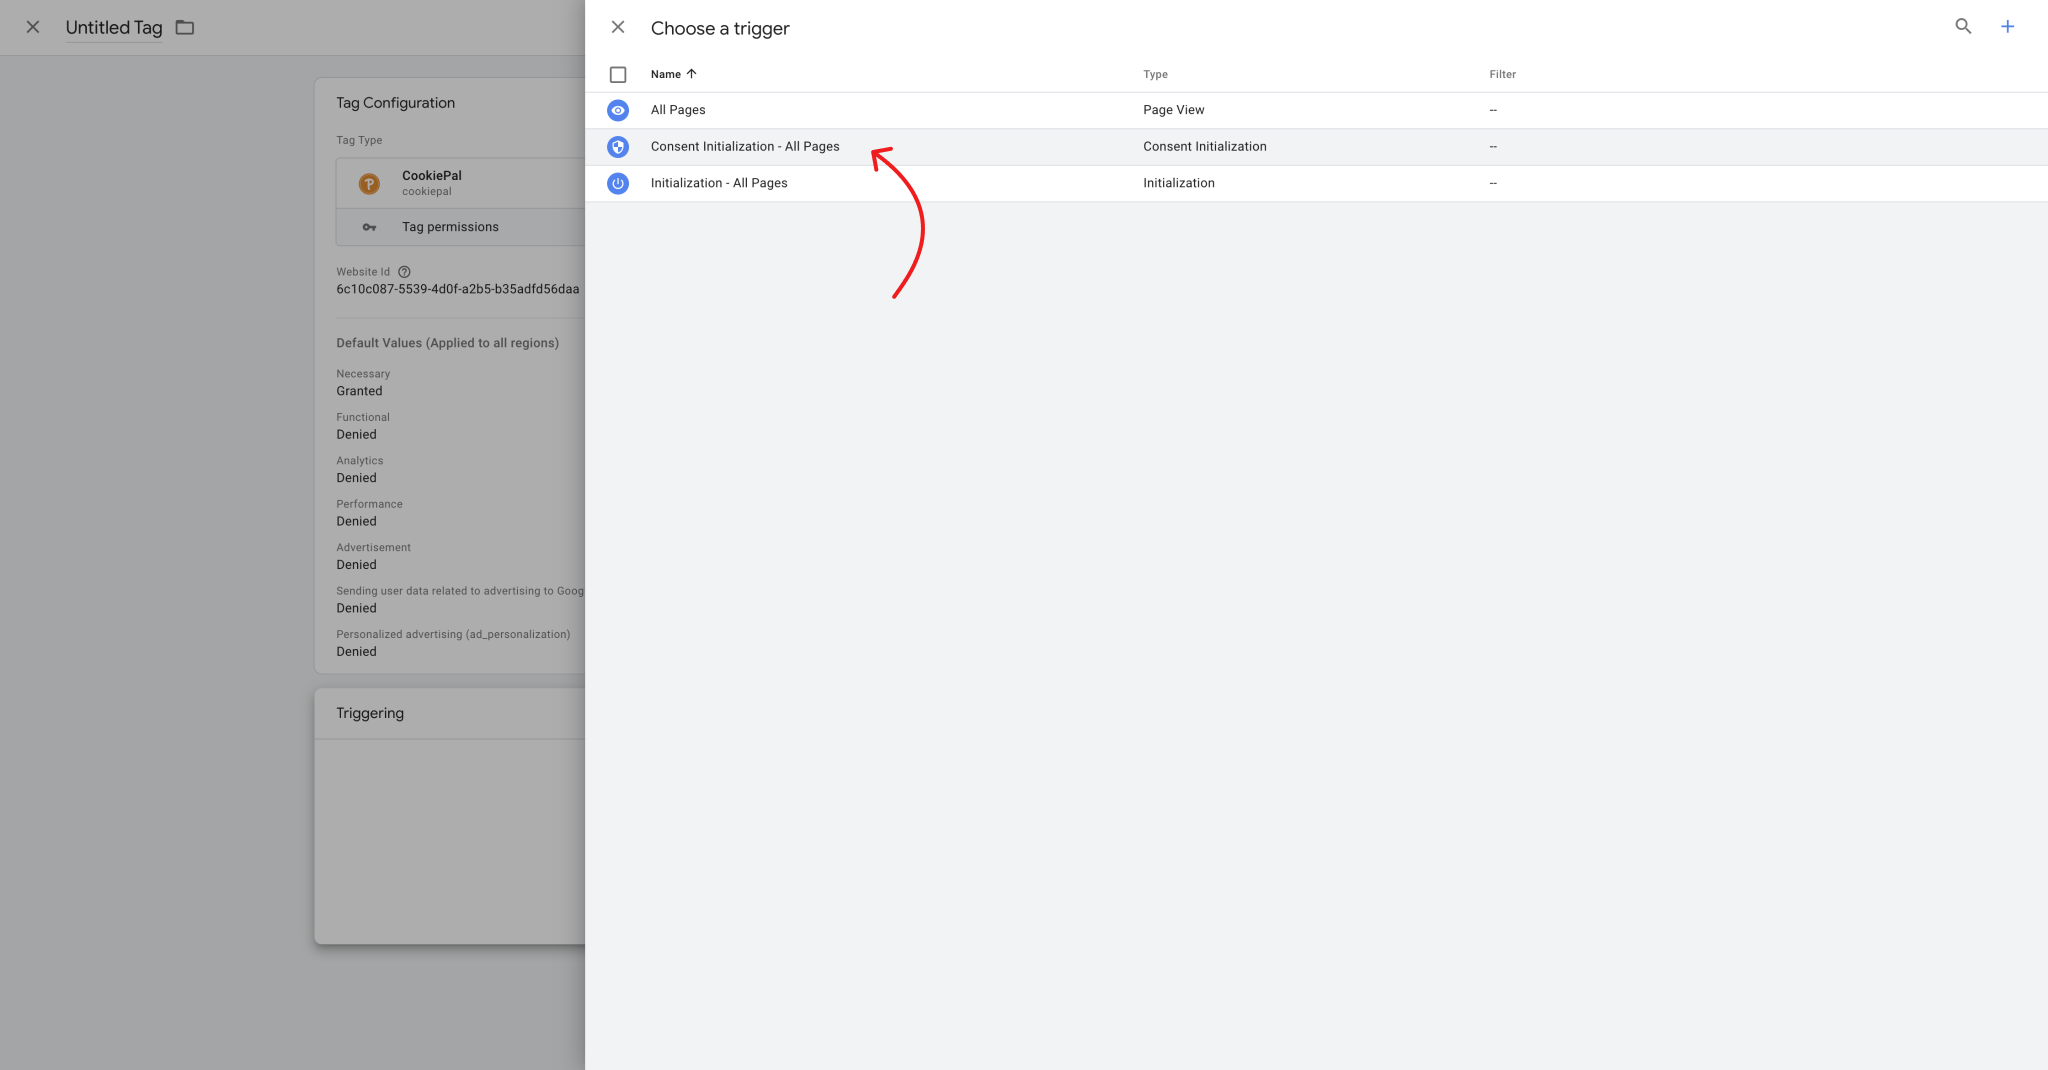
10. After that, click on the triggering field > then on the "Consent Initialization - All Pages" option.
11. Click the publish button at the top right.
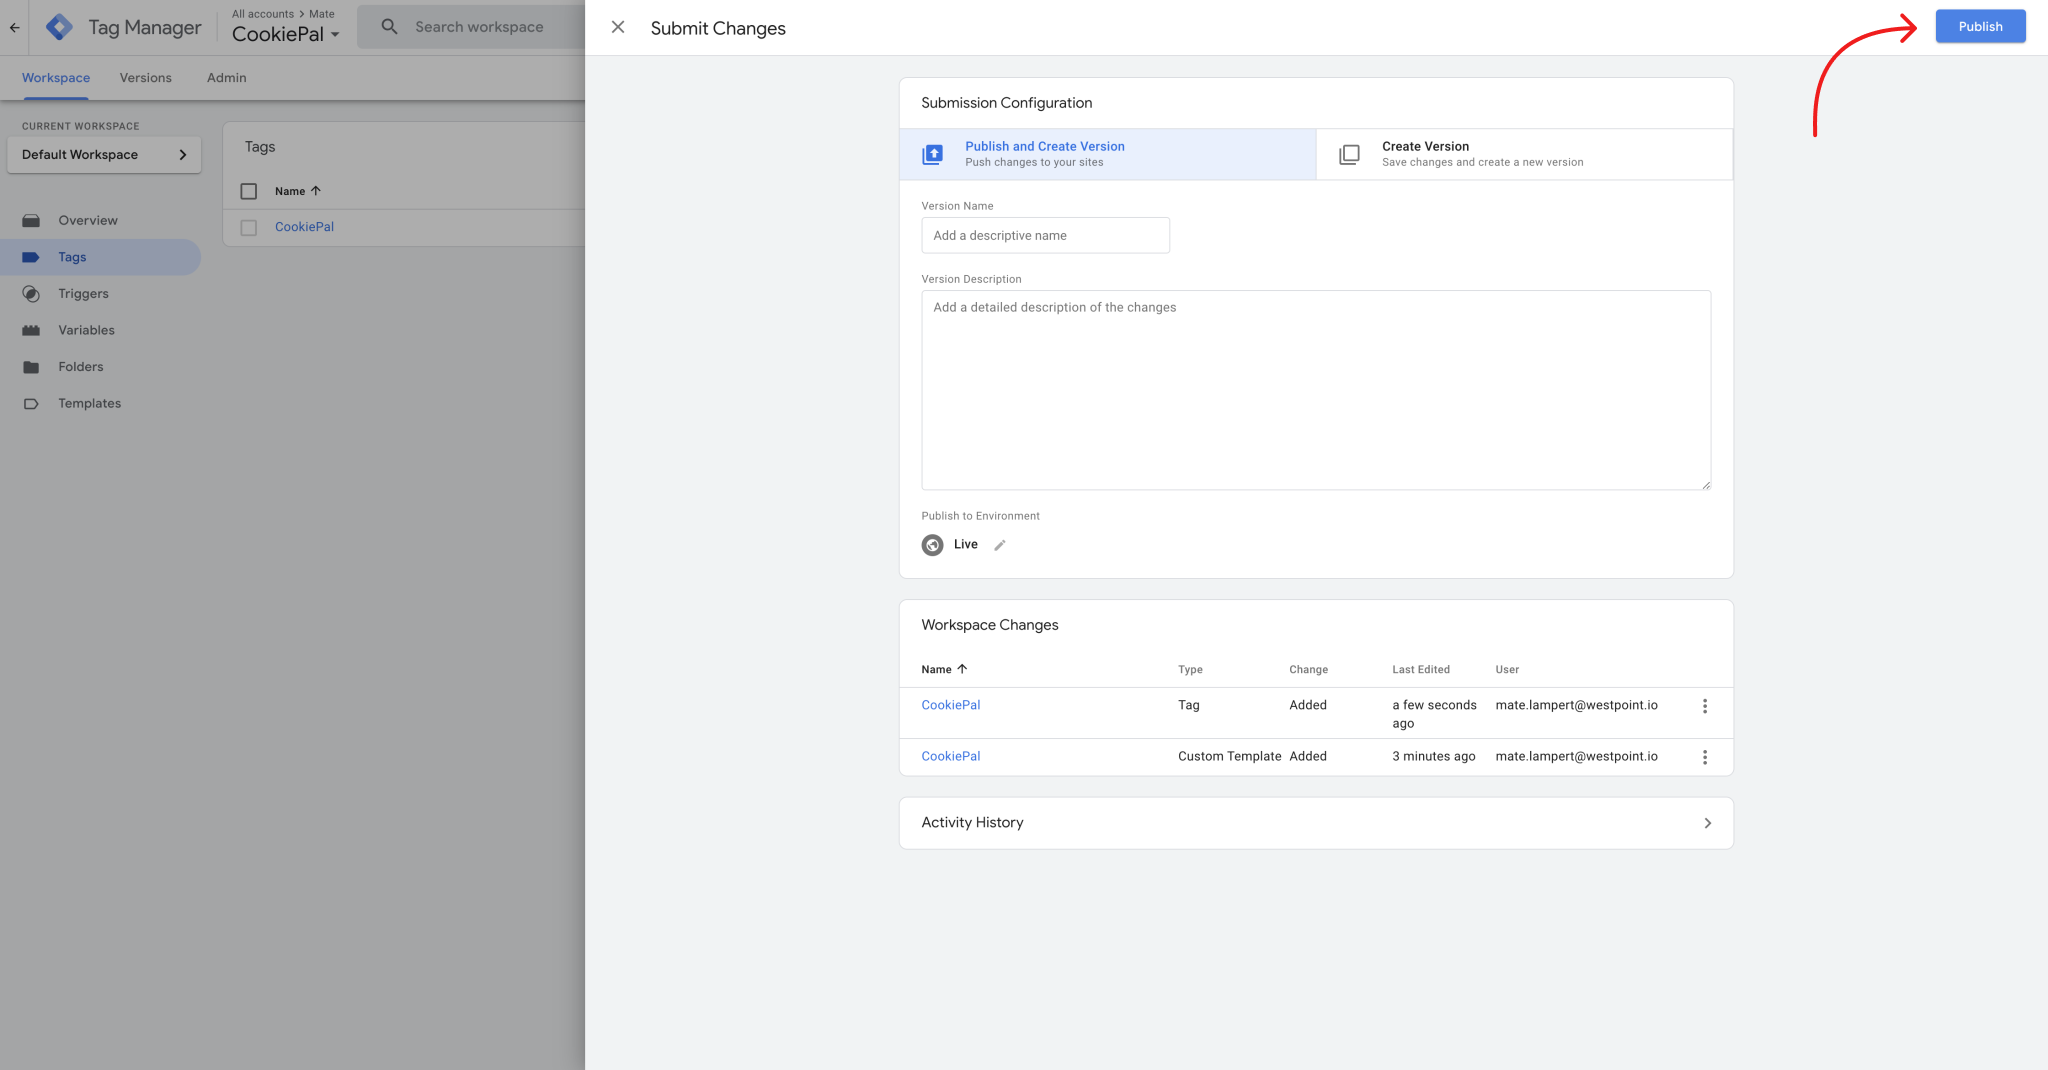
Your banner has been configured successfully.
Step 6: Verify Integration.
To confirm the integration of CookiePal and validate the correct implementation of Google Consent Mode on your website, access our help guide .
1. Finally, verify your banner on CookiePal.

2. You can go to the dashboard.

Defining the Default Consent State of Google Consent Mode.
CookiePal CMP maps all seven Google consent types into 4 categories.
Advanced Consent Mode.
In accordance with Google's documentation , we allow an user to select between basic and advanced consent mode. Click here to understand the difference.
When enabling Google Consent Mode, basic consent mode is enabled by default.
To enable Advanced Consent Mode.
1. Go to CookiePal settings.

2. Select the "Allow Google tags to fire before consent" option.
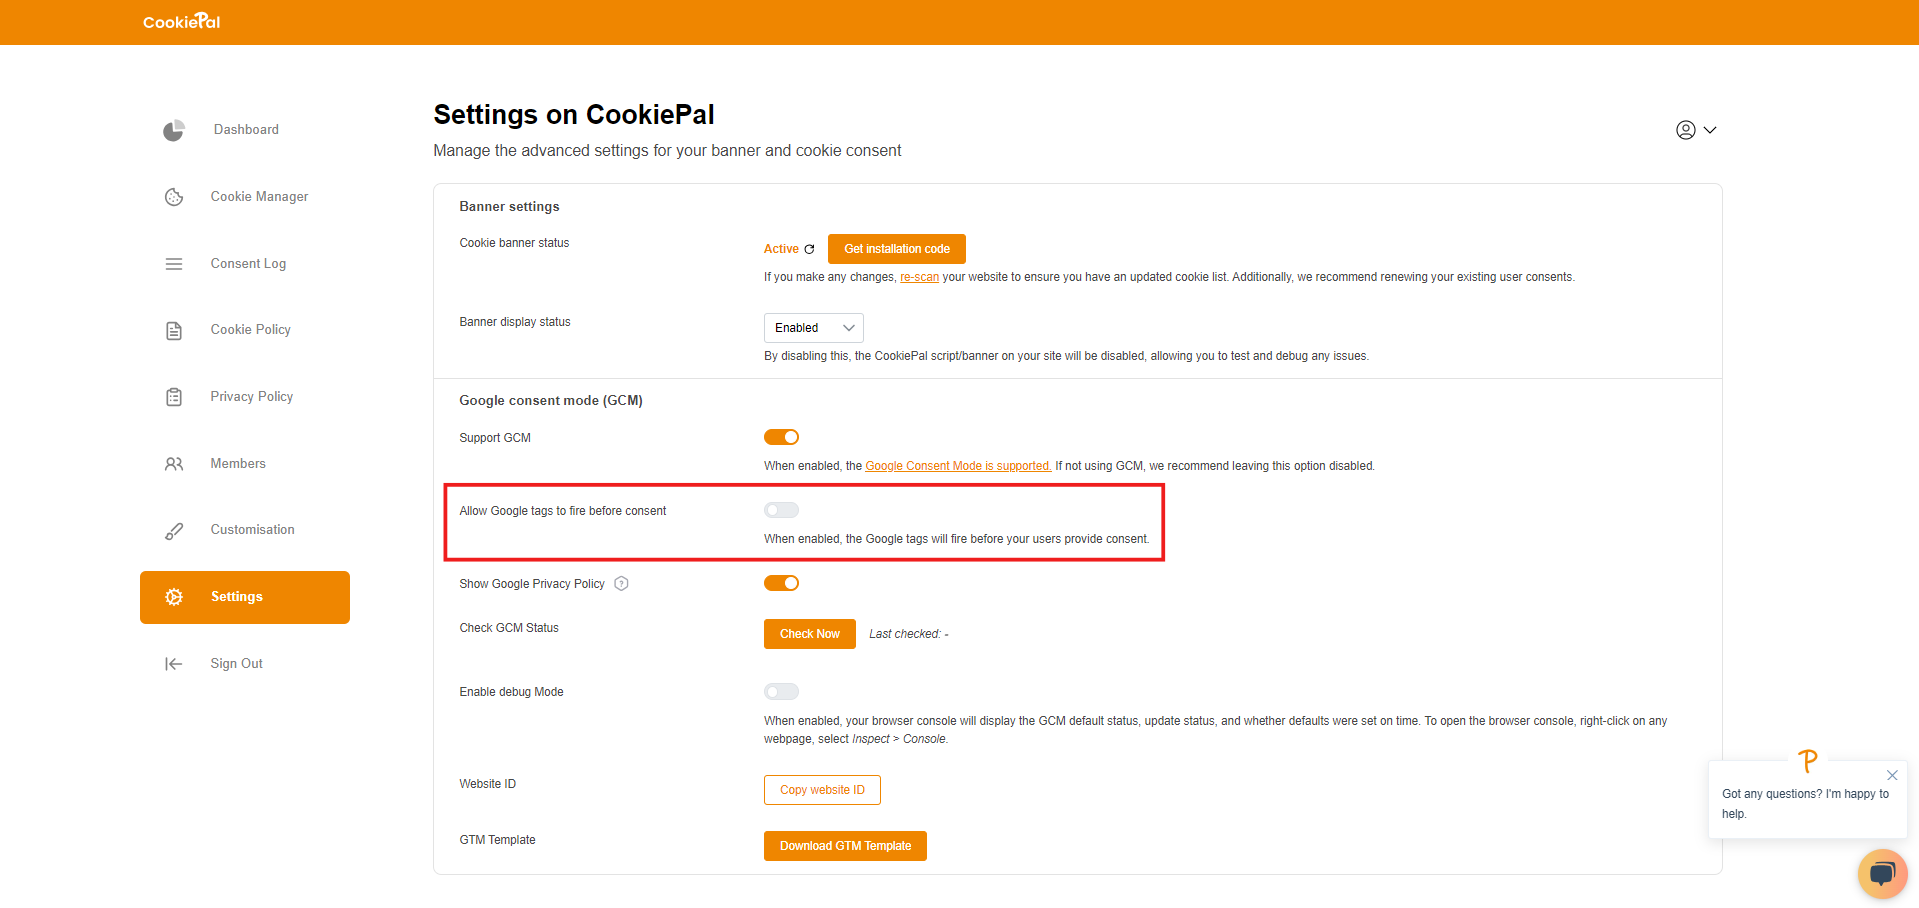
Settings and Google Privacy Policy
All settings related to Google Consent Mode can be viewed and adjusted in the CookiePal settings. These settings allow you to customise how Google's scripts interact with user consent on your website.
Additionally, Google's privacy policy is enabled by default when you activate Google Consent Mode. This policy governs how user data is collected and used by Google. For more details on Google's privacy policy and its implications, you can review Google's official documentation or check the CookiePal settings.
Troubleshooting and Support.
If you encounter any issues during the integration of CookiePal with Google Tag Manager , please contact our support team at support@cookiepal.io or use the chat bubble available on the CookiePal dashboard. Our support team is ready to assist you and address any problems before seeking assistance from Google Support.

If you do not yet have a CookiePal account or have not yet configured your banner, follow the steps below.